How to Make a Chess Game with Unity
Not every successful game involves shooting aliens or saving the world. Board games, and chess, in particular, have a history that spans thousands of years. In this tutorial, you’ll build a 3D chess game in Unity. By Brian Broom.
Not every successful game involves shooting aliens or saving the world. Board games, and chess, in particular, have a history that spans thousands of years. Not only are they fun to play, but they’re also fun to port from a real-life board game to a video game.
In this tutorial, you’ll build a 3D chess game in Unity. Along the way, you’ll learn how to:
- Choose which piece to move
- Determine legal moves
- Alternate players
- Detect a win
By the time you’ve finished this tutorial, you’ll have created a feature-rich chess game that you can use as a starting point for other board games.
Getting Started
Download the project materials for this tutorial. You can find a link at the top and the bottom of this page. Open the starter project in Unity to get going.
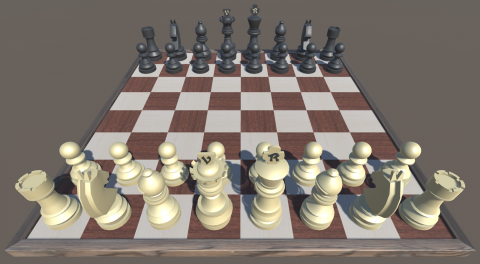
Chess is often implemented as a simple 2D game. However, this version is 3D to mimic sitting at a table playing with your friend. Besides… 3D is cool. =]
Open the Main scene in the Scenes folder. You’ll see a Board object representing the game board and an object for the GameManager. These objects already have scripts attached.
- Prefabs: Includes the board, the individual pieces and the indicator squares that will be used in the move selection process.
- Materials: Includes materials for the chess board, the chess pieces and the tile overlays.
- Scripts: Contains the components that have already been attached to objects in the Hierarchy.
- Board: Keeps track of the visual representations of the pieces. This component also handles the highlighting of individual pieces.
-
Geometry.cs: Utility class that handles the conversion between row and column notation and
Vector3points. - Player.cs: Keeps track of the player’s pieces, as well as the pieces a player has captured. It also holds the direction of play for pieces where direction matters, such as pawns.
- Piece.cs: The base class that defines enumerations for any instantiated pieces. It also contains logic to determine the valid moves in the game.
- GameManager.cs: Stores game logic such as allowed moves, the initial arrangement of the pieces at the start of the game and more. It’s a singleton, so it’s easy for other classes to call it.
GameManager stores a 2D array named pieces that tracks where the pieces are located on the board. Take a look at AddPiece, PieceAtGrid and GridForPiece to see how this works.
Enter play mode to view the board and get the pieces set up and ready to go.
Moving Pieces
The first step is figuring out which piece to move.
Raycasting is a way to find out which tile the user is mousing over. If you aren’t familiar with raycasting in Unity, check out our Introduction to Unity Scripting tutorial or our popular Bomberman tutorial.
Once the player selects a piece, you need to generate valid tiles where the piece can move. Then, you need to pick one. You’ll add two new scripts to handle this functionality. TileSelector will help select which piece to move, and MoveSelector will help pick a destination.
Both components have the same basic methods:
-
Start: For one-time setup. -
EnterState: Does the setup for this activation. -
Update: Performs the raycast as the mouse moves. -
ExitState: Cleans up the current state and callsEnterStateof the next state.
This is a basic implementation of the State Machine pattern. If you need more states, you can make this more formal; however, you’ll add complexity.
Selecting a Tile
Select Board in the Hierarchy. Then, in the Inspector window, click the Add Component button. Now, type TileSelector in the box and click New Script. Finally, click Create and Add to attach the script.
Highlighting the Selected Tile
Double-click TileSelector.cs to open it and add the following variables inside the class definition:
public GameObject tileHighlightPrefab;

private GameObject tileHighlight;
These variables store the transparent overlay to help indicate which tile you’re pointing at. The prefab is assigned in edit mode and the component tracks and moves around the highlight.
Next, add the following lines to Start:
Vector2Int gridPoint = Geometry.GridPoint(0, 0);
Vector3 point = Geometry.PointFromGrid(gridPoint);
tileHighlight = Instantiate(tileHighlightPrefab, point, Quaternion.identity, gameObject.transform);
tileHighlight.SetActive(false);
Start gets an initial row and column for the highlight tile, turns it into a point and creates a game object from the prefab. This object is initially deactivated, so it won’t be visible until it’s needed.
Geometry.cs has helper methods for these conversions:
-
GridPoint(int col, int row): gives you aGridPointfor a given column and row. -
PointFromGrid(Vector2Int gridPoint): turns aGridPointinto aVector3actual point in the scene. -
GridFromPoint(Vector3 point): gives theGridPointfor the x and z value of that 3D point, and the y value is ignored.
Vector2Int and is referred to as a GridPoint. Vector2Int has two integer values: x and y. When you need to place an object in the scene, you need the Vector3 point. Vector3 has three float values: x, y and z.
Next, add EnterState:
public void EnterState()
{
    enabled = true;
}
This re-enables the component when it’s time to select another piece.
Then, add the following to Update:
Ray ray = Camera.main.ScreenPointToRay(Input.mousePosition);

RaycastHit hit;
if (Physics.Raycast(ray, out hit))
{
    Vector3 point = hit.point;
    Vector2Int gridPoint = Geometry.GridFromPoint(point);

    tileHighlight.SetActive(true);
    tileHighlight.transform.position =
        Geometry.PointFromGrid(gridPoint);
}
else
{
    tileHighlight.SetActive(false);
}
Here, you create a Ray from the camera, through the mouse pointer, and off into infinity and beyond!
Physics.Raycast checks to see if this ray intersects any physics colliders in the system. Since the board is the only object with a collider, you don’t have to worry about pieces being hidden by each other.
If the ray intersects a collider, then RaycastHit has the details, including the point of intersection. You turn that intersection point into a GridPoint with the helper method, and then you use that method to set the position of the highlight tile.
Since the mouse pointer is over the board, you also enable the highlight tile, so it’s displayed.
Finally, select Board in the Hierarchy and click Prefabs in the Project window. Then, drag the Selection-Yellow prefab into the Tile Highlight Prefab slot in the Tile Selector component of the board.
Now when you enter play mode, there will be a yellow highlight tile that follows the mouse pointer around.
