Introduction to Unity Scripting
In this tutorial, learn the basics of scripting in Unity by creating a classic arena shooter whereby geometric shapes try to crush you. By Georgi Ivanov.

Much of the power of Unity is in its rich scripting language, C#. You can use it to handle user input, manipulate objects in the scene, detect collisions, spawn new GameObjects and cast directional rays around the scene to help with your game logic. It might sound intimidating, but Unity exposes well-documented APIs that make these tasks a breeze – even for novice developers!
In this tutorial, you’ll create a top-down shooter that uses Unity scripting to handle the spawning of enemies, player control, firing projectiles and other important aspects of the gameplay.
This tutorial was written for Unity 5.3 or greater. You can download the latest version of Unity here.
While Unity also supports UnityScript and Boo, C# is the programming language that most developers tend to use, and with good reason. C# is used by millions of developers around the globe for application, web and game development and there’s a plethora of information and tutorials to help you out.
Getting Started
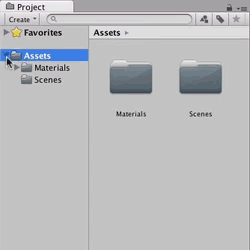
Download the BlockBuster starter project, unzip it and open the created folder in Unity.
This is what you should see once opened:

Take a look around in the Scene view. There’s a small arena which will be the battleground for the game, a camera and a light. If your layout is different than in the screenshot, select the top-right drop down menu and change it to 2 by 3.

What’s a game without a hero? Your first task is to create a GameObject to represent the player in the scene.
Creating the Player
In the Hierarchy, click the Create button and select Sphere from the 3D section. Position the Sphere at (X:0, Y:0.5, Z:0) and name it Player:

Unity uses an entity-component system to build its GameObjects. This means all GameObjects are containers for components which can be attached to give it its behavior and properties. Here are a few examples of the components Unity has built-in:
- Tranform: Every GameObject comes with this component. It holds the position, rotation and scale of a GameObject.
- Box Collider: A collider in the shape of a cube which can be used to detect collisions.
- Mesh Filter: The mesh data which is used to show a 3D model.

The Player GameObject will need to respond to collisions with other objects in the scene.
To make this happen, select the Player in the Hierarchy window and click the Add Component button in the Inspector window. Select Physics > Rigidbody in the menu that pops up, this will add a Rigidbody component to the Player so it can make use of Unity’s physics engine.
Adjust the Rigidody’s values like this: Set Drag to 1, Angular Drag to 0 and check the Y checkbox next to Freeze Position.

This will make sure the Player won’t be able to move up and down and has no added damping when rotating.
Creating the Player Movement Script
Now that the Player is ready, it’s time to create the script that will take input from the keyboard and move the Player around.
In the Project window, click the Create button and select Folder. Name the new folder Scripts and create a subfolder within it named Player.
Inside the Player folder, click the Create button and select C# Script. Name your new script PlayerMovement. The sequence looks like this:
Double-click the PlayerMovement.cs script. This will open your preferred code editor with the script loaded. Unity comes with MonoDevelop pre-installed on all platorms and Windows users can choose to install Visual Studio and use that instead when they run the installer.
This tutorial assumes you’re using MonoDevelop but Visual Studio users should be able to follow along without any issues.
Once your editor of choice opens up, you’ll be greeted by the following:

This the default class Unity generates for new scripts. It’s derived from the base class MonoBehaviour which makes sure this script will be running in the game loop and has additional functionality to react on certain events. If you come from the iOS world, this object is the equivalent of a UIViewController. Unity calls several methods in a predetermined order as the script is running. Here are a few of the most common ones:
-
Start(): This method will get called once right before the script gets its first update. -
Update(): While the game is running and the script is enabled, this method will get fired every frame. -
OnDestroy(): This method gets called right before the GameObject this script is attached to gets destroyed. -
OnCollisionEnter(): When the collider or rigidbody this script is attached to touches another collider or rigidbody, this method gets called.
For a full list of events, check out Unity’s documentation on MonoBehaviours.
Add these two lines above the Start() method:
public float acceleration;
public float maxSpeed;
This is what it should look like:

These are public variable declarations, which means that these variables will be visible in the Inspector and can be tweaked without having to go back and forth between the script and the editor.
acceleration describes how much the Player's speed increases over time. maxSpeed is the “speed limit”.
Just below that, declare the following variables:
private Rigidbody rigidBody;
private KeyCode[] inputKeys;
private Vector3[] directionsForKeys;
Private variables can’t be set through the Inspector, it’s the developers’ responsibility to initialize them at the appropriate time.
rigidBody will hold a reference to the Rigidbody component that’s attached to the Player GameObject.
inputKeys is an array of keycodes that will be used to detect input.
directionsForKeys holds an array of Vector3 variables, which will hold directional data.
Replace the Start() method with the following:
void Start () {
  inputKeys = new KeyCode[] { KeyCode.W, KeyCode.A, KeyCode.S, KeyCode.D };
  directionsForKeys = new Vector3[] { Vector3.forward, Vector3.left, Vector3.back, Vector3.right };
  rigidBody = GetComponent<Rigidbody>();
}
This piece of code links the corresponding directions for each key, e.g. pressing W moves the object forward. The last line gets a reference to the atttached Rigidbody component and saves it in the rigidBody variable for later use.
To actually move the Player, you’ll have to handle input from the keyboard.
Rename Update() to FixedUpdate() and add the following code:
// 1
void FixedUpdate () {
  for (int i = 0; i < inputKeys.Length; i++){
    var key = inputKeys[i];

    // 2
    if(Input.GetKey(key)) {
      // 3
      Vector3 movement = directionsForKeys[i] * acceleration * Time.deltaTime;
    }
  }
}
There are couple of important things going on here:
-
FixedUpdate()is frame rate independent and should be used when working with Rigidbodies. Instead of running as fast as possible, this method will be fired at a constant interval. - This loop checks to see if any of the input keys were pressed.
- Get the direction for the pressed key, multiply it by the acceleration and the number of seconds it took to complete the last frame. This produces a direction vector (speed on the X, Y and Z axes) that you'll use to move the
Playerobject.
If you are new to game programming, you might ask yourself why you have to multiply by Time.deltaTime. While the game is running the framerate (or frames per second) will vary depending on the hardware and the stress it is under, this might cause things to happen too fast on powerful machines and too slow on weaker ones which can cause undesired behaviour. The general rule is when you perform an action every (fixed) frame, you need to multiply by Time.deltaTime.
Add the following method below FixedUpdate():
void movePlayer(Vector3 movement) {
  if(rigidBody.velocity.magnitude * acceleration > maxSpeed) {
    rigidBody.AddForce(movement * -1);
  } else {
    rigidBody.AddForce(movement);
  }
}
The above method applies force to the ridigbody, causing it to move. If the current speed exceeds maxSpeed, the force goes in the opposite direction to slow the player down and effectively limits the maximum speed.
In FixedUpdate(), before the closing brace of the if-statement, add the following line::
movePlayer(movement);

Perfect! Save this script and return to the Unity editor. In the Project window, drag the PlayerMovement script onto the Player inside the Hierarchy.
Adding a script to a GameObject creates an instance of a component, which means all the code will get executed for the GameObject you attached it to.
Use the Inspector to set Acceleration to 625 and Max Speed to 4375:

Run the scene and move the Player around with the WASD keys:

That's a pretty good result for only a few lines of code! :]
However, there is one obvious issue - the player can quickly move out of sight, which makes it a little difficult to fight the bad guys.