Adaptive UI Tutorial for Android with Kotlin
Make your Android app feel at home on any device. Learn how to build an adaptive UI that looks and works well across all devices and screen sizes. By Joe Howard.
Main Activity
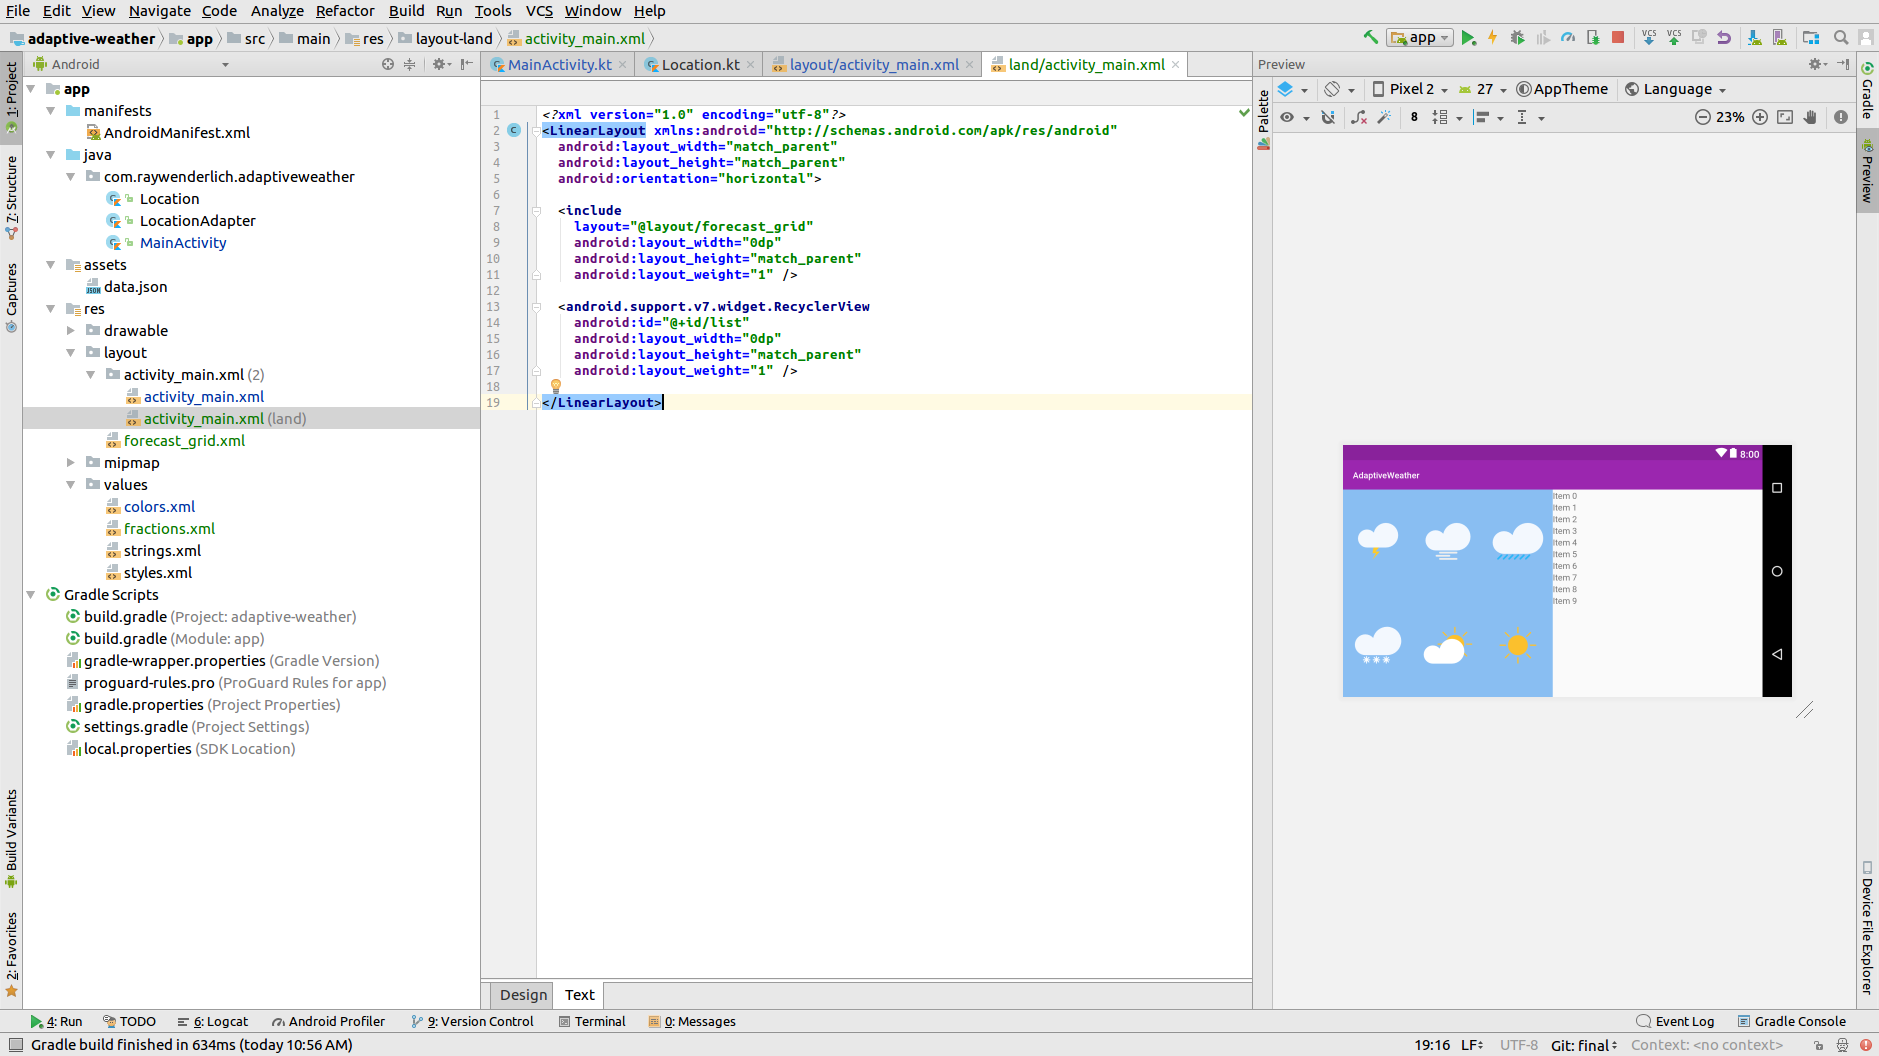
Open res/layout/activity_main.xml and replace its contents with the following:
<?xml version="1.0" encoding="utf-8"?>
<LinearLayout xmlns:android="http://schemas.android.com/apk/res/android"
  android:layout_width="match_parent"
  android:layout_height="match_parent"
  android:orientation="vertical">

  <include
    layout="@layout/forecast_grid"
    android:layout_width="match_parent"
    android:layout_height="0dp"
    android:layout_weight="1" />

  <android.support.v7.widget.RecyclerView
    android:id="@+id/list"
    android:layout_width="match_parent"
    android:layout_height="0dp"
    android:layout_weight="1" />

</LinearLayout>
Here’s what is happening in this layout:
- Orientation for the
LinearLayoutis set to vertical - Dimensions: using the
layout_weightXML attribute you’re setting each child view to take half of the screen height - Layout reuse: using the
includeXML tag you’re placing the forecast grid on the top half by referencing the forecast_grid.xml layout. This is one of the core functionalities to creating different layouts without duplicating the code.
Notice that the preview in the editor gets instantly updated. At this point you still haven’t deployed the application to a device or emulator which is astonishing.
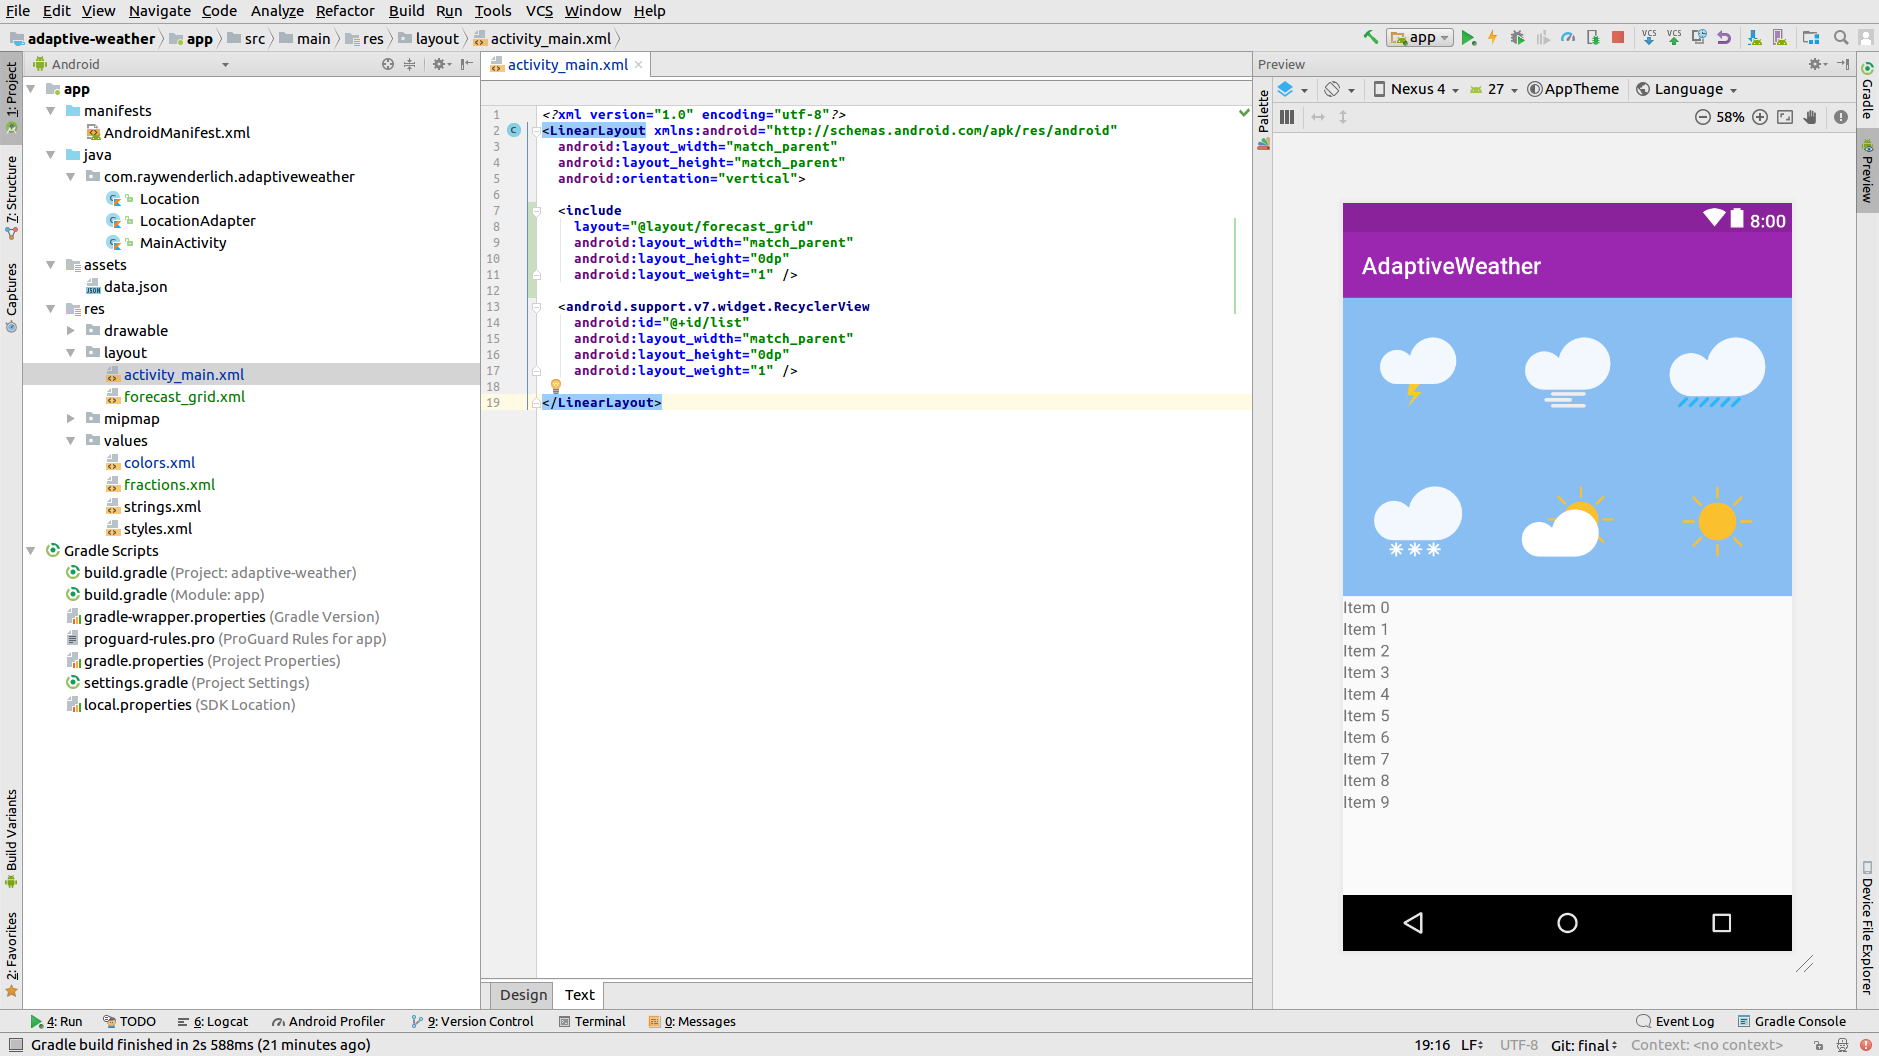
Build and run. You should now see the weather icons above the list of locations.
![]()
Updating the Weather Forecast
Take a look at the static JSON data in assets/data.json. The forecast for a given location is represented as an array of strings. You could create another RecyclerView with a GridLayout to dynamically create the forecast, but that’s asking for trouble :]. Instead you will write a method that maps each possible forecast value to a corresponding drawable icon.
In MainActivity, add a new method:
private fun mapWeatherToDrawable(forecast: String): Drawable? {
  var drawableId = 0
  when (forecast) {
    "sun" -> drawableId = R.drawable.ic_sun
    "rain" -> drawableId = R.drawable.ic_rain
    "fog" -> drawableId = R.drawable.ic_fog
    "thunder" -> drawableId = R.drawable.ic_thunder
    "cloud" -> drawableId = R.drawable.ic_cloud
    "snow" -> drawableId = R.drawable.ic_snow
  }
  return ContextCompat.getDrawable(this, drawableId)
}
Now you are ready to write the code that responds to the click event of a RecyclerView row. Add the following method to MainActivity:
private fun loadForecast(forecast: List<String>) {
  val forecastView = findViewById<View>(R.id.forecast) as FlexboxLayout
  for (i in 0 until forecastView.childCount) {
    val dayView = forecastView.getChildAt(i) as AppCompatImageView
    dayView.setImageDrawable(mapWeatherToDrawable(forecast[i]))
  }
}
Then find // TODO in MainActivity and replace it with the following:
loadForecast(location.forecast)
Build and run. Click on a location name and notice the weather forecast gets updated:

Good job, what a beautiful looking weather application! The weather in San Francisco isn’t looking so beautiful though :].
Creating Adaptive UI: Landscape Layout
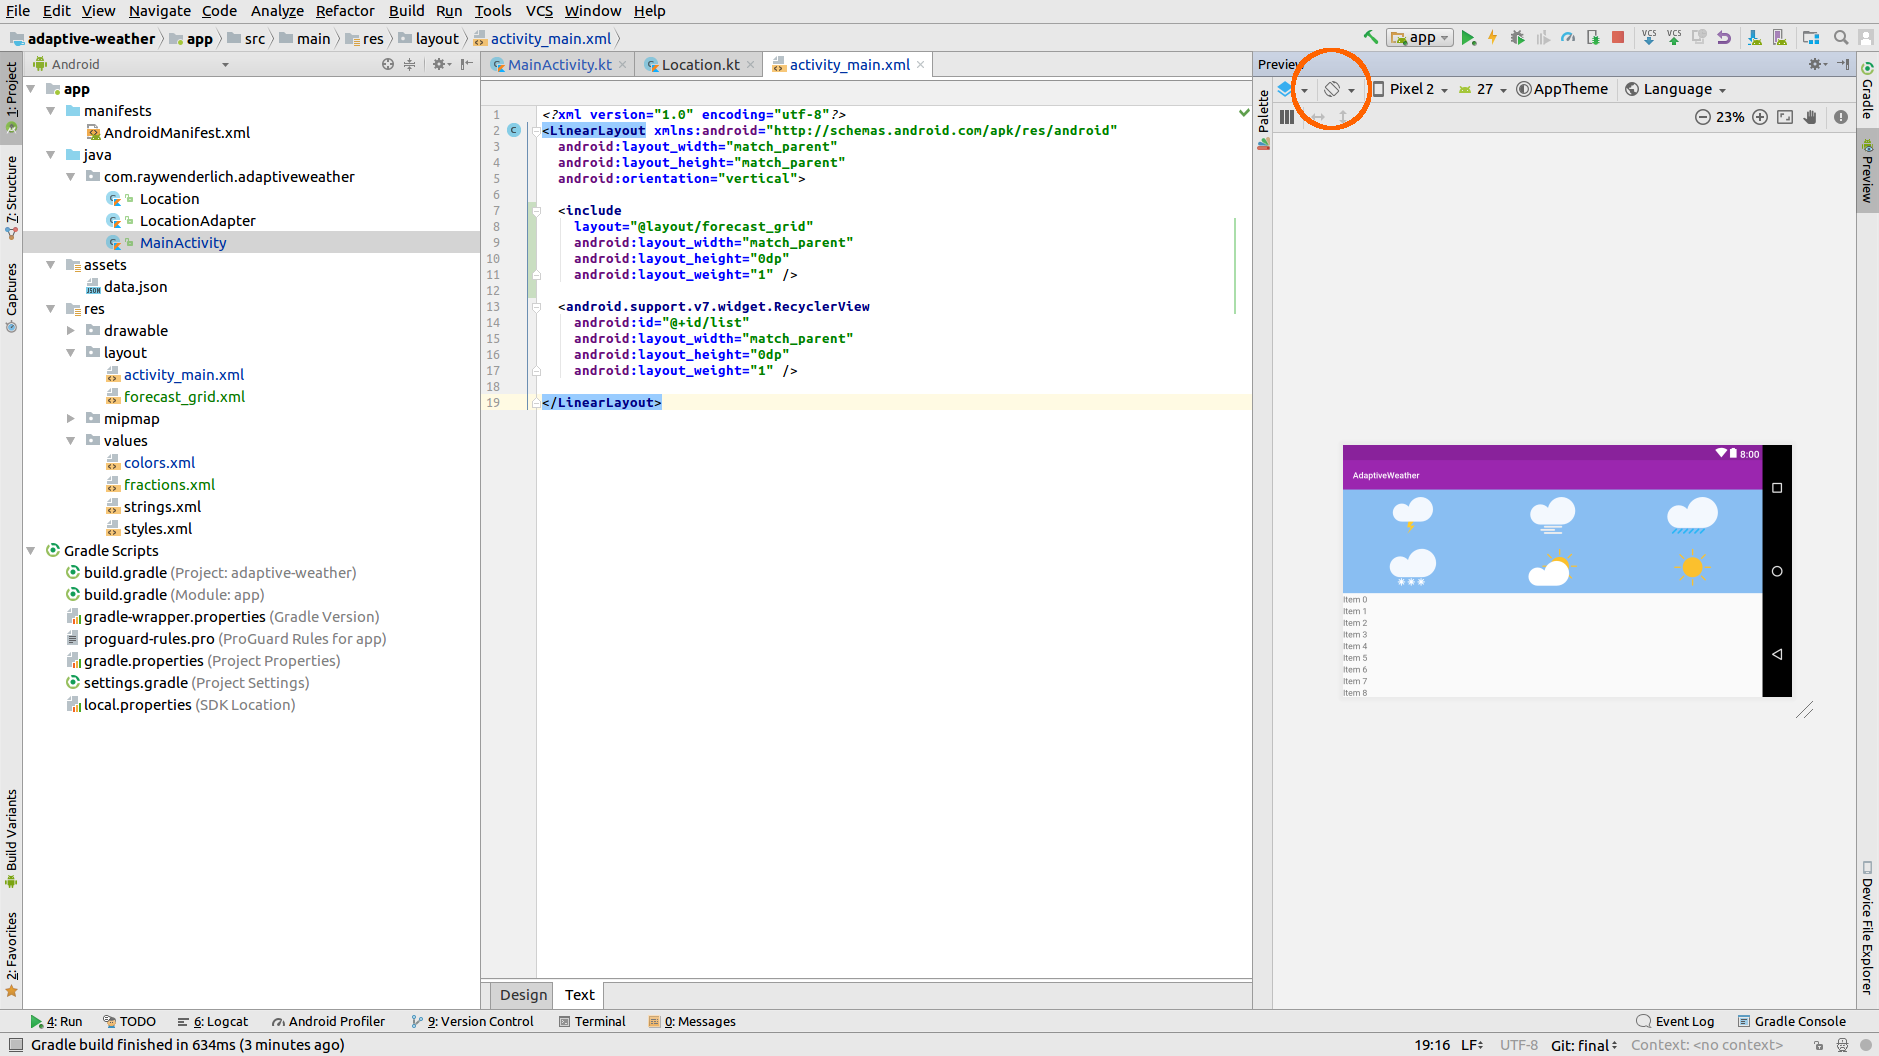
So far, you built this application with the portrait mode in mind but let’s take a look at what happens when the phone is rotated to landscape. Open activity_main.xml, in the layout editor click on the orientation icon, and choose Switch to Landscape:
At this stage, you could run the app on multiple Android devices or simulators. But this method of testing alternative layouts is time consuming and repetitive at best, and error prone at worst. There must be another way.
Thankfully, Android Studio has extensive previewing capabilities. Open the default activity_main.xml file, and hover your mouse over the bottom right corner of the screen to resize the layout. Notice that upon clicking the handle, Android Studio automatically displayed guides for different device sizes.

Ugh — landscape mode is none too kind to your design. Let’s try to have both views side by side instead. To tell the system which resource to pick for a given dimension, you place the layout resource in a folder named in a particular way. The system will pick the correct activity layout for the current device’s screen dimensions. This way, you will have adaptive UIs for your app.
Layout qualifiers
Back in Android Studio, right-click on res/layout and click on the New\Layout resource file menu:

Name the file activity_main and add the landscape resource qualifier:
The layout editor now shows a blank screen for the landscape mode because it picked the newly-created layout file layout-land/activity_main.xml. This only contains an empty ConstraintLayout, though not for much longer :]. Add the following to reuse the weather forecast layout and RecyclerView in a horizontal orientation this time.
<?xml version="1.0" encoding="utf-8"?>
<LinearLayout xmlns:android="http://schemas.android.com/apk/res/android"
  android:layout_width="match_parent"
  android:layout_height="match_parent"
  android:orientation="horizontal">

  <include
    layout="@layout/forecast_grid"
    android:layout_width="0dp"
    android:layout_height="match_parent"
    android:layout_weight="1" />

  <android.support.v7.widget.RecyclerView
    android:id="@+id/list"
    android:layout_width="0dp"
    android:layout_height="match_parent"
    android:layout_weight="1" />

</LinearLayout>
And the layout editor now shows all your elements in landscape orientation.
Well done! You have created the first layout qualifier in this application. There are layout qualifiers for plenty of other configurations (screen width, height, aspect ratio etc.). In the next section we will modify the landscape layout even further with just a one-line change.
Resource qualifiers
Another enhancement you could make to the layout is to organize the weather icons as 2 columns and 3 rows as opposed to the current 3 columns and 2 rows layout. We could duplicate the forecast_grid.xml layout, but then it would be duplicated code and harder to maintain. The width occupied by each weather icon in relation to the FlexBox view width is determined by the layout_flexBasisPercent attribute:
<android.support.v7.widget.AppCompatImageView
  android:id="@+id/day1"
  android:layout_width="wrap_content"
  android:layout_height="60dp"
  app:layout_flexBasisPercent="@fraction/weather_icon"
  app:srcCompat="@drawable/ic_thunder" />
The value is a fraction type and is currently equal to 33% in the resource qualifier file res/values/fractions.xml. Following the same approach to creating a landscape layout, you can create resource files for the landscape configuration. Right-click on res/values and select the New\Values resource file menu item. Name the file fractions and add the landscape orientation qualifier:
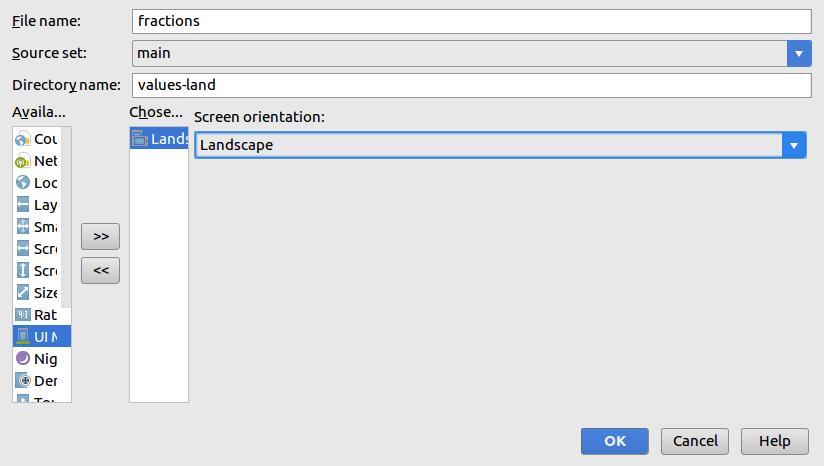
Inside the resources XML tag, add the following:
<item name="weather_icon" type="fraction">49%</item>
Return to the main activity layout in landscape mode and notice the weather icons are laid out on 2 columns and 3 rows:

Well done! You can pause here and appreciate the fact that once again, you didn’t have to deploy the application to achieve this result. Of course now you should build & run though and make sure it works :]
The configuration qualifiers can be applied to any attribute type in your XML layout (font size, colors, margins etc.).
Extra Large Layout
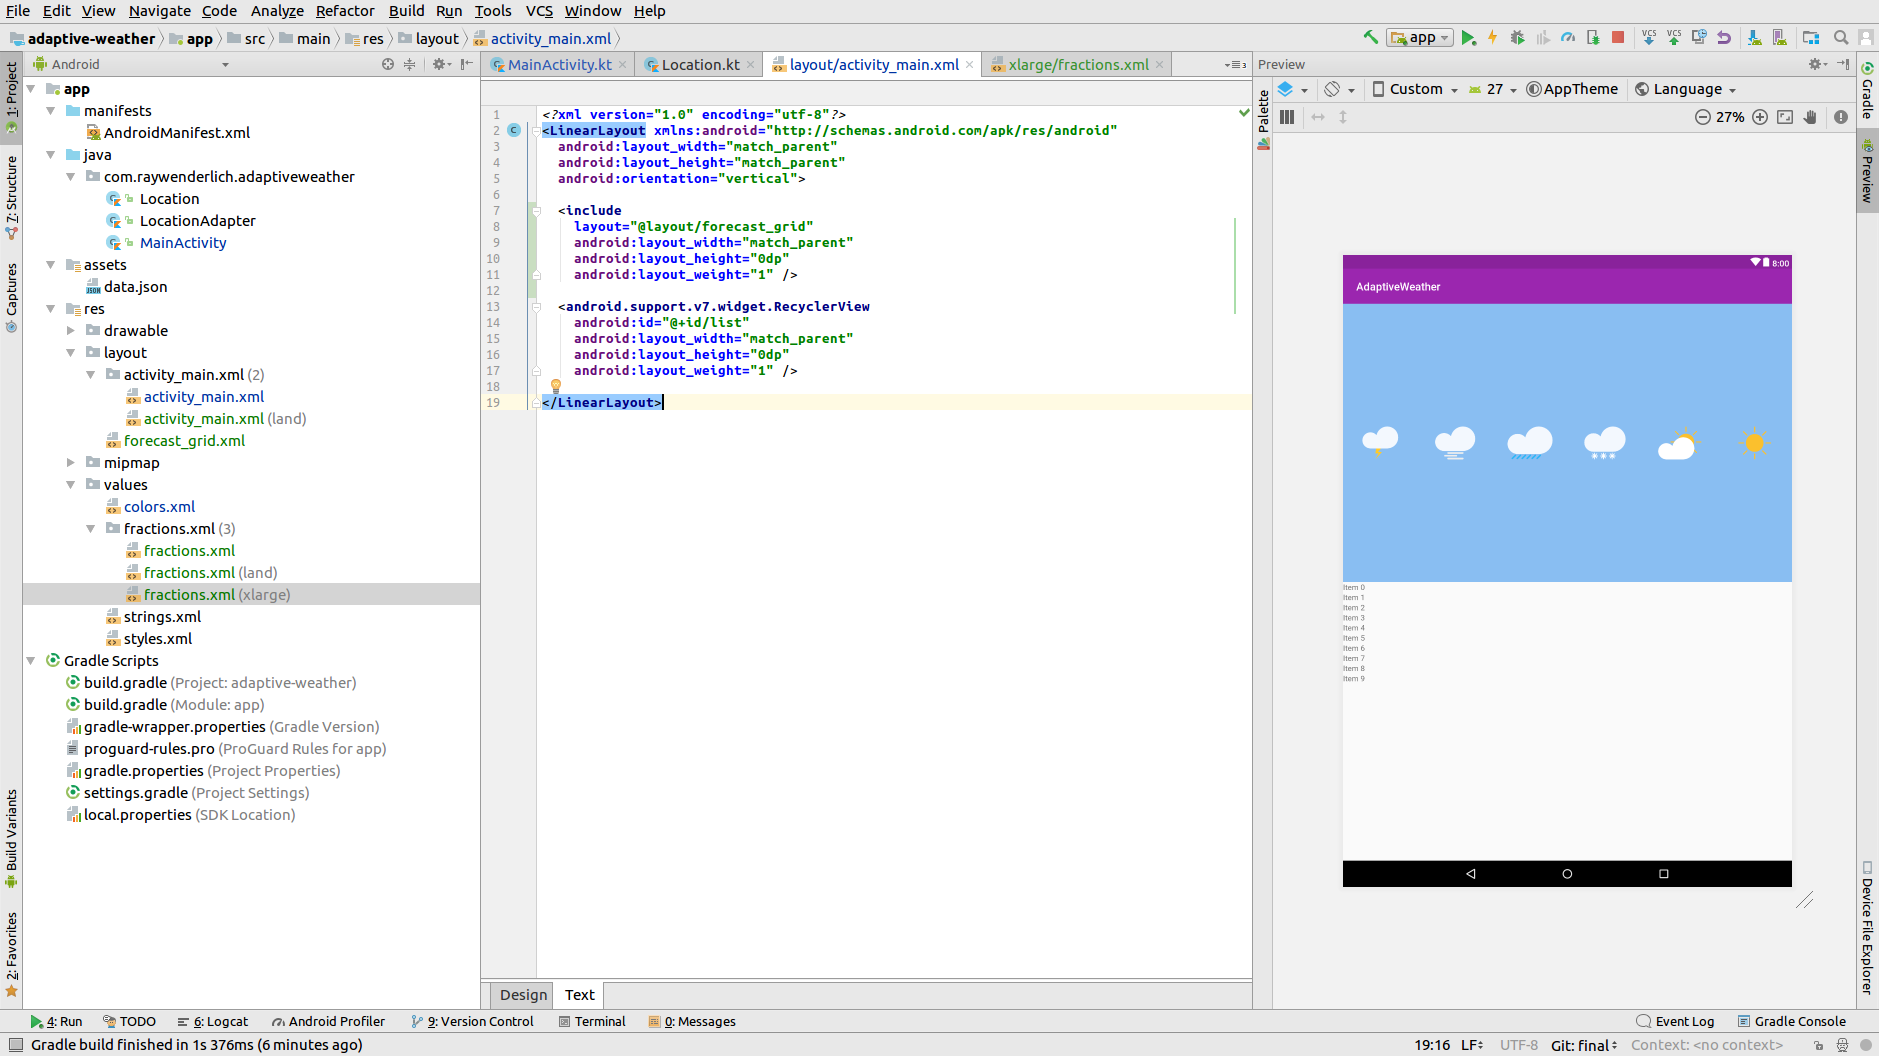
Return to the portrait orientation in the layout editor and drag the screen size all the way to the X-Large size range.

For devices with that much screen real estate, you could show all the weather icons on 1 row. Go ahead and right-click on res/values and select the New\Values resource file menu item. Name the file fractions and add the X-Large Size qualifier:

Add the following inside the resources XML tag:
<item name="weather_icon" type="fraction">16%</item>
Return to the layout editor and notice that all the weather icons are aligned on 1 row.