Continuous Integration With GitHub, Fastlane & Jenkins
In this tutorial, you’ll learn how to use GitHub, Travis, Jenkins and fastlane to make Continuous Integration part of your daily workflow. By Audrey Tam.
Notifying Jenkins With GitHub Webhook
Great, Jenkins pulled your project, built it and ran the test. But you had to tell it to Build Now — that’s not very automated. You want Jenkins to pull your project as soon as you push a commit to GitHub, the way Travis CI did. It turns out, Travis CI did something with GitHub automatically that you now have to do manually.
You need to create a GitHub webhook to notify your Jenkins server whenever you push a new commit. A webhook is a GitHub mechanism for POSTing a notification to the webhook’s URL whenever certain events happen in your GitHub repository — for example, whenever you push a commit.
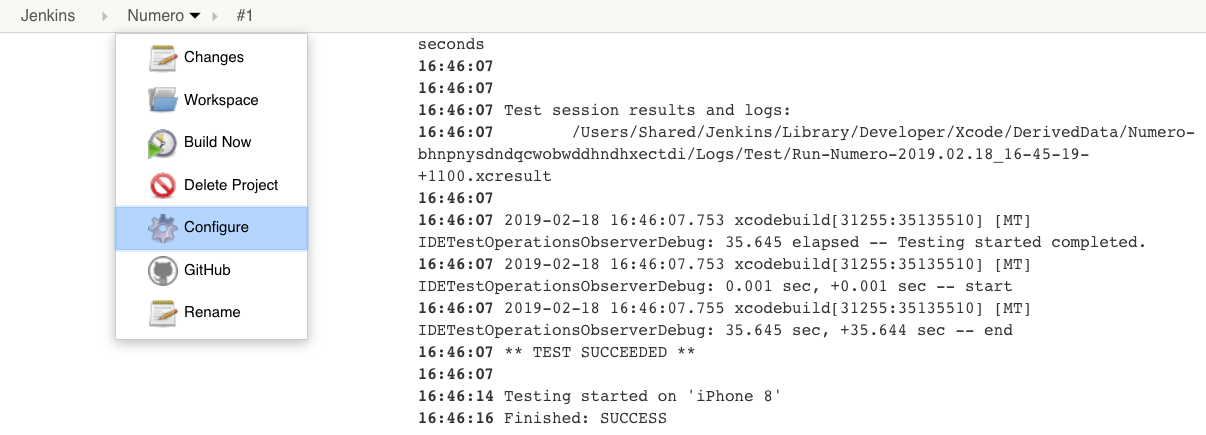
First, set up your Jenkins project to expect notifications from GitHub: Use the Numero menu to get back to Configure:
Select the Build Triggers tab and check GitHub hook trigger for GITScm polling:
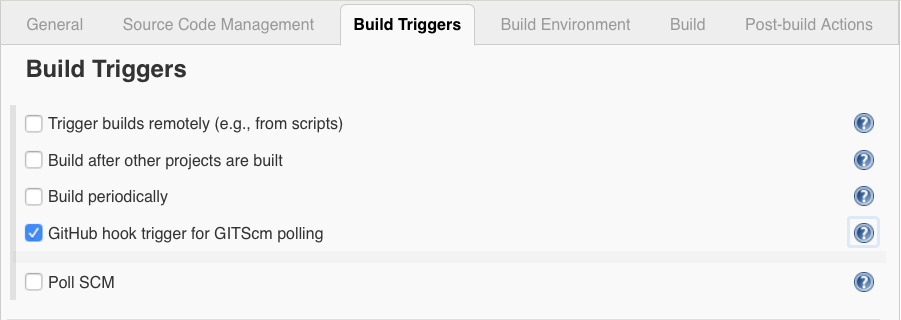
Scroll to the bottom and press Save.
Now go to your GitHub page to set up the webhook.
If you’d like to disable Travis-CI on your repository to avoid builds running in both places, you’ll need to uninstall Travis from your repository. This is optional; click Reveal to show the instructions. Or, just leave it running and skip ahead to creating a webhook for Jenkins.
[spoiler]
On your Numero repository page, click Settings, select Integrations & Services, then click Configure in the row for Travis CI.
Scroll to the bottom and click Uninstall. Click OK and GitHub will schedule a job to remove Travis.
[/spoiler]
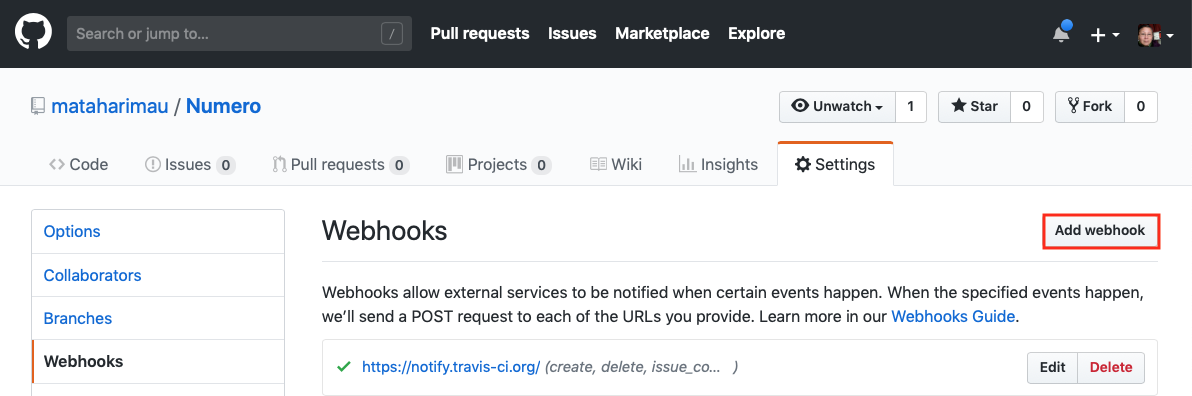
To add a webhook for your Jenkins server, go to your Numero repository page and click Settings. Select Webhooks from the side menu, then click Add webhook:
The first thing you need is the Payload URL — the URL of your Jenkins server. But, unless you set up your Jenkins with a proper external URL, back at the Instance Configuration step, you’re using localhost while you work through this tutorial. But GitHub needs a real URL to send notifications to — what to do?
ngrok to the rescue! It’s a free app that uses a secure tunnel to expose localhost to the internet. GitHub’s webhooks tutorial uses it, so it must be OK ;]. Go ahead and download ngrok for Mac OS X:

In Terminal, cd to where ngrok is, then run this command:
./ngrok http 8080
Your output will look similar to this:
ngrok by @inconshreveable                                       (Ctrl+C to quit)

Session Status                online
Session Expires               7 hours, 59 minutes
Version                       2.2.8
Region                        United States (us)
Web Interface                 http://127.0.0.1:4040
Forwarding                    http://4c94cdf1.ngrok.io -> localhost:8080
Forwarding                    https://4c94cdf1.ngrok.io -> localhost:8080

Connections                   ttl     opn     rt1     rt5     p50     p90
                              0       0       0.00    0.00    0.00    0.00
Copy your Forwarding URL — mine is http://4c94cdf1.ngrok.io, for the next almost-8 hours.
Back on your GitHub Add webhook page, paste this URL in the Payload URL field, and add /github-webhook/ to the end of the URL. This is the endpoint on your Jenkins server that responds to pushes from GitHub:

Click Add Webhook. GitHub sends a test POST request to the URL, which responds with 302 Found, meaning the URL has been redirected. Don’t worry that GitHub flags this as a failure.
Now, in ConverterTests.swift add this new unit test to Numero, so you have something to push to GitHub, which will notify your Jenkins server:
func testConversionForTwo() {
  let result = converter.convert(2)
  XCTAssertEqual(result, "II", "Conversion for 2 is incorrect")
}
convert(_:) returns “I”, not “II”.
Commit and push to GitHub, then check your Jenkins page — Numero’s menu now has an item for GitHub Hook Log!
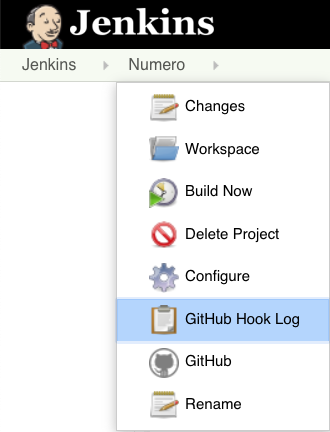
Select GitHub Hook Log: An event from your ngrok URL caused Jenkins to poll your GitHub repository for changes, which it found:
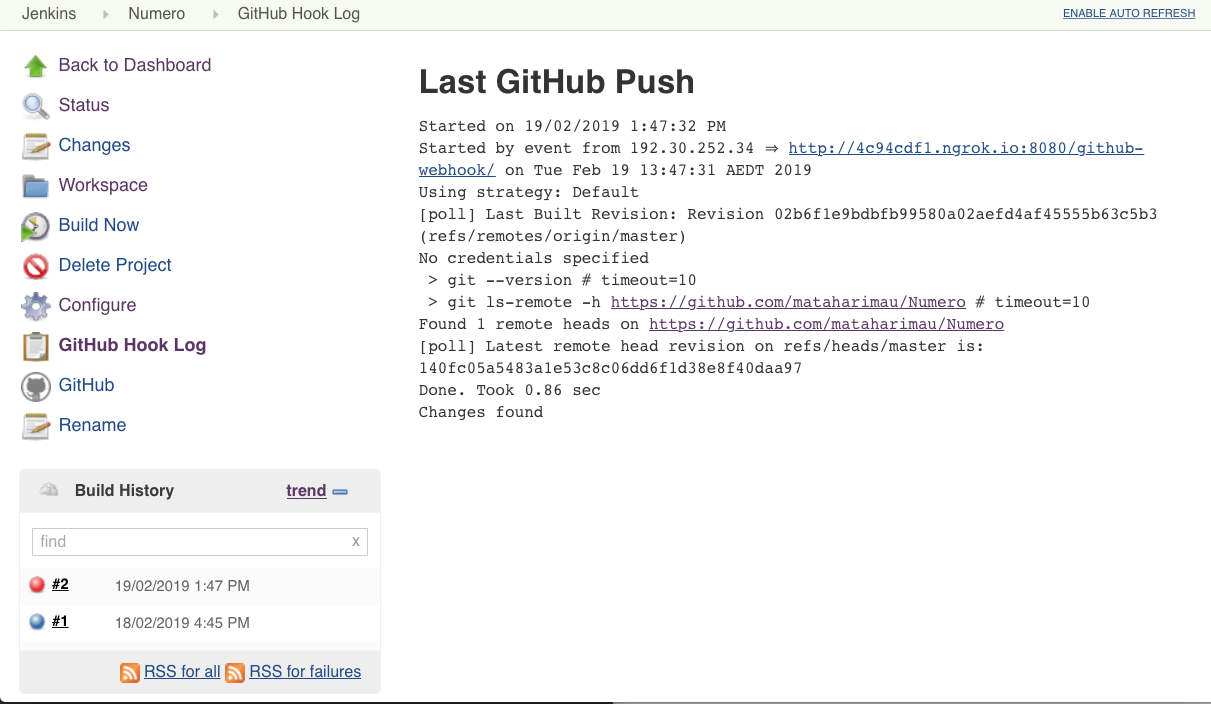
Your push to GitHub triggered build #2 — its light is red, because the unit test failed. Use the pop-up menu to view build #2’s Console Output:
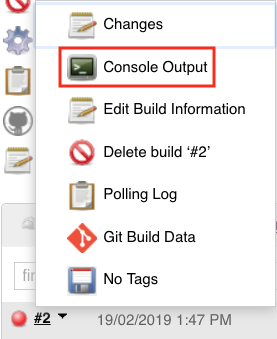
Scroll all the way down to see the test results:
13:48:12 Test Suite 'All tests' started at 2019-02-19 13:48:12.227
13:48:12 Test Suite 'NumeroTests.xctest' started at 2019-02-19 13:48:12.228
13:48:12 Test Suite 'ConverterTests' started at 2019-02-19 13:48:12.228
13:48:12 Test Case '-[NumeroTests.ConverterTests testConversionForOne]' started.
13:48:12 Test Case '-[NumeroTests.ConverterTests testConversionForOne]' passed (0.002 seconds).
13:48:12 Test Case '-[NumeroTests.ConverterTests testConversionForTwo]' started.
13:48:12 /Users/Shared/Jenkins/Home/workspace/Numero/NumeroTests/ConverterTests.swift:32: error: -[NumeroTests.ConverterTests testConversionForTwo] : XCTAssertEqual failed: ("I") is not equal to ("II") - Conversion for 2 is incorrect
...
13:48:15 Failing tests:
13:48:15    ConverterTests.testConversionForTwo()
13:48:15 ** TEST FAILED **
13:48:15
13:48:21 Testing started on 'iPhone 8'
13:48:21 Build step 'Execute shell' marked build as failure
13:48:21 Finished: FAILURE
Congratulate yourself — you’ve set up communication from GitHub to Jenkins! Something that Travis CI did for you auto-magically. Well, Travis CI has a fixed URL, so that made it easier — no need to ngrok.
Travis CI has another useful default behavior: It sends emails to notify you of build results. You can set up Jenkins to do this, but you have to do some work.
Emailing From Jenkins
First, you need an SMTP (Simple Mail Transfer Protocol) server. You could configure one with Postfix, but this tutorial uses smtp.gmail.com — you need a Google account to follow along.
This time, you must configure both your project and your Jenkins system.
Configuring Your Project
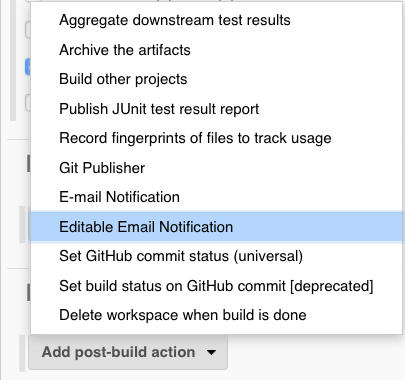
Start with your project: Use the Numero menu to get back to Configure, then select the Post-build Actions tab.
From the Add post-build action menu, select Editable Email Notification:
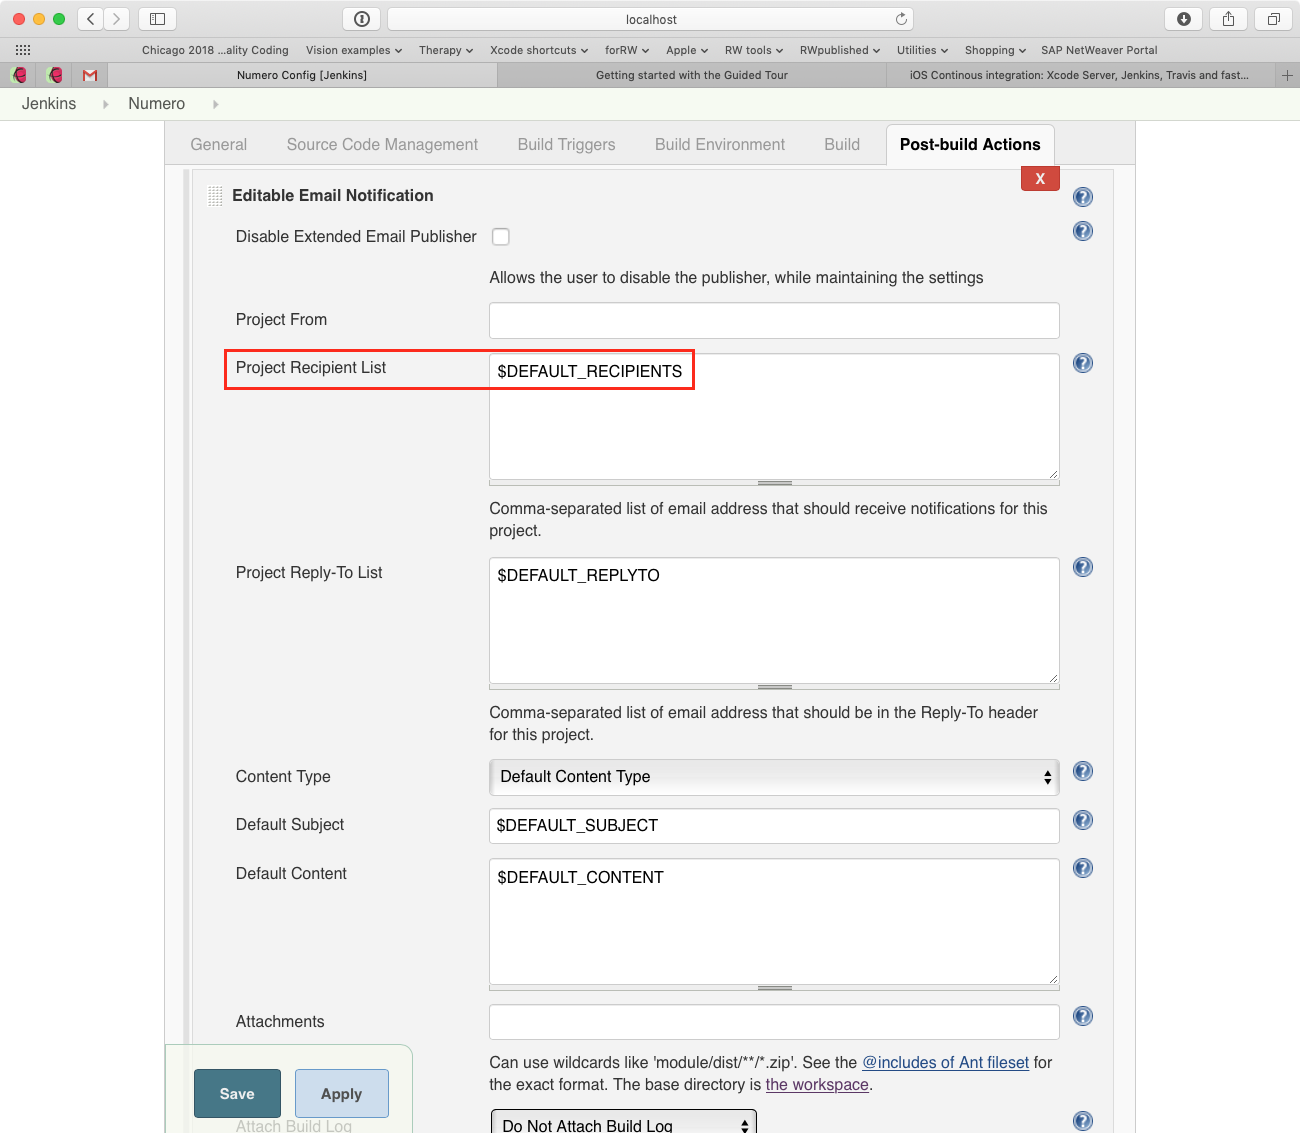
In the form that appears, you don’t have to edit anything, but note the value of Project Recipient List is $DEFAULT_RECIPIENTS — you’ll need to make sure to edit this field, when you find it.
Below this form, click Advanced Settings… to see more options: The default trigger is Failure – Any, so you don’t have to do anything to prevent success emails.
To duplicate the default behavior of Travis CI, select Always from the Add Trigger menu:

Click Advanced… in the Always section and add your email address to Recipient List:
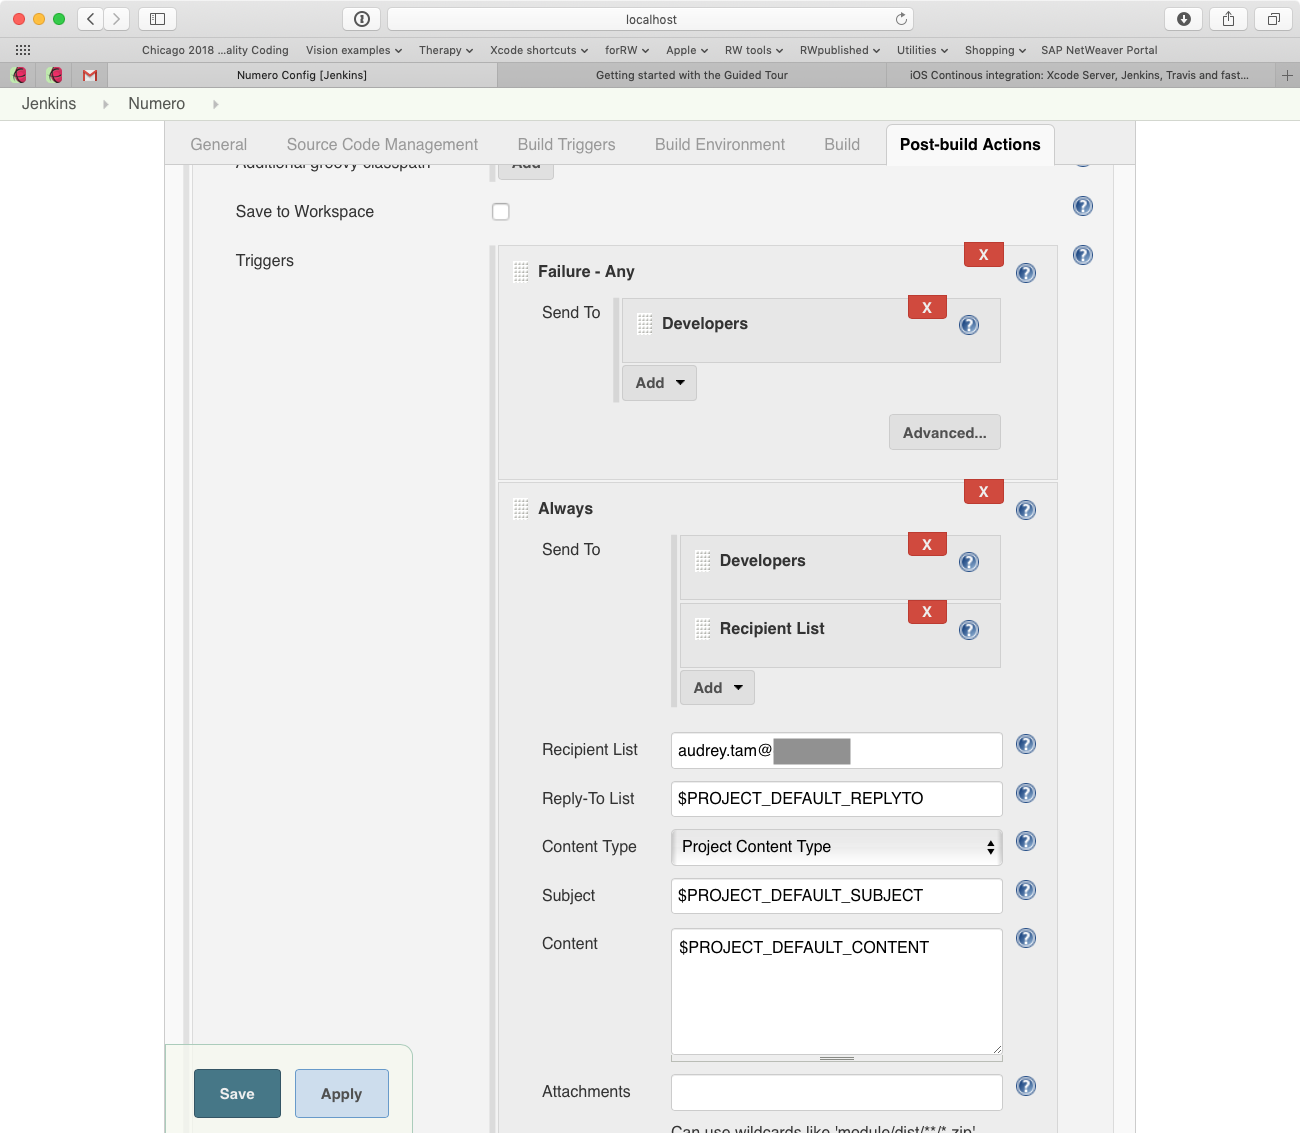
Click Save to return to your project page.
Configuring Your Jenkins System
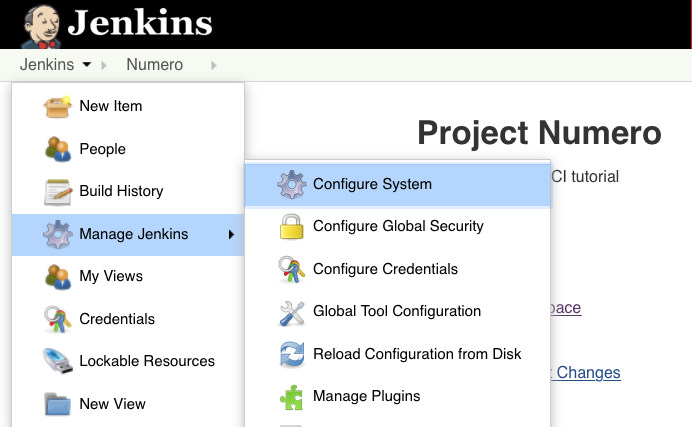
Now to configure your Jenkins system: Use the Jenkins menu to select Manage Jenkins ▸ Configure System:
Scroll down to Extended E-mail Notification and settle in for lots of form-filling!
- For SMTP server, type smtp.gmail.com, then click Advanced….
- Check Use SMTP Authentication, then type your Google User Name and Password.
- Check Use SSL.
- For SMTP port, type 465.
- For Default Recipients (aha!), type your email address.
- Click Apply to save your entries but stay on this page.

Scroll all the way down, to (plain old) E-mail Notification and click Advanced…: All your email settings should be already here; if not, enter them again.
Right down at the bottom, check Test configuration by sending test e-mail, then fill in your email address.

Before you click Test configuration, there’s one more thing you need to do. Because Google has tightened up security, go to Less secure app access and flick the switch to ON:

Now return to Jenkins and click Test configuration. Wait a bit, and you should see “Email was successfully sent”. Check your email to find:

Pushing to GitHub
Now edit the code in Converter.swift to make your second unit test pass. Edit the convert(_:) method so it returns a String with the correct number of “I” characters:
func convert(_ number: Int) -> String {
  return String(repeating: "I", count: number)
}
Commit and push to GitHub, then watch your build’s console log — it should end with “2 tests, with 0 failures” and an email sent to your email address:
20:54:28 Test Suite 'ConverterTests' passed at 2019-02-19 20:54:28.700.
20:54:28     Executed 2 tests, with 0 failures (0 unexpected) in 0.002 (0.003) seconds
20:54:28 Test Suite 'NumeroTests.xctest' passed at 2019-02-19 20:54:28.701.
20:54:28     Executed 2 tests, with 0 failures (0 unexpected) in 0.002 (0.003) seconds
20:54:28 Test Suite 'All tests' passed at 2019-02-19 20:54:28.701.
20:54:28     Executed 2 tests, with 0 failures (0 unexpected) in 0.002 (0.004) seconds
20:54:29
20:54:29
20:54:29 Test session results and logs:
20:54:29    /Users/Shared/Jenkins/Library/Developer/Xcode/DerivedData/Numero-bhnpnysdndqcwobwddhndhxectdi/Logs/Test/Run-Numero-2019.02.19_20-54-23-+1100.xcresult
20:54:29
20:54:29 2019-02-19 20:54:29.034 xcodebuild[49013:36278327] [MT] IDETestOperationsObserverDebug: 1.783 elapsed -- Testing started completed.
20:54:29 2019-02-19 20:54:29.034 xcodebuild[49013:36278327] [MT] IDETestOperationsObserverDebug: 0.000 sec, +0.000 sec -- start
20:54:29 2019-02-19 20:54:29.034 xcodebuild[49013:36278327] [MT] IDETestOperationsObserverDebug: 1.783 sec, +1.783 sec -- end
20:54:29 ** TEST SUCCEEDED **
20:54:29
20:54:29 Testing started on 'iPhone 8'
20:54:29 Email was triggered for: Always
20:54:29 Sending email for trigger: Always
20:54:29 Sending email to: audrey.tam@xxxxxxx
20:54:33 Finished: SUCCESS
And there’s the email:

Whew! That took a while longer than Travis CI, but you’ve got the basic CI workflow happening with pushes to GitHub triggering Jenkins builds, which trigger email notifications. Take a well-earned break!