Continuous Integration With GitHub, Fastlane & Jenkins
In this tutorial, you’ll learn how to use GitHub, Travis, Jenkins and fastlane to make Continuous Integration part of your daily workflow. By Audrey Tam.
Using fastlane With Travis
In fact, you can make your CI life just that bit easier by using fastlane. You may know it as a super-assistant for streamlining deployment to the App Store, but it can also help with CI, by automating unit testing with fastlane scan.
And because Travis CI is so accommodating, you don’t even have to install fastlane on your Mac.
Open .travis.yml to edit it, and replace the last four lines with this:
script:
- fastlane scan
That’s right — you just have to specify the Xcode version and the Swift language, then fastlane takes care of the rest!
Now edit the code in Converter.swift, to make your unit test pass. The starter project has a convert(_:) method that returns an empty String. Change it so it returns "I":
return "I"
Commit and push to GitHub. On your Travis CI Numero repository page, click Build History, then #2 — its status might be received, booting or started.

This time, Travis CI boots a virtual machine (VM):

And the Job log shows the configuration of the VM with Swift, macOS 10.14.4, and various utilities. Travis CI then runs fastlane, which runs an xcodebuild command:
$ fastlane scan
...
$ xcodebuild -showBuildSettings -scheme Numero -project ./Numero.xcodeproj
Cool — fastlane figures out for itself the scheme and project values that you wrote in your first .travis.yml file! Then fastlane finds a simulator — it’s just the first in the simulator list, the 5s. And fastlane defaults to the latest iOS:
Found simulator "iPhone 5s (12.2)"
--device option to tell fastlane to use a specific simulator device, for example, --device "iPhone 8". This is useful for UI tests. The similarly named --devices (plural) option lets you specify an array of physical devices that are connected your server. This option isn’t useful for Travis CI because it doesn’t support running tests against actual iOS devices.
Then fastlane displays a long Summary for scan table, and eventually displays Test Results:
+--------------------+---+
|      Test Results      |
+--------------------+---+
| Number of tests    | 1 |
| Number of failures | 0 |
+--------------------+---+
...
The command "fastlane scan" exited with 0.
Done. Your build exited with 0.
This time, the build succeeds! But you knew that would happen ;]. And here’s the good news in your mailbox:

Time for a celebration!

Doing CI With Jenkins
Travis CI is such an instant feel-good experience, why would you look anywhere else? Well, maybe because you need CI for a private repository — check out Travis CI Plans & Pricing. Or, if your team or company already maintains or rents servers, it might be more cost-effective to install Jenkins.
Installing Jenkins
Jenkins Docker images exist, but Jenkins running in a Docker container won’t be able to run xcodebuild, so you’ll install Jenkins directly on your Mac. Download the installer by visiting the Jenkins download page and clicking Mac OS X.
While the installer downloads, check to see if you have the appropriate Java installed. You need Java 1.8 to install Jenkins. Mojave doesn’t have Java pre-installed, but if you’re not sure, enter this command to see if you already have it:
java -version
If the output doesn’t include java version “1.8 …”, you’ll need to install it. While you can download it from the Oracle web site, it’s simpler to install it using Homebrew, a popular package manager for macOS. If you don’t have Homebrew installed already, enter this command in Terminal:
/usr/bin/ruby -e \
  "$(curl -fsSL https://raw.githubusercontent.com/Homebrew/install/master/install)"
Enter your password if prompted. You should see Installation Successful once it completes.
To install Java, enter this command in Terminal:
brew cask install homebrew/cask-versions/java8
Again, enter your password if prompted.
Once Java 1.8 is installed, run the Jenkins installer, which should have finished downloading by now. When the installer finishes, it should open localhost:8080 in your browser — it wants a password:

The easiest way to find the initial admin password is to look in the log — enter this command:
cat /var/log/jenkins/jenkins.log
There’s a lot in this log, but you only need to scroll up a little from the bottom to see your password between the two triple-rows of asterisks:
*************************************************************
*************************************************************
*************************************************************

Jenkins initial setup is required. An admin user has been created and a password generated.
Please use the following password to proceed to installation:

<your initial admin password>

This may also be found at: /Users/Shared/Jenkins/Home/secrets/initialAdminPassword

*************************************************************
*************************************************************
*************************************************************
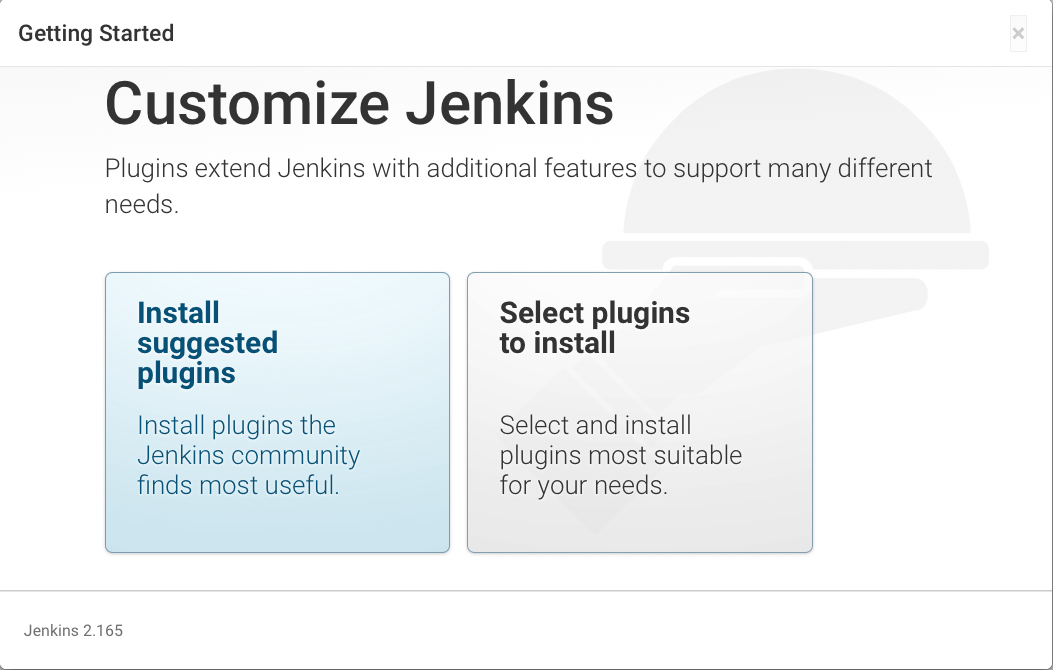
Copy the password and paste it into the Administrator password field. Click Continue to load the Customize Jenkins page:
This opens the offending configuration file in a simple text editor. Find https and change it to http. To exit the editor and save the file, press Control-C, then press Y, then finally press Enter. Now, refresh the page in your browser and you should see the correct page.
sudo nano /Users/Shared/Jenkins/Home/hudson.model.UpdateCenter.xml
sudo nano /Users/Shared/Jenkins/Home/hudson.model.UpdateCenter.xml
Select Install suggested plugins, then go for a walk — this takes several minutes.

Ah, you’re back! Now create your admin account — entering admin for both Username and Password works OK:

On the Instance Configuration page, just click Not now:

And on the next page, click Start using Jenkins:

Your First Jenkins Build
Next, you’ll see a welcome page, prompting you to create new jobs:
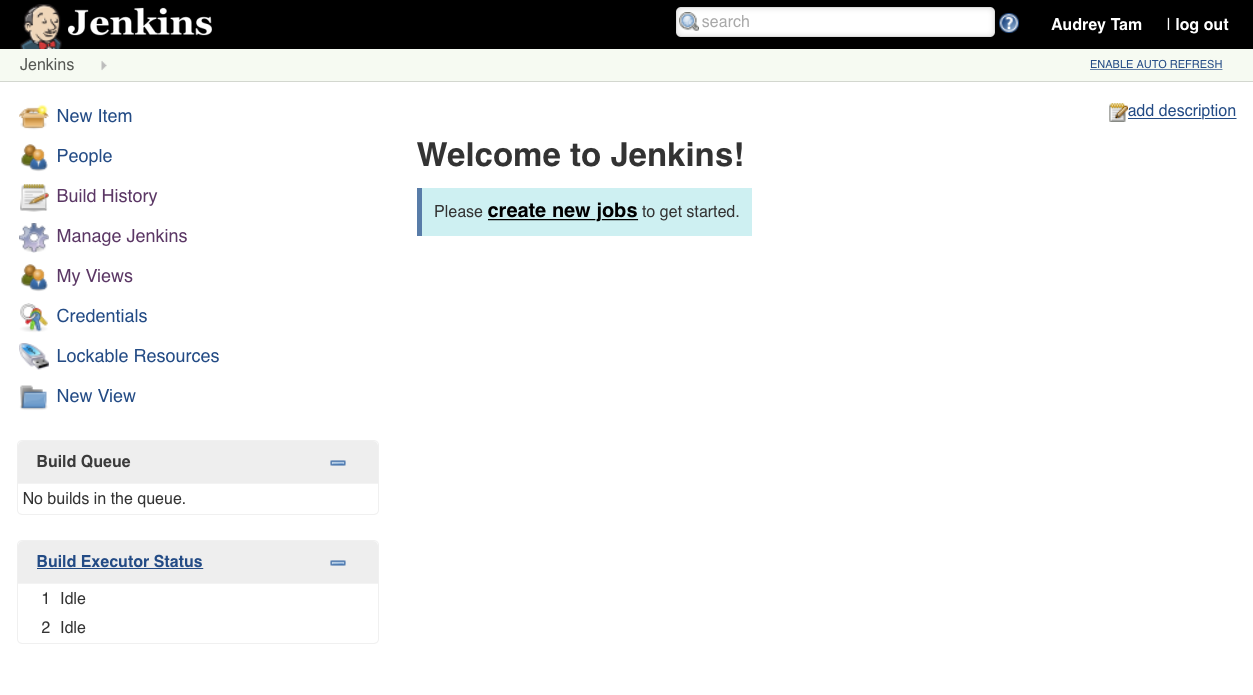
Click that link, and you’ll need to sign in:

Just use your admin/admin account and check the box Keep me signed in.
On the next page, enter Numero for item name and select Freestyle project:

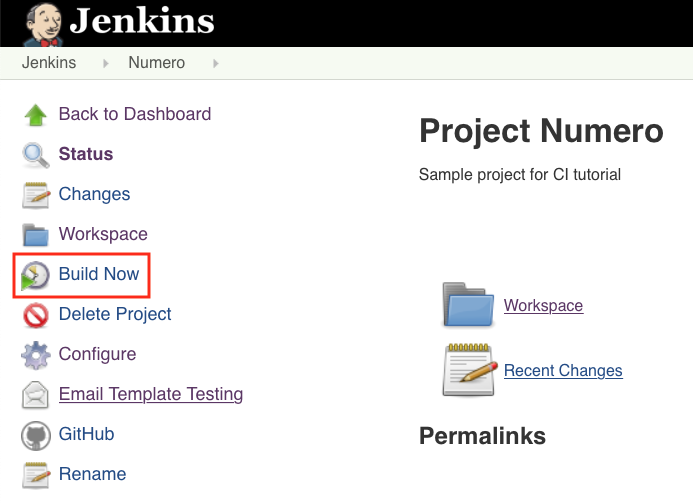
And here’s your new project page! Select Configure from the side menu to really get started! That is, of course, if Jenkins didn’t automatically take you to the configuration page!

The project configuration page has several tabs. Start with the first — General — all you need to do here is check GitHub project, then paste your repository URL in the Project url field that appears. For simplicity, make sure you use HTTPS and not SSH access to GitHub.

Next, scroll down or click across to Source Code Management: Select Git and paste your Repository URL again.

Scroll down past Build Triggers — you’ll come back to this tab later.
The next section is Build Environment: Sometimes a build keeps going, even after the console log says it’s finished, so check Abort the build if it’s stuck and select No Activity as the Time-out strategy. If you like to know when things happened, also check Add timestamps to the Console Output.

Finally, the Build section is where it all happens! In the Add build step menu, select Execute shell:

In the Command field that appears, paste this shell command:
xcodebuild -scheme Numero -configuration Debug build test \
  -destination 'platform=iOS Simulator,name=iPhone 8'

Click the Save button to return to the project page, then select Build Now from the side menu:
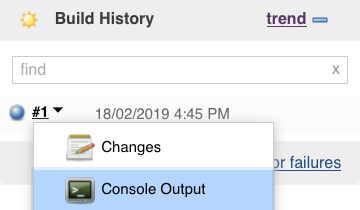
Something starts happening in the Build History section — your first build appears! Hover your cursor over #1 to make the menu button appear, then select Console Output from the menu:
Here are some highlights from my console log:
16:46:07 Test Suite 'ConverterTests' started at 2019-02-18 16:46:07.264
16:46:07 Test Case '-[NumeroTests.ConverterTests testConversionForOne]' started.
16:46:07 Test Case '-[NumeroTests.ConverterTests testConversionForOne]' passed (0.004 seconds).
...
16:46:07 Test session results and logs:
16:46:07    /Users/Shared/Jenkins/Library/Developer/Xcode/DerivedData/Numero-bhnpnysdndqcwobwddhndhxectdi/Logs/Test/Run-Numero-2019.02.18_16-45-19-+1100.xcresult
...
16:46:07 ** TEST SUCCEEDED **
16:46:07
16:46:14 Testing started on 'iPhone 8'
16:46:16 Finished: SUCCESS
SUCCESS indeed!