Document-Based Apps Using SwiftUI
SwiftUI makes it easier than ever to create document-based apps that work with the iOS document interaction system. In this tutorial, you’ll learn how to create a SwiftUI document-based meme-maker app. By David Piper.
Creating the Data Model
Before you can continue working on MemeMakerDocument, you need to define the meme it works with. Create a new Swift file called Meme.swift in the Shared group and select both checkboxes in Targets so it’ll be included in both the iOS and the macOS targets.

Add the following code:
struct Meme: Codable {
  var imageData: Data?
  var topText: String
  var bottomText: String
}
MemeMaker will save a Meme to disk. It conforms to Codable, so you can convert it to Data and back using JSONEncoder and JSONDecoder. It also wraps all the information needed to represent a Meme: two strings and an image’s data.
Open MemeMakerDocument.swift again and find this code at the beginning of the class:
var text: String

init(text: String = "Hello, world!") {
  self.text = text
}
MemeMakerDocument can now hold the actual Meme instead of text. So replace these lines with the following code:
// 1
var meme: Meme

// 2
init(
  imageData: Data? = nil,
  topText: String = "Top Text",
  bottomText: String = "Bottom Text"
) {
  // 3
  meme = Meme(
    imageData: imageData,
    topText: topText,
    bottomText: bottomText)
}
This is what’s happening in the code above:
- This is the meme represented by an instance of
MemeMakerDocument. - You define an initializer for
MemeMakerDocument. The initializer receives the data for an image and both the top and bottom text. - Finally, you initialize a new
Memegiven these parameters.
At this point, you’ll see errors in your code. Don’t worry — there are a couple of additional changes you need to make to encode and decode a document when saving and loading a file.
Encoding and Decoding the Document
First, make a change to fileWrapper(configuration:). Replace the method body with these lines:
let data = try JSONEncoder().encode(meme)
return .init(regularFileWithContents: data)
This converts the meme to data and creates a WriteConfiguration that the system uses to write this document to disk.
Next, replace the body of init(configuration:) with the following code:
guard let data = configuration.file.regularFileContents else {
  throw CocoaError(.fileReadCorruptFile)
}
meme = try JSONDecoder().decode(Meme.self, from: data)
The app calls this initializer when an existing document is opened. You try to get the data from the given ReadConfiguration and convert it to an instance of Meme. If the process fails, the initializer will throw an error which the system deals with.
You’ve now added support for reading and writing custom meme documents to your app. However, the user still can’t see any of this since you’re not showing a meme editor. You’ll solve that problem in the next section.
Providing a Custom Editor
Currently, the app uses a TextEditor. The template for SwiftUI document-based multi-platform apps starts with this view. It’s used to present editable and scrollable text.
TextEditor isn’t suitable for creating and editing memes, so you’ll create your own view to edit a MemeMakerDocument.
Before you start creating your new editor view, you’ll remove the old one. Open ContentView.swift and replace body with an empty view:
Spacer()
This makes sure you don’t get compiler errors while building up your new editor.
Creating the Image Layer
The editor will consist of two subviews. You’ll create these before creating the actual editor.
The first one is ImageLayer, a view that’s representing the image. Create a new SwiftUI View file in Shared called ImageLayer.swift and select both checkboxes for MemeMaker (iOS) and MemeMaker (macOS) in Targets. Replace the two structs in the file with the following:
struct ImageLayer: View {
  // 1
  @Binding var imageData: Data?

  // 2
  var body: some View {
    NSUIImage.image(fromData: imageData ?? Data())
      .resizable()
      .aspectRatio(contentMode: .fit)
  }
}

// 3
struct ImageLayer_Previews: PreviewProvider {
  static let imageData = NSUIImage(named: "AppIcon")!.data

  static var previews: some View {
    ImageLayer(imageData: .constant(imageData))
      .previewLayout(.fixed(width: 100, height: 100))
  }
}
Here’s what the code above is doing:
-
ImageLayerhas a SwiftUI binding to the meme image’s data. In a later step,MemeEditorwill pass the data to this view. - Its
bodyconsists of anNSUIImage, a view you initialize with the image data. You may wonder what this view is. It’s a typealias forUIImageon iOS andNSImageon macOS, together with an extension. It allows for one common type for images, which has the same methods and properties on both platforms. You can find it in the NSUIImage_iOS.swift file in the iOS group and NSUIImage_macOS.swift in the macOS group. It uses the correct type depending on whether you’re running the MemeMaker (iOS) or MemeMaker (macOS). - Finally, you add a preview to support Xcode’s previewing feature.
Take a look at the preview to make sure your view is showing an image:
Now that you are showing the image, you can move on to showing the text!
Creating the Text Layer
TextLayer is the second subview, and it positions the top and bottom text above the image. Again, create a new SwiftUI View file in Shared and call it TextLayer.swift. Remember to check MemeMaker (iOS) and MemeMaker (macOS) as Targets.
Replace the generated TextLayer struct with this:
struct TextLayer<ImageContent: View>: View {
  @Binding var meme: Meme
  let imageContent: () -> ImageContent
}
TextLayer has two properties: meme, holding the Meme that’s shown; and imageContent. imageContent is a closure to create another view inside of TextLayer‘s body. Note that you declared the view as a generic struct where the the image content view can be anything that conforms to View.
Next, add the body to the view:
var body: some View {
  ZStack(alignment: .bottom) {
    ZStack(alignment: .top) {
      imageContent()
      MemeTextField(text: $meme.topText)
    }

    MemeTextField(text: $meme.bottomText)
  }
}
You use two ZStacks in body to place the top text at the top of the image and the bottom text at its bottom. To show the image, you call the closure passed to your TextLayer view. To show the text, you use MemeTextField, a normal TextField set up in your starter project to show formatted text.
Finally, replace the preview with the following:
struct TextLayer_Previews: PreviewProvider {
  @State static var meme = Meme(
    imageData: nil,
    topText: "Top Text Test",
    bottomText: "Bottom Text Test"
  )

  static var previews: some View {
    TextLayer(meme: $meme) {
      Text("IMAGE")
        .frame(height: 100)
    }
  }
}
Take a look at the preview:
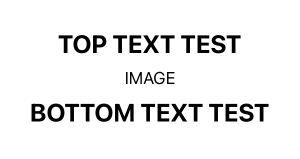
Right now it’s not looking like much of a meme. Not to worry, in the next section, you’ll combine both the image and text layers to create MemeEditor.