Accessing Heart Rate Data for Your ResearchKit Study
In this tutorial, you’ll learn how to easily access heart rate data from HealthKit and use it in a ResearchKit study. By Matt Luedke.
Measuring Music’s Effect on Heart Rate
Research into music and its effects on our minds and bodies is a fascinating field; you’ll build a sample task to gather data to test whether a random music clip affects a user’s heart rate.
Start by downloading this archive of a few short music clips, and drag them into your Xcode project. Make sure that Copy items if needed, Create groups, and the Karenina target are selected:

Next, you need a way for your app to easily choose and access a random song file.
Create a file named MusicClip.swift and replace its contents with the following enum:
import Foundation

enum MusicClip: String {
  case Chill3 = "chill_preview_3"
  case Chill4 = "chill_preview_4"
  case Dark4 = "dark_preview_4"
  case Happy1 = "happy_preview_1"
  case Light2 = "light_preview_2"
  case Light3 = "light_preview_3"

  static func random() -> MusicClip {
    switch arc4random_uniform(6) {
    case 0:
      return .Chill3
    case 1:
      return .Chill4
    case 2:
      return .Dark4
    case 3:
      return .Happy1
    case 4:
      return .Light2
    default:
      return .Light3
    }
  }

  func fileURL() -> NSURL {
    return NSURL(fileURLWithPath: NSBundle.mainBundle().pathForResource(self.rawValue, ofType: "mp3")!)
  }
}
The MusicClip enum contains a case for each clip that provides its filename. random() returns a random clip, and fileURL() provides the exact mp3 file URL for a given clip.
Next, you need to think about the step that will eventually play the music clip. In the fitness check task you implemented earlier, the task defined the duration of the walking and resting steps and knew which types of data to collect during the steps. In this case, you’ll need to create a custom task that plays a specific clip for a set duration.
Luckily, there’s a base class in ResearchKit that lets you set a specific duration: ORKActiveStep. For the music step, the only customization you need to add to this class is a MusicClip property.
Create a new file named MusicStep.swift and subclass ORKActiveStep with a property for the music clip, like this:
import ResearchKit

class MusicStep: ORKActiveStep {
  var clip: MusicClip!
}
That handles the step, but how will the task know when to start and stop the music clip? That will be handled by the view controller that displays this step.
ResearchKit comes with a custom view controller that handles the display of a step: ORKActiveStepViewController. You have actually already been using this class behind the scenes for your MicrophoneTask and WalkTask. These predefined tasks come with predefined steps and view controllers – subclasses of ORKActiveStep and ORKActiveStepViewController.
Now that you’re delving into the realm of custom steps, you’ll need a custom subclass of ORKActiveStepViewController too. Create a new file named MusicStepViewController.swift and add the class below:
import AVFoundation
import ResearchKit

class MusicStepViewController: ORKActiveStepViewController {

  var audioPlayer: AVAudioPlayer?

  override func start() {
    super.start()

    if let step = step as? MusicStep {
      do {
        try audioPlayer = AVAudioPlayer(contentsOfURL: step.clip.fileURL(),
          fileTypeHint: AVFileTypeMPEGLayer3)
        audioPlayer?.play()
      } catch {}
    }
  }

  override func stepDidFinish() {
    super.stepDidFinish()
    audioPlayer?.stop()
  }
}
In addition to the usual view controller life cycle methods like viewDidLoad(), an ORKActiveStepViewController keeps track of the life cycle of the step itself. You override start() and stepDidFinish() to perform additional actions at those points in the step’s life cycle.
Here, those additional actions are to play the mp3 clip contained in the step when it starts, and to stop playing when the step is over. You call the super functions as well to let the default implementation complete its work.
Next, it’s time to create a subclass of ORKOrderedTask to display instructions, play the music clip and thank the user for participating. In the previous ResearchKit tutorial, you created a ConsentTask and SurveyTask in this way, so the general process should be familiar.
Create a new file named MusicTask.swift, and add the following class:
import ResearchKit
public var MusicTask: ORKOrderedTask {
var steps = [ORKStep]()
let instructionStep = ORKInstructionStep(identifier: "instruction")
instructionStep.title = "Music + Heart Rate"
instructionStep.text = "Please listen to a randomized music clip for 30 seconds, and we'll record your heart rate."
steps += [instructionStep]
// TODO: add recorder configuration
// TODO: add Music Step
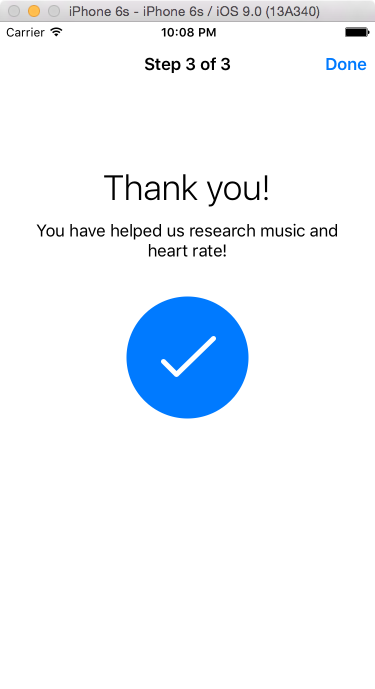
let summaryStep = ORKCompletionStep(identifier: "SummaryStep")
summaryStep.title = "Thank you!"
summaryStep.text = "You have helped us research music and heart rate!"
steps += [summaryStep]
return ORKOrderedTask(identifier: "MusicTask", steps: steps)
}
Here, you’ve created the task and added the introduction and summary steps, leaving a spot in the middle to add the step to play the music clip. But what is this TODO item to add the recorder configuration all about?
Attribution: FreeImages.com/melodi2

An ORKRecorder runs during the step to record data and save it to an output directory. The type of data it records is up to an ORKRecorderConfiguration, which specifies the desired quantity type and unit.
Replace the following line:
// TODO: add recorder configuration
…with the code below:
let configuration = ORKHealthQuantityTypeRecorderConfiguration(identifier: "heartRateConfig",
  healthQuantityType: HKQuantityType.quantityTypeForIdentifier(HKQuantityTypeIdentifierHeartRate)!,
  unit: HKUnit(fromString: "count/min"))
The quantity type and unit for this configuration are the same as what you used in saveMockHeartData(), so the recorder will pick up all the mock data as it comes in.
Next, configure the music step by replacing the code below:
// TODO: add Music Step
with the following:
let musicStep = MusicStep(identifier: "music")

musicStep.clip = MusicClip.random()

musicStep.stepDuration = 30
musicStep.recorderConfigurations = [configuration]

musicStep.shouldShowDefaultTimer = true
musicStep.shouldStartTimerAutomatically = true
musicStep.shouldContinueOnFinish = true
musicStep.title = "Please listen for 30 seconds."

steps += [musicStep]
You create the music step just as you do any other step: by supplying an identifier string. Then you assign a random music clip to the step, set the timer duration to 30 seconds and supply the heart rate recorder configuration you initialized in the previous code block. Note that the configuration is wrapped in an array; you can supply more than one configuration if you want to read several data types.
The remaining properties are common to all subclasses of ORKActiveStep and allow for some quick and easy customization behavior. I encourage you to experiment with these and other properties which you can find in the class reference.
Now that you have created your music task, it’s time to do the familiar work to trigger the task in your UI. Navigate back to ViewController.swift and add the following method:
@IBAction func musicTapped(sender: AnyObject) {
  let taskViewController = ORKTaskViewController(task: MusicTask, taskRunUUID: nil)
  taskViewController.delegate = self
  taskViewController.outputDirectory = NSURL(fileURLWithPath:
    NSSearchPathForDirectoriesInDomains(.DocumentDirectory, .UserDomainMask, true)[0],
    isDirectory: true)
  presentViewController(taskViewController, animated: true, completion: nil)
  HealthKitManager.startMockHeartData()
}
Here you’ve created and presented a ORKTaskViewController, while immediately starting your mock heart rate data just as you did for the walk task.
Finally, add a UIButton to Main.storyboard with the title Music, and connect it to musicTapped(_:).

Again, optionally add some Auto Layout constraints to align the button to the other buttons.
Build and run your app; tap Music to see your new task at work:
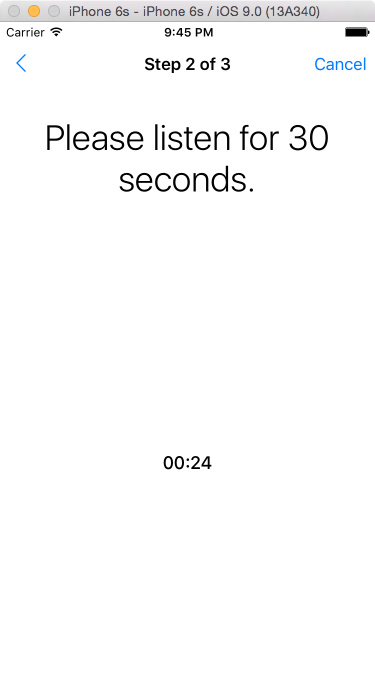
All your steps are there visually, but wait! There’s no music to listen to!

MusicStepViewController is in charge of playing the music clips, but you haven’t connected it yet. What you’re seeing is simply a generic ORKActiveStepViewController, which can handle the title and countdown, but not the music playback.
To associate your MusicStep and MusicStepViewController, you turn to the ORKTaskViewControllerDelegate protocol and its taskViewController(_:viewControllerForStep:) method. Your ViewController class already implements this protocol, and implementing this method lets you supply a custom view controller for a given step.
Copy the following method into ViewController.swift:
func taskViewController(taskViewController: ORKTaskViewController, viewControllerForStep step: ORKStep) -> ORKStepViewController? {

  if step.identifier == "music" {
    return MusicStepViewController(step: step)
  } else {
    return nil
  }
}
If the step identifier is music, as you defined in MusicTask, then you create and return a new MusicStepViewController. In any other case, you return nil.
nil here doesn’t actually mean “don’t use a view controller.” It means “use the default view controller you would’ve used anyway.”
Build and run your app, and listen for a random music clip to play:
Great! You now have an app with a custom task, reading heart rate during a music clip. You’ve parsed out the data from a walking task, and now it’s time to do the same for your custom task. And while you’re at it, wouldn’t it be nice to associate that heart rate data with the music clip played?
Open ResultParser.swift and add the following method to find the heart rate data:
static func findMusicHeartFiles(result: ORKTaskResult) -> NSURL? {

  if let results = result.results
    where results.count > 1,
    let heartResult = results[1] as? ORKStepResult,
    let heartSubresults = heartResult.results
    where heartSubresults.count > 0,
    let fileResult = heartSubresults[0] as? ORKFileResult,
    let fileURL = fileResult.fileURL {

    return fileURL
  }

  return nil
}
Underneath all this unwrapping, you retrieve the file URL associated with the music step. This file houses the heart rate data in JSON format.
Next, add the following method to find the music clip:
static func findClip(task: ORKTask?) -> MusicClip? {

  if let task = task as? ORKOrderedTask
    where task.steps.count > 1,
    let musicStep = task.steps[1] as? MusicStep {

    return musicStep.clip

  } else {
    return nil
  }
}
This time, your input parameter is ORKTask?, not ORKTaskResult. You use ORKTask? as the music clip is a property of the MusicStep, which you will access via the MusicTask rather than the task results.
With those methods ready, go back to ViewController.swift and find taskViewController(_:didFinishWithReason:error:). Remember that this method is called when an ORKTaskViewController finishes, at which point you can access results of the view controller.
Add the following to the top of the method, just below HealthKitManager.stopMockHeartData():
if (taskViewController.task?.identifier == "MusicTask"
  && reason == .Completed) {

    let clip = ResultParser.findClip(taskViewController.task)
    print("clip name: \(clip!.rawValue)")

    let heartURL = ResultParser.findMusicHeartFiles(taskViewController.result)
    if let heartURL = heartURL {
      do {
        let string = try NSString.init(contentsOfURL: heartURL, encoding: NSUTF8StringEncoding)
        print(string)
      } catch {}
    }
}
If the finishing view controller is for the MusicTask, you send that task to the ResultParser to find the clip used and print the clip’s name to the console.
Next, you use the ResultParser to find the generated file with heart rate data. As you did earlier, you print the JSON contents to the console so that you can easily review the results of your work.
Build and run your app; run the music task again and this time you’ll see results like the following printed to the console when you’re done:
clip name: chill_preview_4
{"items":[{"unit":"count\/min","type":"HKQuantityTypeIdentifierHeartRate","endDate":"2015-10-08T22:53:59-0700","source":"Karenina","value":150,"startDate":"2015-10-08T22:53:59-0700"},{"unit":"count\/min","type":"HKQuantityTypeIdentifierHeartRate","endDate":"2015-10-08T22:54:00-0700","source":"Karenina","value":129,"startDate":"2015-10-08T22:54:00-0700"}]}
With the clip name and associated heart results readily available, you’ll be able to upload this to your server and start analyzing the data! Who knows what relationships or correlations you might find?