Card Game Mechanics in Sprite Kit with Swift
Learn how to implement basic card game mechanics and animation with Sprite Kit and Swift. By Brian Broom.
Pros & Cons Of Scene Touch Handling
Before going any further, let’s stop for a moment and muse upon some of the advantages and disadvantages of handling the touches at the scene level.
Touch handling at the scene level is a good place to start working with a project because it’s the simplest, easiest approach. In fact, if your sprites have transparent regions that should be ignored, such as hex grids, this may be the only reasonable solution.
However, it starts to fall apart when you have composite sprites. For example, these could contain multiple images, labels or even a health bar. It can also be unwieldy and complicated if you have different rules for different sprites.
One gotcha that comes into play when you use atPoint(_:) is that it always returns a node.
What if you drag outside of one of the card sprites? Because SKScene is a subclass of SKNode, if the touch location intersects no other node, the scene itself returns as a SKNode.
This tutorial will continue to do touch handling in the scene, but in your games, you might find it better to have the SKNode subclasses handle their own touches.
Tracking Damage
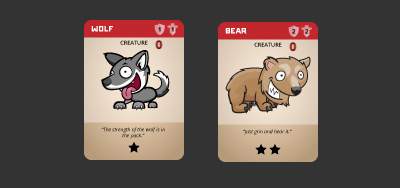
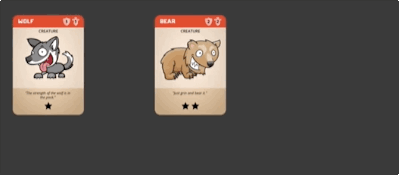
In many collectible card games, monsters like these have hit points associated with them, and they can fight each other.
To implement this, you’ll need a label on top of the cards so the user can track damage inflicted on each creature. In Card.swift, add the following to the property section at the top of the class:
var damage = 0
let damageLabel :SKLabelNode
Then, add the following to the init(texture:color:size:) method, before the call to super.init(texture:color:size:)
damageLabel = SKLabelNode(fontNamed: "OpenSans-Bold")
damageLabel.name = "damageLabel"
damageLabel.fontSize = 12
damageLabel.fontColor = SKColor(red: 0.47, green: 0.0, blue: 0.0, alpha: 1.0)
damageLabel.text = "0"
damageLabel.position = CGPoint(x: 25, y: 40)
Finally, add this line after super.init(texture:color:size:) in the same method
addChild(damageLabel)
Since the damageLabel property is not optional, it has to be initialized before calling super.init(texture:color:size:). You can’t call instance methods until after super.init(texture:color:size:), so the addChild(_:) call has to be at the end.
This is the general pattern for initializing Swift objects. First, initialize all non-optional properties; then, call super.init(texture:color:size:); finally, call any instance methods needed to complete initialization.
Are you wondering how the position works in this example?
Since the label is a child of the card sprite, the position is relative to the sprite’s anchor point and that is the center, by default.
Build and run the project. You will now see a red ‘0’ within each card.
Cards now have a label that shows how much damage they’ve taken.
Card Animations
Now that the card is moving properly over other cards, it’s time to add some satisfying depth — in this case, a visual indication that the card has been lifted up.
Still in GameScene.swift, add the following to the end of the code inside the if let portion of touchesBegan(_:with:)
card.removeAction(forKey: "drop")
card.run(SKAction.scale(to: 1.3, duration: 0.25), withKey: "pickup")
and similarly in touchesEnded(_:with:)
card.removeAction(forKey: "pickup")
card.run(SKAction.scale(to: 1.0, duration: 0.25), withKey: "drop")
Here you’re using the scale(to:duration:) method of SKAction to grow the width and height of the card to 1.2x its original size when clicked and back down to 1.0 when released. The removeAction(forKey:) call is to stop currently running pickup or drop animations if you tap and release quickly.
Build and run the project to see how this looks.
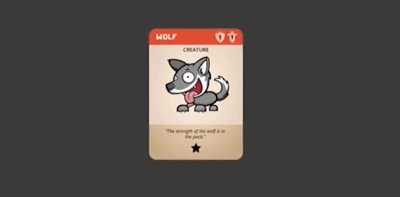
This simple animation gives the appearance of picking up a card and putting it back down. Sometimes the simplest animations are the most effective.
Tinker with the scale and duration values to find what the levels that look best to you. If you set the lift and drop durations as different values you can make it appear as though that card lifts slowly, then drops quickly when released.
Making The Card Wiggle
Dragging cards around now works pretty well, but you should add a bit of flair. Making the cards appear to flutter around their y-axis certainly qualifies as flair.
Since SpriteKit is a pure 2D framework, there doesn’t seem to be any way to do a partial rotation effect on a sprite. What you can do, however, is change the xScale property to give the illusion of rotation.
Again, you’ll add code to the touchesBegan(_:with:) and touchesEnded(_:with:) pair of functions. In touchesBegan(_:with:) add the following code to the beginning of the if let card section:
let wiggleIn = SKAction.scaleX(to: 1.0, duration: 0.2)
let wiggleOut = SKAction.scaleX(to: 1.2, duration: 0.2)
let wiggle = SKAction.sequence([wiggleIn, wiggleOut])

card.run(SKAction.repeatForever(wiggle), withKey: "wiggle")
And similarly, in touchesEnded(_:with:) add the following before removing the pickup action:
card.removeAction(forKey: "wiggle")
This code makes the card appear to rotate back and forth — just a tad — as it moves around. This effect makes use of the run(_:) method to add a string name to the action so that you can cancel it later.
There is a small caveat to this approach: when you remove the animation, it leaves the sprite wherever it is in the animation cycle.
You already have an action to return the card to its initial scale value of 1.0. Since scale sets both the x and y scale, that part is taken care of, but if you use another property, remember to return the initial value in the touchesEnded(_:with:) function.
Build and run the project, so you can see the cards now flutter when you drag them around.
A simple animation to show that this card is currently active.
Challenge: In the bonus example game at the end of the tutorial, you’ll learn about using zRotation to make the cards wobble back and forth.
Try replacing the scaleXTo(_:duration:) actions with rotateByAngle(_:duration) to replace the “wiggle” animation with a “rocking” animation. Remember to make it a cycle, which means it needs to return to its starting point before repeating.
Try to reproduce this effect for the wiggle animation.
[spoiler]Replace the current wiggle code with the following in touchesBegan(_:with:):
This gives your cards a satisfying little wiggle, but there’s still one problem. Try dropping the card mid-cycle. Does it rotate incorrectly? Yes, and that’s your next problem to solve, by adding the following line to touchesEnded(_:with:) inside the if let card section:
Now you have a nice looking wiggle action that properly rotates itself when you let go of a card!
[/spoiler]

let rotR = SKAction.rotate(byAngle: 0.15, duration: 0.2)
let rotL = SKAction.rotate(byAngle: -0.15, duration: 0.2)
let cycle = SKAction.sequence([rotR, rotL, rotL, rotR])
let wiggle = SKAction.repeatForever(cycle)
card.run(wiggle, withKey: "wiggle")
card.run(SKAction.rotate(toAngle: 0, duration: 0.2), withKey:"rotate")