How to Make a Game Like Monster Island Tutorial
Learn how to make a game like Monster Island. By Brian Broom.
Power Meter
The beaker throw is looking great, but you need to get that pesky remaining cat. It’s time to add the power meter so you can adjust the strength and angle of your throw.
In GameScene.sks, drag a Color Sprite from the object library into your scene for the base arrow. Set the name, texture, position and anchor point attributes to the following values:
Sprite settings for angle meter.

Next, drag a second Color Sprite into the scene for the power indicator, and set its name, parent, texture, position, anchor point, and zPosition attributes:
Sprite settings for power meter.

The arrow tells you the direction of the thrown beaker, and the size of the green bar is the strength of the throw. Making the arrow the parent of the green bar means that the two will rotate together, and the anchor point setting makes sure that the arrow rotates around its end, instead of the center of the sprite.
Build and run to see how it looks.
Still need more power.

Accessing the Power Meter From Code
Tracking touches as you drag your finger across the screen doesn’t have to be complicated. Instead of calculating based on touch directly, you can add a UIGestureRecognizer to do the heavy lifting.
In this case, a UIPanGestureRecognizer is perfect, since it measures how far your finger has moved from the starting point in either direction.
Add these properties to GameScene.swift:
var previousThrowPower = 100.0
var previousThrowAngle = 0.0
var currentPower = 100.0
var currentAngle = 0.0
var powerMeterNode: SKSpriteNode? = nil
var powerMeterFilledNode: SKSpriteNode? = nil
Here you keep track of the current and previous values for power and angle, along with references to the power meter nodes so they can move.
The way UIPanGestureRecognizer works is that you provide an update method for it to call. Add this to the end of GameScene.swift just after touchesBegan(_:with:):
func handlePan(recognizer:UIPanGestureRecognizer) {
  if recognizer.state == UIGestureRecognizerState.began {
    // do any initialization here
  }

  if recognizer.state == UIGestureRecognizerState.changed {
    // the position of the drag has moved
    let viewLocation = recognizer.translation(in: self.view)
    print("x: \(viewLocation.x) y: \(viewLocation.y)")
  }

  if recognizer.state == UIGestureRecognizerState.ended {
    // finish up
    tossBeaker(strength: CGVector(dx: 1600, dy: 1100))
  }
}
Shortly after you start sliding your finger on the screen, the UIPanGestureRecognizer recognizes this as a pan and calls your update method, with the UIPanGestureRecognizer as a parameter. The state of the recognizer tells you if the pan has just started, is moving, or has just ended, giving you a chance to respond appropriately in the update method.
Scroll up to didMove(to:) and add the following before the end of the method:
powerMeterNode = childNode(withName: "powerMeter") as? SKSpriteNode
powerMeterFilledNode = powerMeterNode?.childNode(withName: "powerMeterFilled") as? SKSpriteNode

let panRecognizer = UIPanGestureRecognizer(target: self, action: #selector(handlePan))
view.addGestureRecognizer(panRecognizer)
Here you get the power meter nodes from GameScene.sks, then add a UIPanGestureRecognizer to the scene.
Finally, delete the touchesBegan(_:) method.
Build and run the app. As you scroll your finger across the screen, look at Xcode’s console window, which will show you the current displacement, meaning the distance from your initial touch to your finger’s current position.
Sample console output
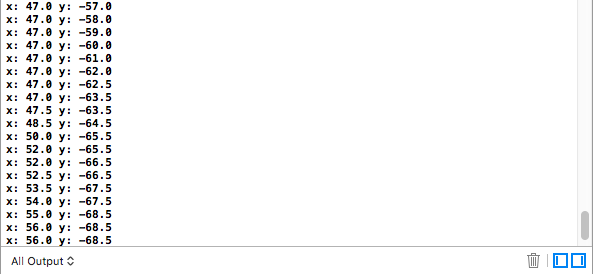
Take a look at the sign of the numbers in each direction. Notice that dragging your finger upwards makes the y values negative, not positive. This is because the UIPanGestureRecognizer works in the UIKit coordinate system, where the origin is in the upper left, instead of the SpriteKit coordinate system, where the origin is the lower left.
UIPanGestureRecognizer Translation

The power meter isn’t moving, however, so you’ll tackle that next.
Updating the Meter
A meter that doesn’t move isn’t very helpful, so here you’ll update it to reflect a user’s touch.
For this game, the x component of the translation will change the power from 0% to 100%, while the y component will change the angle from 0° (horizontal) to 90° (vertical). To achieve this, add a method to do the calculations:
func updatePowerMeter(translation: CGPoint) {
  // 1
  let changeInPower = translation.x
  let changeInAngle = translation.y
  // 2
  let powerScale = 2.0
  let angleScale = -150.0
  // 3
  var power = Float(previousThrowPower) + Float(changeInPower) / Float(powerScale)
  var angle = Float(previousThrowAngle) + Float(changeInAngle) / Float(angleScale)
  // 4
  power = min(power, 100)
  power = max(power, 0)
  angle = min(angle, Float(M_PI_2))
  angle = max(angle, 0)
  // 5
  powerMeterFilledNode?.xScale = CGFloat(power/100.0)
  powerMeterNode?.zRotation = CGFloat(angle)
  // 6
  currentPower = Double(power)
  currentAngle = Double(angle)
}
Here’s a summary of what’s happening:
- Split the translation value into an x part for changing power, and a y part for changing angle.
- Define scale factors for power and angle changes. The values need to be scaled down, otherwise a small finger movement will change the power from 0 to 100%. Larger factors mean it takes a longer pan gesture to produce a given change in power or angle. Don’t make the factors too large, or you will run out of screen before you get the value you want. The angle scale value is negative, because of the flipped sign of the values coming from the gesture recognizer.
- Compute the new power and angle by taking the previous value and adding the change, dividing by the scale factors from part 2. Starting with the previous values keeps the arrow from having a jump back to 0 power with every new gesture.
- Make sure the power and angle values are between the minimum and maximum values that make sense.
- Adjust the sprite parameters to match the computed power and angle.
- Save these computed values so that when the gesture ends, you can provide the right impulse to the beaker.
Each time the UIPanGestureRecognizer updates, you compute the new power from 0 to 100 and use the xScale property to stretch the green bar accordingly. At the same time, you compute the updated angle and set the zRotation on the entire meter to make it rotate. Since rotating an SKSpriteNode also rotates its internal x and y axes, you can set the xScale property on the power bar to scale it horizontally regardless of the orientation of the power arrow.
Next, find the section of handlePan(recognizer:) where you check for UIGestureRecognizerState.changed, and update it to call this new method:
if recognizer.state == UIGestureRecognizerState.changed {
  // the position of the drag has moved
  let translation = recognizer.translation(in: self.view)
  updatePowerMeter(translation: translation)
}
Build and run. Now, dragging your finger around the screen adjusts both the green power bar as well as the angle of the arrow.
This one is juuusst right.
