Augmented Reality iOS Tutorial: Location Based
In this augmented reality tutorial, you’ll learn how to use your iOS users location to create compelling augmented reality experiences. By Jean-Pierre Distler.
4.5 (4) · 2 Reviews
Finishing touches
You have a complete working AR app now, you can show POIs on a camera view and detect taps on this POIs, to make your app complete you'll add some tap handling logic now.
If you closed it open ViewController.swift and replace extension which adopts the AnnotationViewDelegate protocol with the following:
extension ViewController: AnnotationViewDelegate {
  func didTouch(annotationView: AnnotationView) {
  //1
    if let annotation = annotationView.annotation as? Place {
    //2
      let placesLoader = PlacesLoader()
      placesLoader.loadDetailInformation(forPlace: annotation) { resultDict, error in

      //3
      if let infoDict = resultDict?.object(forKey: "result") as? NSDictionary {
          annotation.phoneNumber = infoDict.object(forKey: "formatted_phone_number") as? String
          annotation.website = infoDict.object(forKey: "website") as? String

          //4
          self.showInfoView(forPlace: annotation)
        }
      }
    }
  }
}
- First you cast
annotationViewsannotation to aPlace. - Then you load additional information for this place.
- And assign it to the appropriate properties.
-
showInfoView(forPlace:)is a method you implement right now.
Add this method below showARController(sender:)
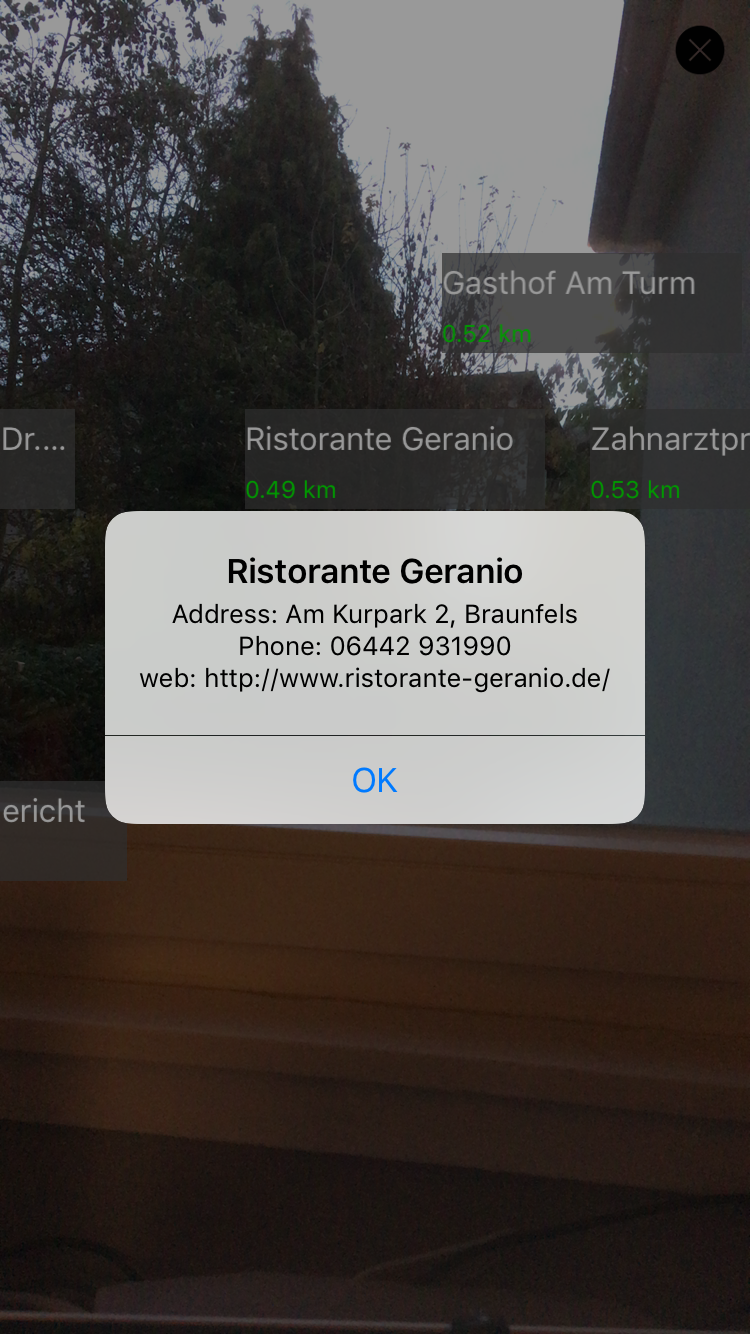
func showInfoView(forPlace place: Place) {
  //1
  let alert = UIAlertController(title: place.placeName , message: place.infoText, preferredStyle: UIAlertControllerStyle.alert)
  alert.addAction(UIAlertAction(title: "OK", style: UIAlertActionStyle.default, handler: nil))
   //2
  arViewController.present(alert, animated: true, completion: nil)
}
- To show the additional info you create an alert view with the POIs name as title and an info text as message.
- Since
ViewControlleris not a part of the view hirarchy right now, you usearViewControllerto show the alert.
Build and run again and see your finished app.
Where to Go from Here?
Here is the final project with all of the code from above.
Congratulations, you now know how to make your own location based augmented reality app! And as a bonus, you’ve also gotten a short introduction to the Google Places API.
In the meantime, if you have any comments or questions, please join the forum discussion below!