UIScrollView Tutorial: Getting Started
In this UIScrollView tutorial, you’ll create an app similar to the default iOS Photos app to learn all about paging, scrolling and more with UIScrollView. By Ron Kliffer.
Scrolling Vertically
Now, suppose you want to change PhotoScroll to display the image at the top and add comments below it. Depending on how long the comment is, you may end up with more text than your device can display. UIScrollView to the rescue!
To size the scroll view’s frame with Auto Layout, you need to either make the constraints regarding the width and height of the scroll view explicit, or you must tie the edges of the scroll view to views outside of its own subtree.
You can read more in this technical note from Apple.
UIScrollView scrolls its content by changing the origin of its bounds. To make this work with Auto Layout, the edges within a scroll view actually refer to the edges of its Content view.
Next, you’ll learn how to fix the width of a scroll view, which is really its content size width, using Auto Layout.
Scroll View and Auto Layout
Open Main.storyboard and lay out a new scene.
First, add a new View Controller. In the Size inspector, replace Fixed with Freeform for the Simulated Size, then enter a width of 340 and a height of 800.

You’ll notice the layout of the controller gets narrower and longer, simulating the behavior of a long, vertical piece of content. The Simulated Size helps you visualize the display in Interface Builder. It has no runtime effect.
Uncheck Adjust Scroll View Insets in the Attributes inspector for your newly-created view controller.

Add a Scroll view that fills the entire space of the view controller.
Add leading and trailing constraints with constant values of 0 to the view controller. Make sure to uncheck Constrain to margins. Add top and bottom constraints from Scroll view to the Top and Bottom Layout guides, respectively. They should also have constants of 0.
Add a view as a child of the Scroll view and resize it to fit the entire space of the Scroll view.
Rename its storyboard Label to Container View. Like before, add top, bottom, leading and trailing constraints, with constants of 0, and uncheck Constrain to margins. Again, make sure to pin the constraints to the Scroll view and not the Frame Layout Guide.
To fix the Auto Layout errors, you need to specify the Container View’s size. You want it to be as wide as the scroll view, so attach an equal-width constraint from the Container View to the Scroll view. For Container View’s height, define a height constraint of 500.
contentSize. This is the key step in correctly sizing a scroll view when using Auto Layout.
Add an Image View inside Container View.
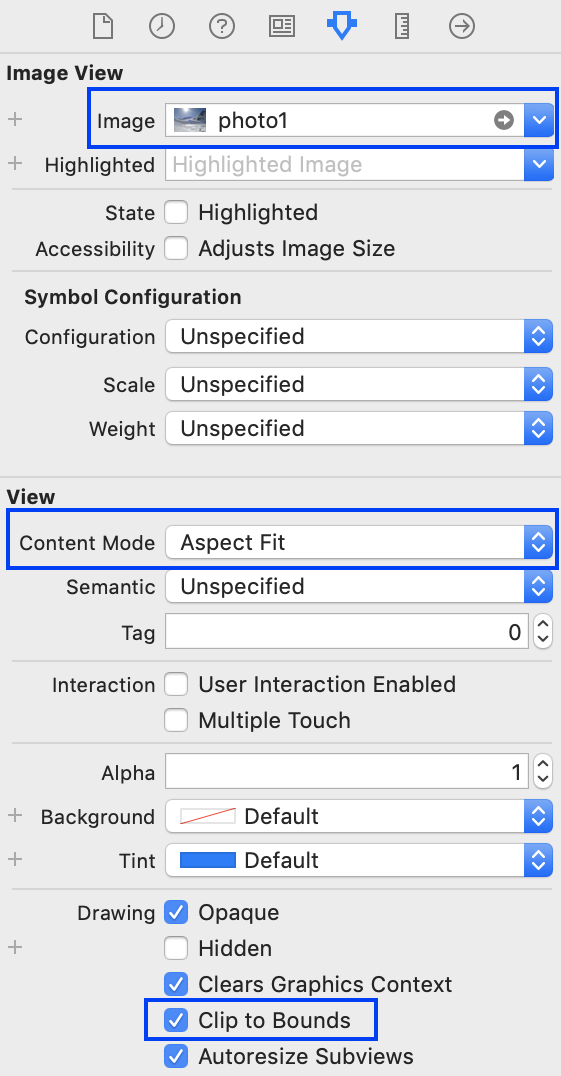
In the Attributes inspector, specify photo1 for the image, choose Aspect Fit for the mode and check Clip to Bounds.
Add top, leading and trailing constraints to Container view like before, and add a height constraint of 300.
Adding a Label to Your Image
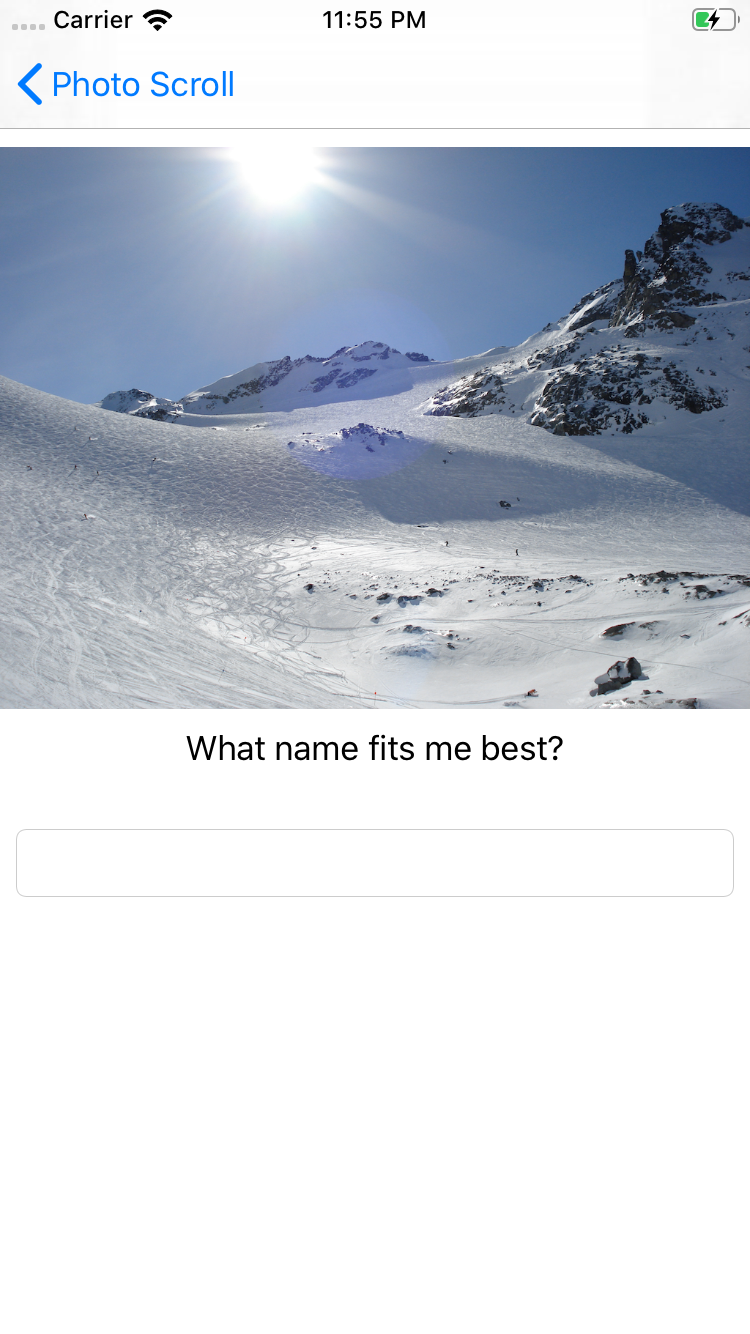
Add a Label inside Container View below the image view. Specify the label’s text as What name fits me best? and add a centered horizontal constraint relative to Container View. Next, add a vertical spacing constraint of 0 with the UIImage.
Add a text field inside of Container View, below the new label. Add leading and trailing constraints to Container View with constant values of 8 and no margin. Next, add a vertical-space constraint of 30 relative to the label.
Your document outline should now look like this:

Now, you need to connect a segue to your new View Controller.
To do so, first delete the existing show segue between the Photo Scroll scene and the Zoomed Photo View Controller scene. Don’t worry, you’ll add all the work you’ve done on Zoomed Photo View Controller back to your app later.
In the Photo Scroll scene, control-drag from PhotoCell to the new View Controller and add a show segue. Make the identifier showPhotoPage.
Build and run.
Displaying Properly in Every Orientation
You can see that the layout displays correctly when the device is in vertical orientation. Try rotating to landscape orientation. Oops!
In landscape, there’s not enough vertical room to show all the content, yet the scroll view allows you to properly scroll to see the label and the text field. Unfortunately, since the image in the new View Controller is hard-coded, you won’t see the image you selected in the Collection view.
To fix this, you need to pass the image name to the View Controller when the segue executes.
Scrolling to See More
Go to File ▸ New ▸ File…, choose the iOS ▸ Source ▸ Cocoa Touch Class template and click Next. Name the class PhotoCommentViewController and set the subclass to UIViewController. Make sure that the language is set to Swift. Click Next and save it with the rest of the project.
Now, replace the contents of PhotoCommentViewController.swift with this code:
import UIKit

class PhotoCommentViewController: UIViewController {
  //1
  @IBOutlet weak var imageView: UIImageView!
  @IBOutlet weak var scrollView: UIScrollView!
  @IBOutlet weak var nameTextField: UITextField!

  //2
  var photoName: String?

  override func viewDidLoad() {
    super.viewDidLoad()
    //3
    if let photoName = photoName {
      self.imageView.image = UIImage(named: photoName)
    }
  }
}
Here’s what this code does, step-by-step:
- Adds
IBOutlets for the UI elements. - Adds a
photoNameproperty to represent the presented image’s name. - Sets the image on
imageViewusingphotoName.
Back in the storyboard, open the Identity inspector for View Controller and select PhotoCommentViewController for the Class. Then, wire the IBOutlets for the scroll view, image view and text field.
Open CollectionViewController.swift, and replace prepare(for:sender:) with this:
override func prepare(for segue: UIStoryboardSegue, sender: Any?) {
  if let cell = sender as? UICollectionViewCell,
      let indexPath = collectionView?.indexPath(for: cell),
      let viewController = segue.destination as? PhotoCommentViewController {
    viewController.photoName = "photo\(indexPath.row + 1)"
  }
}
This sets the name of the photo your app will display on PhotoCommentViewController whenever the user taps one of the photos.
Build and run.

Your view nicely displays the content and, when needed, allows you to scroll down to see more. However, you’ll notice two issues with the keyboard: First, when entering text, the keyboard hides the text field. Second, there’s no way to dismiss the keyboard.
Ready to fix the glitches?