Trying It Out
Build and run your project, and make sure you install it on your iPhone (i.e. not your Simulator), because File Sharing only works with iTunes on a physical device.
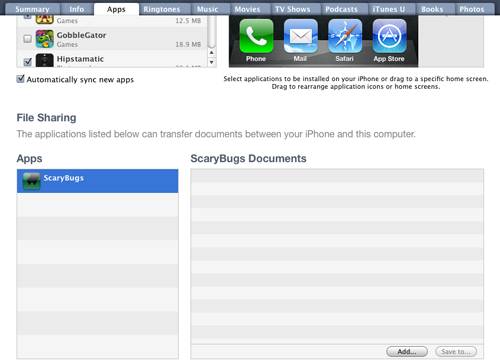
You can test that the OS detected your “UIFileSharingEnabled” flag by loading up iTunes, switching to the Apps Tab, and scrolling down: you should see your app there as long as your device is connected:

If it doesn’t show up, try deleting the app from your device and re-installing, and synching iTunes.
Next go ahead and create a new bug, and tap Export. You should immediately see a new entry in the Scary Bug Documents in iTunes File Sharing:

Now for some fun. Download a copy of a sample bug I made. Then in File Sharing in iTunes click “Add…” and browse to the file you downloaded.
Finally, go to the table view in Scary Bugs, tap the “+” button, and tap “Import Bug”. Choose the file you downloaded and you should see a new bug appear on your screen!
Where To Go From Here?
Attached is a sample project with the code we’ve developed in the above iTunes tutorial.
Theres still a little bit of life left in these bugs! Next up is a tutorial on how to import and export your bug documents via email – which will be a snap considering all of the groundwork we’ve laid so far!

