How to Make a Simple Mac App on OS X 10.7 Tutorial: Part 3/3
This is a post by iOS Tutorial Team Member Ernesto García, a Mac and iOS developer founder of CocoaWithChurros. Welcome back to the third and final part of the How to Create a Simple Mac App tutorial series! In the first part of the series, you created a Mac app that showed a list of […] By Ernesto García.
Sign up/Sign in
With a free Kodeco account you can download source code, track your progress, bookmark, personalise your learner profile and more!
Create accountAlready a member of Kodeco? Sign in
Sign up/Sign in
With a free Kodeco account you can download source code, track your progress, bookmark, personalise your learner profile and more!
Create accountAlready a member of Kodeco? Sign in
Contents
How to Make a Simple Mac App on OS X 10.7 Tutorial: Part 3/3
15 mins
Attention to details
Now our app is working fine, and it’s able to adapt to the window size changes. The user interface looks better and more professional than the previous one.
So, what else is there to do? Not much, just a few small details that can make the user experience a little better.
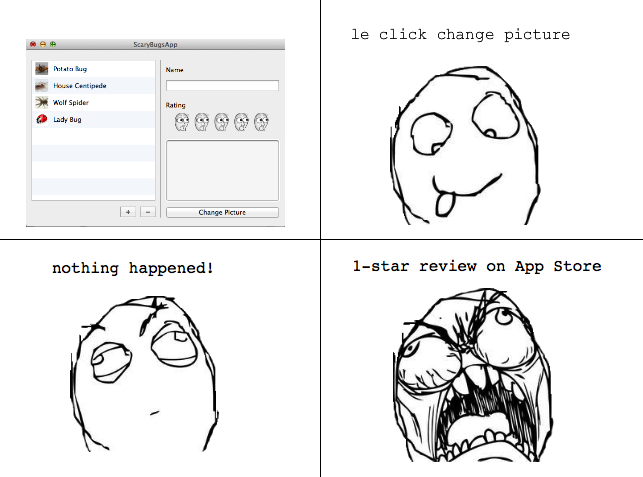
Let’s see a couple of examples. Compile and run the application, and without selecting anything, click the “Delete” or the “Change Picture” buttons. You can click them, but nothing happens, right?
Since you’re the developer of the app, you know that those buttons don’t do anything when there is no selection. But the user might not know that, so the following situation could occur:
This is the kind of situation you should avoid so your users have a better experience. These small details add up, and fixing them will make your app look polished.
So, let’s try to fix all these small problems, which are related to the table selection. Whenever the selection changes:
- If a row is selected, you need to enable the “Delete” button, the “Change picture” button, the text field and the rating view.
- If the table does not have any selection, you just need to disable them, so that the user cannot interact with those controls.
In Interface Builder, you’re going to set the buttons and text editor disabled by default. Select MasterViewController.xib. Select the “Delete” button, and open the Attributes Inspector. Scroll down until you find the property “Enabled” and uncheck it.
Repeat this for the Change Picture button, and the text field.
This way, those controls are disabled by default when the application starts. you’ll need to re-enable them when the user selects a row in the table view.
In order to enable those controls, you need to add a property in the view controller. Let’s do it first with the Delete button.
Bring up the Assistant Editor (second button under the “Editor” section in the top toolbar), and make sure it’s set to Automatic\MasterViewController.m.
Select the “Delete” button, and control-drag from the button into MasterViewController.m, at the beginning of the file, right after the line @property (weak) IBOutlet EDStarRating *bugRating;
A popup will appear allowing you to hook the NSButton up to a property in your class. Make sure the connection property in that popup is “Outlet”, name it deleteButton, and click Connect.
Repeat the same operation for the Change Picture button, and name it changePictureButton.
Now let’s add the code that handles the status of those controls based on the table selection.
Select MasterViewController.m, and add the following code in the tableViewSelectionDidChange: method, just below the line [self setDetailInfo:selectedDoc];
// Enable/Disable buttons based on selection
BOOL buttonsEnabled = (selectedDoc!=nil);
[self.deleteButton setEnabled:buttonsEnabled];
[self.changePictureButton setEnabled:buttonsEnabled];
[self.bugRating setEditable:buttonsEnabled];
[self.bugTitleView setEnabled:buttonsEnabled];
In this code, you determine if the controls need to be enabled or not based on the user selection. If the selectedDoc is nil, it means that no rows are selected so the controls should be disabled.
Likewise, if the user selects a bug, they should be enabled again.
There is one more step. The rating view is enabled by default, and you also want it to be disabled when the application starts. Since it’s a custom view, it cannot be enabled/disabled in Interface Builder.
You need to disable it programmatically when the application starts. you can do that in loadView of the MasterViewController.
Select MasterViewController.m and in loadView, change the line:
self.bugRating.editable=YES;
to this:
self.bugRating.editable=NO;
With this change, you set the control as not editable by default. The control is shown, but the rating cannot be changed unless the user selects a bug.
Compile and run the application.
When the application starts, you can see that the controls are disabled. When you select a bug, they’re all enabled back.
And when the row is deselected or deleted, they become disabled, because there are no bugs selected.
Note: You could have also solved this problem by making the detail views hidden until you select a bug. It’s up to your personal preference and what works best for your app.
Where To Go From Here?
Here is a sample project with all of the code we’ve developed in this tutorial series.
At this point I’d recommend reading Apple’s Mac App Programming Guide, or having a look at some of the samples provided by Apple.
You can also try to add different kinds of controls or new functionality to the application. For instance, how about writing the model to a file, and asking the user where to store it using a file save panel? Or maybe add the ability to search a bug in your list, using a search field control?
I hope you enjoyed making this Mac version of the ScaryBugs app! If you have any questions or comments or would like to see more Mac tutorials on this site in the future, please join the forum discussion below!

This is a post by iOS Tutorial Team Member Ernesto García, a Mac and iOS developer founder of CocoaWithChurros.


