Create Your Own Level Editor: Part 2/3
In this second part of the tutorial, you will implement a portion of the editing capabilities of your level editor. You’ll work through adding popup menus, dynamically positioning and sizing your objects on screen, and much more. By Barbara Reichart.
Implementing Dynamic Popup Menu Positioning
Instead of using complex algorithms to calculate the orientation and position of the popup, you'll separate the screen into several areas. Each area will have its own configuration for the popup menu. You can see a possible screen division in the following graphic:
Separation of the screen into different ares where the overlay menu is rotated so that it fits on the screen.

The actual division of the screen into areas should be done based on the size of the menu background graphic in its default orientation. Why? If you base all of the position calculations on the popup size, then you can later switch to a different popup graphic while still retaining the popup menu and its positioning mechanism.
The image below shows the adjustments needed to position the menu in each of the screen locations:
A demonstration of the changes to the popup menu when it is positioned in the top-right corner.

First, you want the arrow of your background image to point to the touched location. You can easily do this by setting the anchor point of the arrow. In its default orientation, the arrow points at the bottom middle, which corresponds to an anchor point of (0.5, 0.0).
However, when the popup menu is in the top-right corner, the arrow needs to point at the top-right corner. Therefore, you need to adjust the anchor point of the arrow to be (1, 0.75). You also need to adjust the position of the menu accordingly.
Make note that the menu is a child of your menu background, so you must always place it within the background coordinates. Also note that the alignment of the menu items sometimes needs to be switched from horizontal to vertical.
It sounds daunting, but you'll see that it's a fairly straightforward exercise to change the drawing code so that it positions everything properly.
Switch to PopupMenu.m and find the TODO line in setPopupPosition:.
Replace the TODO line with the following code:
    // Menu horizontal alignment
    CGSize winSize = [CCDirector sharedDirector].winSize;
    NSString* horizontalAlignment;
    if (position.x < defaultBackgroundSize.width/2) {
        // left
        horizontalAlignment = @"left";
        anchorPoint.x = 0.0f;
        [menu alignItemsVerticallyWithPadding:padding];
        menuPosition.x = defaultBackgroundSize.height * 0.7f;
        menuPosition.y = defaultBackgroundSize.width * 0.5f;
    } else if (winSize.width-position.x < defaultBackgroundSize.width/2) {
        // right
        horizontalAlignment = @"right";
        anchorPoint.x = 1.0f;
        [menu alignItemsVerticallyWithPadding:padding];
        menuPosition.x = defaultBackgroundSize.height * 0.3f;
        menuPosition.y = defaultBackgroundSize.width * 0.5f;
    } else {
        // center
        horizontalAlignment = @"center";
        [menu alignItemsHorizontallyWithPadding:padding];
    }
Have a look at how you divide the screen area into left, center and right sections. This is done based on the width of defaultBackgroundImage. If the x-coordinate is smaller than half of the background image's width, the menu would stick out on the left. Therefore, you set the horizontal alignment to left and adjust anchorPoint.
As well, you set the alignment of the menu to vertical and adjust the position of the menu within the popup menu.
The same is done for the right side, only mirrored along the x-axis. In all other cases, the horizontal alignment is set to center, and the menu is aligned horizontally.
Here's a graphic showing the coordinates and alignment of the popup menu elements for each possible orientation:

The horizontal alignment of the popup has already been handled in the code you added above, but what about vertical orientation and the corresponding anchor point? That's your job to figure out! :]
Don't worry, the spoiler below is there to reference once you've attempted to implement the code in setPopupPosition: yourself.
[spoiler]
    // Menu vertical alignment
    NSString* verticalAlignment;
    if (position.y < defaultBackgroundSize.height) {
        // bottom
        verticalAlignment = @"bottom";
        if ([horizontalAlignment isEqualToString:@"center"]) {
            anchorPoint.y = 0.0f;
        } else {
            anchorPoint.y = 0.25f;
        }
    } else if (winSize.height - position.y < defaultBackgroundSize.height) {
        // top
        verticalAlignment = @"top";
        if ([horizontalAlignment isEqualToString:@"center"]) {
            anchorPoint.y = 1.0f;
            menuPosition.y = defaultBackgroundSize.height*0.3f;
        } else {
            anchorPoint.y = 0.75f;
        }
    } else {
        // middle
        verticalAlignment = @"middle";
        if ([horizontalAlignment isEqualToString:@"center"]) {
            anchorPoint.y = 0.0f;
        } else {
            anchorPoint.y = 0.5f;
        }
    }
[/spoiler]
How did you do? With the addition of the vertical alignment code, you now have the vertical and horizontal alignment of the popup menu and you have stored the matching anchor point. Now use that information to perfect the drawing of your popup menu.
Add the following code to PopupMenu.m right after the horizontal and vertical alignment detection code in setPopupPosition::
    // Draw the menu
    NSString* filename = [NSString stringWithFormat: @"menu-%@-%@.png", verticalAlignment, horizontalAlignment];
    CCTexture2D* tex = [[CCTextureCache sharedTextureCache] addImage:filename];
    if (!tex) {
        tex = [[CCTextureCache sharedTextureCache] addImage:@"menu.png"];
    }
    [background setTexture:tex];
    [background setTextureRect: CGRectMake(0, 0, tex.contentSize.width, tex.contentSize.height)];
The first line builds a string containing the filename of the background image that is suitable for the current orientation. Conveniently, the files for each orientation have been named following the pattern menu-verticalAlignment-horizontalAlignment.png.
A texture is then created using the filename of the image. If the texture could be created (i.e. it's valid), then set it as the new texture for the background sprite. Otherwise, use the default texture.
Don't forget that the background images aren't all the same size. This is why you also need to set the texture rect to fit that of the new texture.
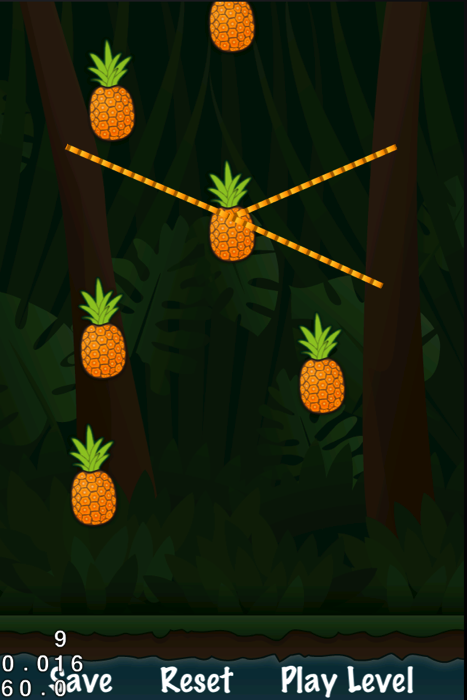
Build and run your app, and change to the editor mode. After all this hard work, the menu will now adjust its orientation to always fit the screen, as shown below:

Adding New Game Objects - Pineapples
Now that the popup menu works properly, you can use it to insert new game objects into your level. Sounds like you're getting close to the end product, doesn't it? :]
Start with the pineapples, as they are much simpler to implement than the ropes.
Think for a moment about what you'll need to do to add a new object to your level:
- Create a model that represents the game object
- Generate a unique ID
- Set all object parameters
First, you need a unique ID. If you make the assumption that there is only one application thread which is responsible for creating and deleting objects, then a relatively simple way to generate a unique ID is to sort the array of game objects.
Once that array is sorted, you iterate over the sorted list. The first index that is missing is also the first unused ID.
Open LevelFileHandler.m and add the following method to sort the game object array:
+(void)sortArrayById:(NSMutableArray*)objectArray {
    NSSortDescriptor* sortDescriptor = [[NSSortDescriptor alloc] initWithKey:@"id" ascending:YES];
    NSArray* sortDescriptors = [NSArray arrayWithObject:sortDescriptor];
    [objectArray sortUsingDescriptors:sortDescriptors];
}
This might look quite short for a sorting algorithm. That's because Objective-C already has a handy sorting algorithm implemented! No need to re-invent the wheel. :]
You only need to tell the sorting algorithm the criteria it should use to sort. You do this by using NSSortDescriptors. In this particular case, you create a very simple descriptor that sorts by a property named "id" in ascending order.
You then add this sort descriptor to an array and pass the array on to sortUsingDescriptors: which actually performs the sorting of the array. While passing the sort descriptor via an array might seem cumbersome, it can also come in handy if you ever want to sort the array based on more than one property.
On to the next step! Add the following method to LevelFileHandler.m:
+(NSNumber*)firstUnusedIdInArray:(NSArray*)array {
    NSNumber* firstUnusedID = nil;
    int lastID = 0;
    for (AbstractModel* object in array) {
        if (object.id - lastID > 1) {
            firstUnusedID = [NSNumber numberWithInt:lastID + 1];
            break;
        }
        lastID++;
    }
    if (!firstUnusedID) {
        firstUnusedID = [NSNumber numberWithInt:lastID + 1];
    }
    return firstUnusedID;
}
This method first creates two variables. firstUnusedID stores the first unused ID, while lastID is used to store the last ID that the code looked at. You then iterate over all models contained in the array of game objects.
In each iteration you check whether the difference between the ID of the current game object and the last ID is greater than one. If yes, then you have found an ID that is currently not in use, so you store the value of the unused ID and exit the loop.
It is possible that you won't find an unused ID in the game object array. In this case, firstUnusedID would still be nil. Then all you need to do is set firstUnusedID to the value of lastID plus one.
You can now use the ID returned from the above method to generate a PineappleModel for your new pineapple.
Add the following code to LevelFileHandler.m:
-(PineappleModel*)addPineappleAt:(CGPoint)position {
    NSNumber* firstUnusedID = [LevelFileHandler firstUnusedIdInArray:self.pineapples];
    PineappleModel* newPineapple = [[PineappleModel alloc] init];
    newPineapple.id = [firstUnusedID intValue];
    newPineapple.position = position;
    [self.pineapples addObject:newPineapple];
    return newPineapple;
}
This code is now a straightforward implementation of the bullet points above for generating a new game object that was discussed earlier. Have a look back to the bullet list if you don't believe it! :]
You grab an unused ID, create a new PineappleModel instance, and assign all the important parameters like ID and position. Then you add the newly created pineapple to the list of pineapples. Finally, you return the newly created pineapple.
Since you'll need to access the above method from outside the LevelFileHandler class, it needs to be public.
Add the following method prototype to LevelFileHandler.h:
-(PineappleModel*)addPineappleAt:(CGPoint)position;
Now you can call addPineappleAt: from the level editor to create new pineapples when the user requests them.
Switch to LevelEditor.mm and replace the existing dummy implementation of createPineappleAt: with the following:
-(void) createPineappleAt:(CGPoint) position {
    CGSize winSize = [CCDirector sharedDirector].winSize;
    PineappleModel* pineappleModel = [fileHandler addPineappleAt:CGPointMake(position.x/winSize.width, position.y/winSize.height)];
    [self createPineappleSpriteFromModel:pineappleModel];
    [popupMenu setMenuEnabled:NO];
}
The above code gets the size of screen and uses it to calculate the level position and create a PineappleModel from this information. The PineappleModel in turn is then used to create a PineappleSprite, which presents the pineapple on-screen. Finally, the popup menu is disabled so that it does not show anymore.
Congratulations! You now have implemented the first interaction that lets the user modify the level.
Build and run your app, and go crazy adding as many pineapples as you like to the level!