AsyncDisplayKit 2.0 Tutorial: Automatic Layout
In part two of this AsyncDisplayKit 2.0 tutorial, learn how easy it is to build fast and flexible layouts in your iOS apps. By Luke Parham.
Introducing ASStackLayoutSpec
This is the perfect time to use the stack layout spec. You can think of it as being the layout spec equivalent to UIStackView, except that its automatically backwards compatible, which is pretty nifty.
Stacks can be defined as either vertical or horizontal and, like all layout specs, can take either nodes or other layout specs as children.
To get this stack set up, add these three lines after the description inset definition:
ASStackLayoutSpec *verticalStackSpec = [[ASStackLayoutSpec alloc] init];
verticalStackSpec.direction = ASStackLayoutDirectionVertical;
verticalStackSpec.children = @[nameOverlaySpec, descriptionTextInsetSpec];
Here you’re creating a stack, setting its direction to be vertical, and adding the top half and bottom half as children.
And again, return your new layout spec.
return verticalStackSpec;
Build and run; you’re pretty close to being done!
Nesting stacks, each having their own justifyContent and alignItems settings, means stacks can be the incredibly expressive, as well as incredibly frustrating. Make sure to check out the flex box froggy game and Async Display Kit docs for a more in-depth look.
Introducing ASBackgroundLayoutSpec
Hey, remember your old friend the overlay spec? Her one rule is that in an overlay spec, the item that is being overlaid upon must have its own size.
The item in the back defines the size and the item in front is simply being stretched over it.
A background spec is exactly the opposite. If you have one item that can define its own size, and another you want to stretch out behind it, then you need a background spec.
In this case, you’ll need to use a background layout spec to stretch the blurred animal image behind the whole stack you’ve build up.
To do so, add this line:
ASBackgroundLayoutSpec *backgroundLayoutSpec = [ASBackgroundLayoutSpec
                                      backgroundLayoutSpecWithChild:verticalStackSpec
                                                         background:self.backgroundImageNode];
And replace the return statement for the final time
return backgroundLayoutSpec;
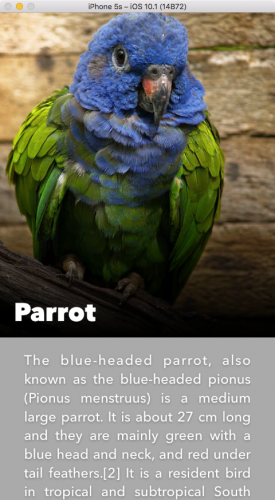
Now build and run to see the finished product:

Where To Go From Here?
To see the completed project, download it here. Once again, this is available in Swift as well.
Once you feel comfortable with the concepts you’ve seen here, a good place to learn more would be the docs. This was really just a taste of what the layout system is capable of.
We hope you enjoyed this AsyncDisplayKit 2.0 tutorial and if you have any layout questions, feel free to leave them in the comments!