Vision Framework Tutorial for iOS: Contour Detection
Learn how to detect and modify image contours in your SwiftUI iOS apps in a fun and artistic way using the Vision framework. By Yono Mittlefehldt.
Processing Images in the Detector
Now you just need to tie these two private methods together somewhere that is callable from outside the class. Still in ContourDetector.swift, add the following method:
func process(image: CGImage?) throws -> [Contour] {
  guard let image = image else {
    return []
  }

  let contourRequest = try perform(request: request, on: image)
  return postProcess(request: contourRequest)
}
Here you're checking if there's an image, then using perform(request:on:) to create a request, and finally returning the result using postProcess(request:). This will be the method your view model will call to detect contours for an image, which is exactly what you'll do next.
Open ContentViewModel.swift and add the following method to the end of the class:
func asyncUpdateContours() async -> [Contour] {
  let detector = ContourDetector.shared
  return (try? detector.process(image: self.image)) ?? []
}
In this code, you're creating an asynchronous method to detect contours. Why asynchronous? Although detecting contours is generally relatively quick, you still don't want to tie up the UI while waiting for the API call results. The asynchronous method returns an empty array if the detector doesn't find any contours. Also, spoiler alert, you'll add a lot more logic here later, which will tax your device's processor. :]
However, you still need to call this method from somewhere. Find the method stub for updateContours, and fill it in with the following code:
func updateContours() {
  // 1
  guard !calculating else { return }
  calculating = true

  // 2
  Task {
    // 3
    let contours = await asyncUpdateContours()

    // 4
    DispatchQueue.main.async {
      self.contours = contours
      self.calculating = false
    }
  }
}
With this code, you:
- Do nothing if we're already calculating contours. Otherwise set a flag to indicate that you're calculating contours. The UI will then be able to inform the user, so they remain patient.
- Create an asynchronous context, from which to run the contour detector. This is necessary for asynchronous work.
- Kick off the contour detection method and await its results.
- Set the results back on the main thread and clear the
calculatingflag. Since bothcontoursandcalculatingare published properties, they should only be assigned on the main thread.
This update method needs to be called from somewhere and the bottom of init is as good a place as any! Find init and add the following line to the bottom:
updateContours()
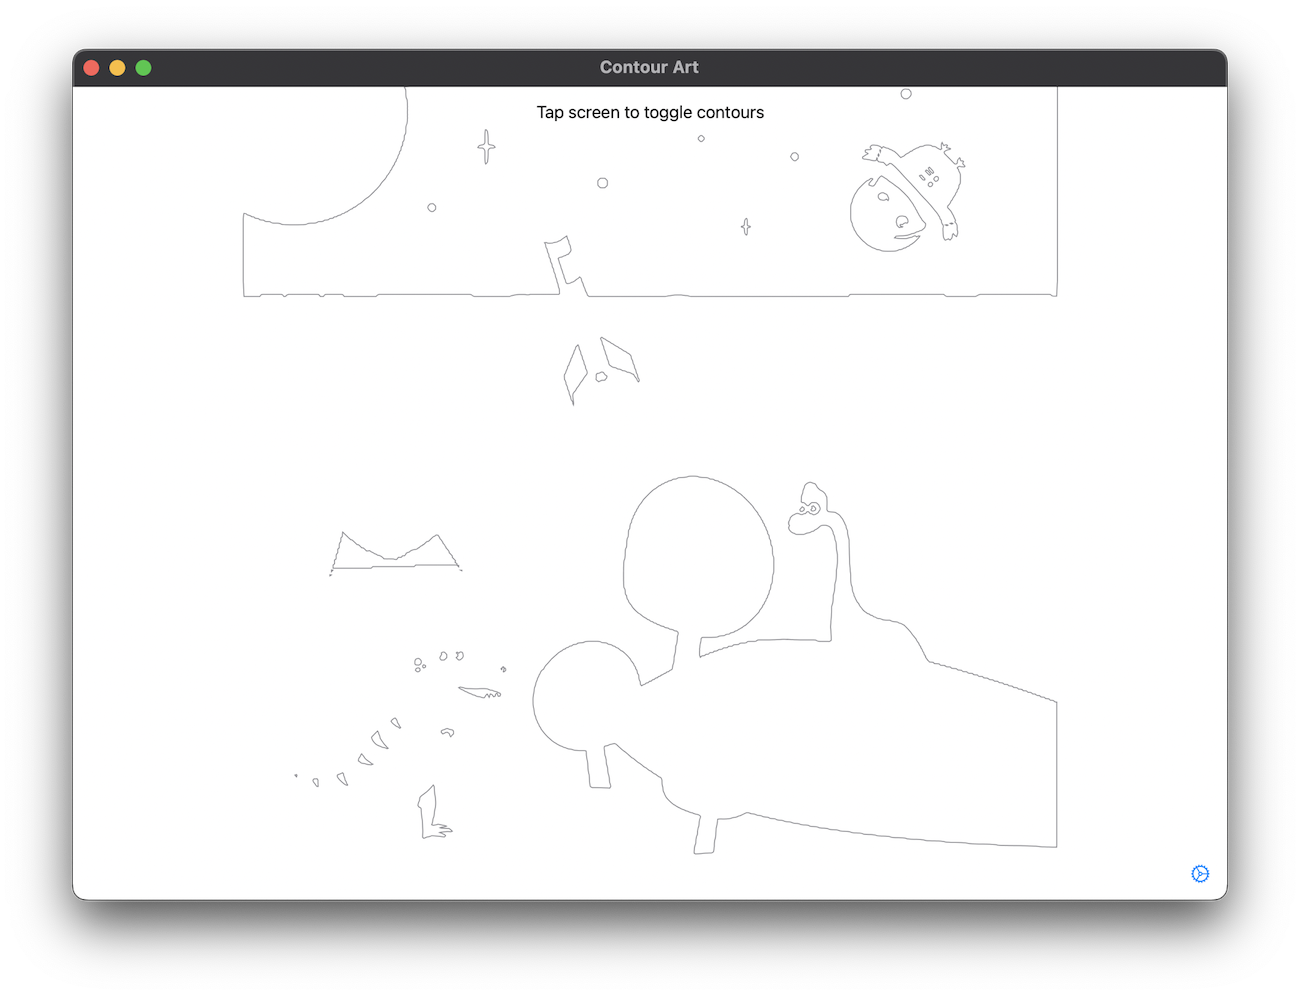
It's now time to build and run your app. After the app loads and you see the image, tap the screen to show its detected contours using the default settings.

Great job!
VNContoursObservation and VNContour
At the time of writing, a VNDetectContoursObservation never seems to return more than one VNContoursObservation in the results array. Instead, all of the contours you see, which is a total of 43 in the previous screenshot, are referenced by the single VNContoursObservation.
Note: The code you wrote handles multiple VNContoursObservation results, just in case Apple ever decides to change how this works.
Each individual contour is described by a VNContour and is organized hierarchically. A VNContour can have child contours. To access them, you have two options:
- Index the
childContoursproperty, which is an array ofVNContours. - Use the
childContourCountinteger property in conjunction with thechildContour(at: Int)method to loop through and access each child contour.
As any VNContour can have a child VNContour, you'll have to recursively access them if you need to preserve the hierarchal information.
If you don't care about the hierarchy, VNContoursObservation gives you an easy way to access all contours in simple manner. A VNContoursObservation has a contourCount integer property and a contour(at: Int) method to access all contours as if they were a flat data structure.
However, if hierarchy is important to you, you need to access the topLevelContours property, which is an array of VNContours. From there, you can access each contour's child contours.
If you were to write some simple code to count top-level and child contours, you'd find that the sample image, with default settings, has four top-level contours and 39 child contours, for a total of 43.
VNDetectContoursRequest Settings
So far, you've created a VNDetectContoursRequest without experimenting with the various settings available to you. Currently, there are four properties you can change to achieve different results-
- contrastAdjustment: The algorithm has a built-in way to adjust the contrast of the image prior to performing contour detection. Adjusting the contrast tries to darken the dark parts of the image and lighten the light parts to exaggerate their differences. This float property ranges from 0.0 to 3.0, with a default value of 2.0. The higher the value, the more contrast will be applied to the image, making it easier to detect some contours.
-
contrastPivot: How does the algorithm know what part of the image should be considered dark vs. light? That's where the contrast pivot comes in. It's an optional
NSNumberproperty ranging from 0.0 to 1.0, with a default of 0.5. Any pixels below this value will be darkened, and any pixels above will be lightened. You can also set this property tonilto have the Vision framework automatically detect what this value "should" be. -
detectsDarkOnLight: This boolean property is a hint to the contour detection algorithm. The default is set to
true, which means it should look for dark objects on a light background. -
maximumImageDimension: Since you can pass in any size image to the request handler, this integer property lets you set the maximum image dimension to use. If your image has a dimension larger than this value, the API scales the image such that the larger of the two-dimensions will be equal to
maximumImageDimension. The default value for this property is 512. Why would you want to change this? Contour detection requires quite a bit of processing power - the larger the image, the more it needs. However, the larger the image, the more accurate it can be. This property allows you to fine-tune this trade-off for your needs.
Changing the Contrast
Now that you understand the settings available to you, you'll write some code to change the values for the two contrast settings. For this tutorial, you'll leave the detectsDarkOnLight and maximumImageDimension properties alone and just use the default values for them.
Open ContourDetector.swift and add the following methods to the bottom of ContourDetector:
func set(contrastPivot: CGFloat?) {
  request.contrastPivot = contrastPivot.map {
    NSNumber(value: $0)
  }
}

func set(contrastAdjustment: CGFloat) {
  request.contrastAdjustment = Float(contrastAdjustment)
}
These methods change the contrastPivot and contrastAdjustment on the VNDetectContoursRequest, respectively, with a little extra logic to allow you to set the contrastPivot to nil.
You'll recall that request is a lazy var, meaning if it hasn't been instantiated by the time you've called one of these methods, it will be now.
Next, open ContentViewModel.swift and find asyncUpdateContours. Update the method so it looks like this:
func asyncUpdateContours() async -> [Contour] {
  let detector = ContourDetector.shared

  // New logic
  detector.set(contrastPivot: 0.5)
  detector.set(contrastAdjustment: 2.0)

  return (try? detector.process(image: self.image)) ?? []
}
Those two new lines hard code values for the contrastPivot and the contrastAdjustment.
Build and run the app and experiment with different values for these settings (you'll need to change the values and then build and run again). Here's some screenshots of different values in action:
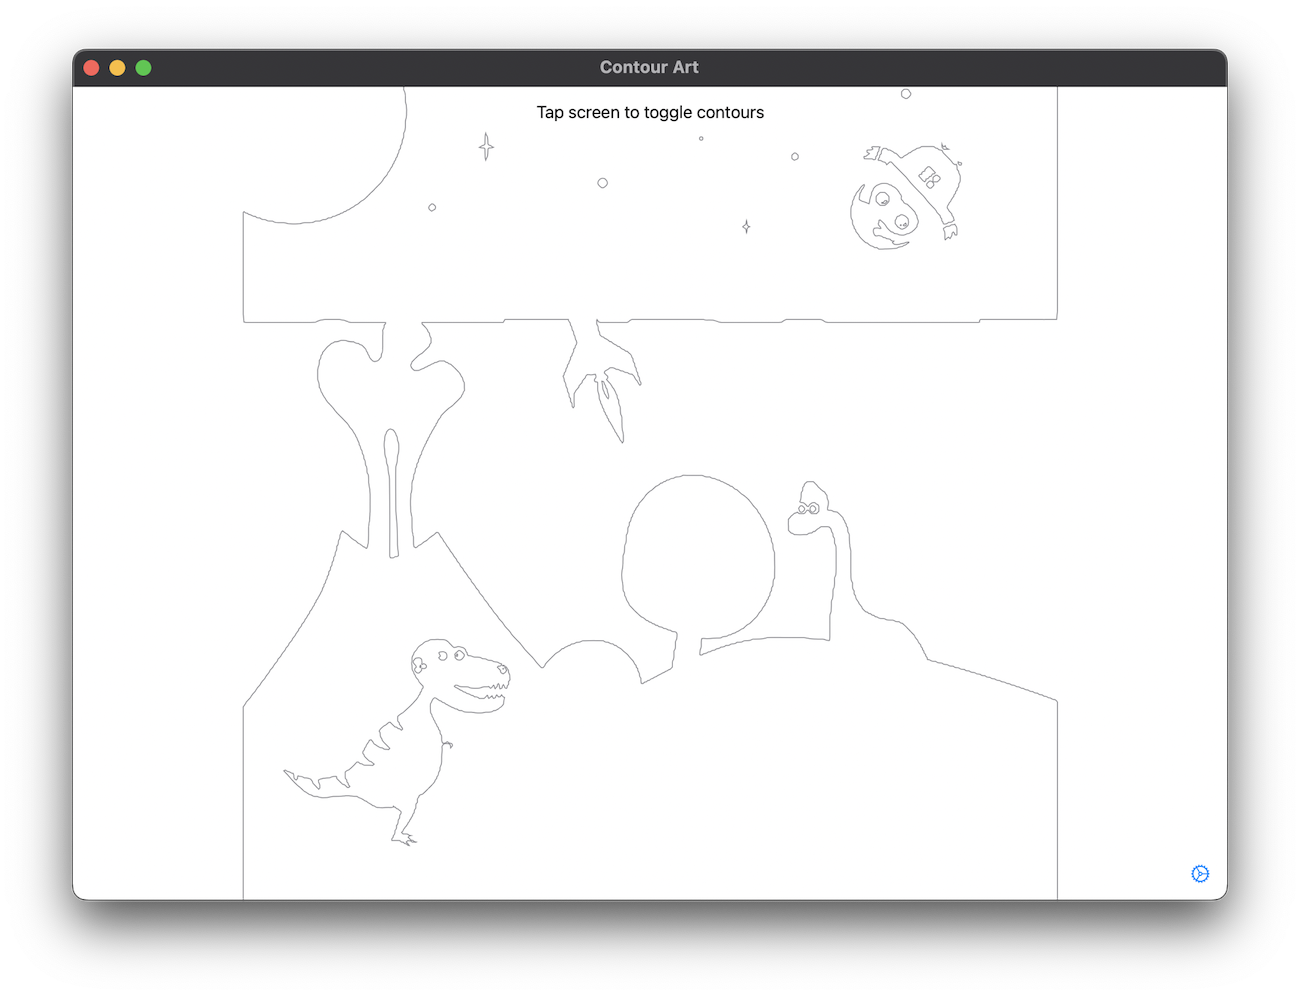


Ok, now you're getting some interesting results. However, it's a bit annoying that there's no magical setting to get all the contours from the image and combine them into one result.
But… there's a solution for that.
When exploring the starter project, you might have tapped on the settings icon in the bottom right corner. If you tapped on it, you would see sliders for minimum and maximum contrast pivot and adjustment.
You'll use these sliders to create ranges for these settings and loop through them. Then you'll combine all the contours from each setting pair to create a more complete set of contours for the image.
If you don't still have ContentViewModel.swift open, go ahead an open it. Delete the entire contents of asyncUpdateContours and replace it with the following code:
// 1
var contours: [Contour] = []

// 2
let pivotStride = stride(
  from: UserDefaults.standard.minPivot,
  to: UserDefaults.standard.maxPivot,
  by: 0.1)
let adjustStride = stride(
  from: UserDefaults.standard.minAdjust,
  to: UserDefaults.standard.maxAdjust,
  by: 0.2)

// 3
let detector = ContourDetector.shared

// 4
for pivot in pivotStride {
  for adjustment in adjustStride {

    // 5
    detector.set(contrastPivot: pivot)
    detector.set(contrastAdjustment: adjustment)

    // 6
    let newContours = (try? detector.process(image: self.image)) ?? []

    // 7
    contours.append(contentsOf: newContours)
  }
}

// 8
return contours
In this new version of asyncUpdateContours, you:
- Create an empty array of
Contours to store all the contours in. - Setup the strides for the
contourPivotandcontourAdjustmentvalues to loop through. - Get a reference to the
ContourDetectorsingleton. - Loop through both strides. Notice that this is a nested loop, so that each value of
contourPivotwill be paired with each value ofcontourAdjustment. - Change the settings for the
VNDetectContoursRequestusing the accessor methods you created. - Run the image through the Vision contour detector API.
- Append the results to the list of
Contours and… - Return this list of
Contours.
Phew! That was a lot, but it'll be worth it. Go ahead and build and run the app and change the sliders in the settings menu. After you dismiss the settings menu by swiping down or tapping outside it, it will begin recalculating the contours.
The ranges used in the screenshot below are:
- Contrast Pivot: 0.2 - 0.7
- Contrast Adjustment: 0.5 - 3.0
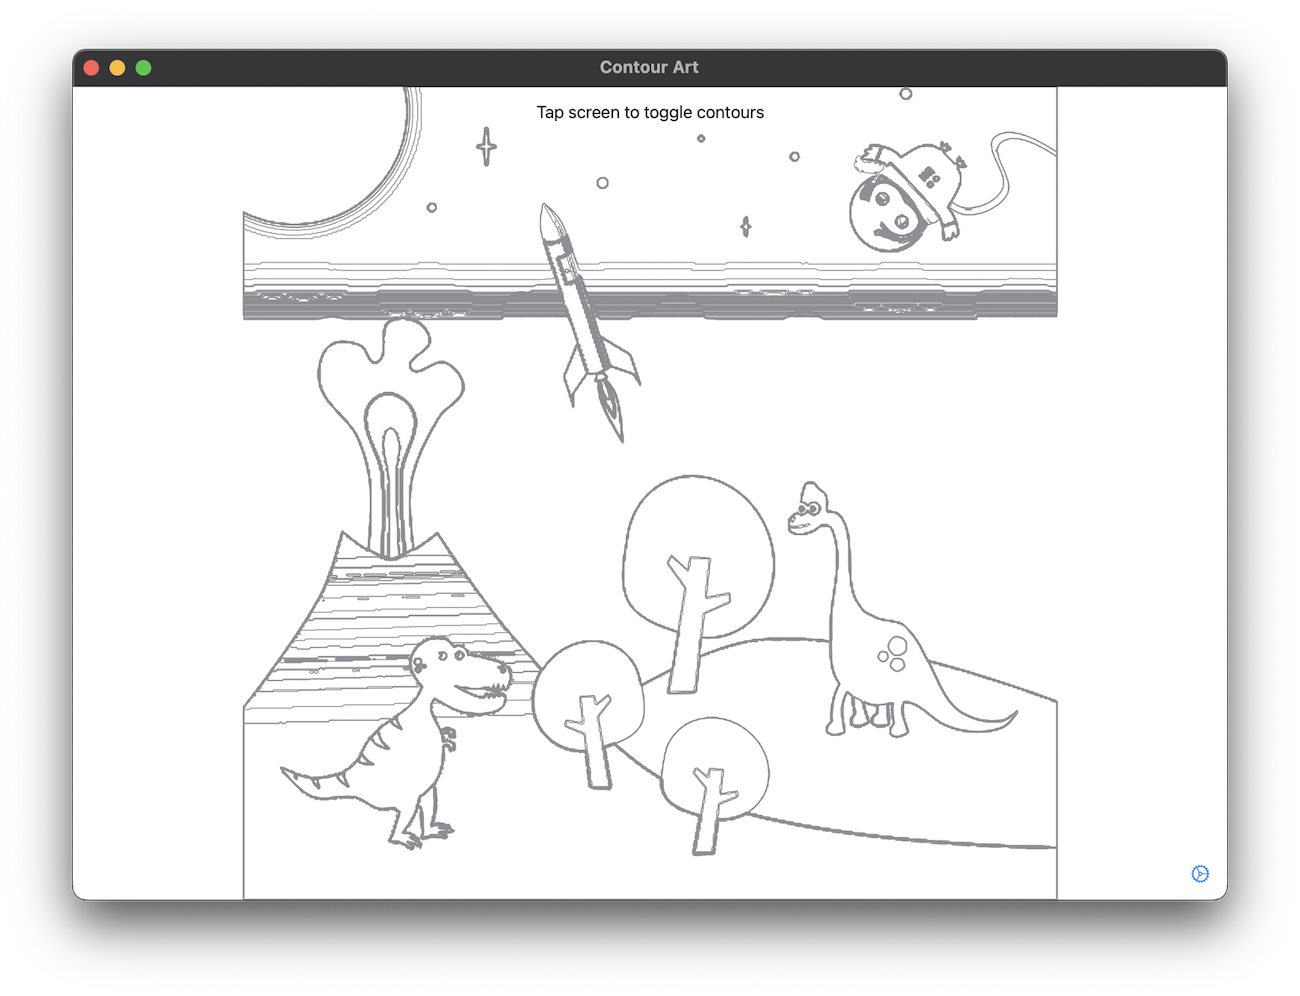
Very cool!