How to Make a Game Like Jetpack Joyride in Unity 2D – Part 2
In the second part of a three part series, you will be generating a series of endless rooms, allowing the user to fly through them. By Mark Placzek.

This is the second part of the tutorial on how to create a game like Jetpack Joyride in Unity 2D. If you’ve missed the first part, you can find it here.
In the first part of this tutorial series, you created a game with a mouse flying up and down in a room. Oh, and don’t forget the flames shooting from his jetpack! Although the fire is fun to look at, simply adding jetpack flames doesn’t make a good game.
In this part of the tutorial series, you’re going to move the mouse forward through randomly generated rooms to simulate an endless level. You’ll also add a fun animation to make the mouse run when it is grounded.
Getting Started
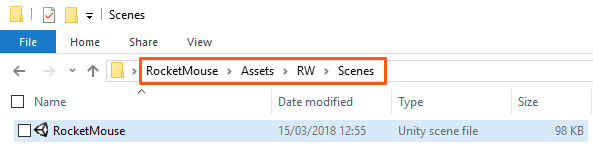
If you completed the first part of this tutorial series, you can continue working with your own project. Alternatively, you can download the RocketMouse Part 1 Final from the materials at the top or bottom of this tutorial. Unpack that and open the RocketMouse.unity scene contained within.
Making the Mouse Fly Forward
It’s time to move forward — literally! To make the mouse fly forward you will need to do two things:
- Make the mouse move.
- Make the camera follow the mouse.
Adding a bit of code will solve both tasks.
Setting the Mouse Velocity
Open the MouseController script and add the following public variable:
public float forwardMovementSpeed = 3.0f;
This will define how fast the mouse moves forward.

Next, add the following code to the end of FixedUpdate:
Vector2 newVelocity = playerRigidbody.velocity;
newVelocity.x = forwardMovementSpeed;
playerRigidbody.velocity = newVelocity;
This code simply sets the velocity x-component without making any changes to the y-component. It is important to only update the x-component, since the y-component is controlled by the jetpack force.
Run the scene! The mouse moves forward, but at some point, the mouse just leaves the screen.

To fix this, you need to make the camera follow the mouse.
Making the Camera Follow the Player
In the Project view, navigate to RW/Scripts and create a new C# Script named CameraFollow. Drag it onto the Main Camera in the Hierarchy to add it as a component.
Open this CameraFollow script and add the following public variable:
public GameObject targetObject;
You will assign the mouse GameObject to this variable in a moment, so that the camera knows which object to follow.
Add the following code to the Update method:
float targetObjectX = targetObject.transform.position.x;
Vector3 newCameraPosition = transform.position;
newCameraPosition.x = targetObjectX;
transform.position = newCameraPosition;
This code simply takes the x-coordinate of the target object and moves the camera to that position.
Switch back to Unity and select Main Camera in the Hierarchy. There is a new property in the CameraFollow component called Target Object. You will notice that it is not set to anything.

To set the Target Object, click on mouse in the Hierarchy and, without releasing, drag the mouse to the Target Object field in the Inspector as shown below:

Note: It is important to not release the mouse button, since if you click on the mouse and release the mouse button you will select the mouse character and the Inspector will show the mouse properties instead of Main Camera.
Alternatively, you can lock the Inspector to the Main Camera by clicking the lock button in the Inspector.

Run the scene. This time the camera follows the mouse.

This is a good news / bad news kind of thing – the good news is that the camera follows the mouse, but the bad news is that, well, nothing else does!
You’ll address this in a moment, but first you will need to offset the mouse to the left side of the screen. Why? Unless the player has the reflexes of a cat, you will want to give them a little more time to react and avoid obstacles, collect coins, and generally have fun playing the game.
Adjusting the Camera Offset
Select the mouse in the Hierarchy and set its Position to (-3.5, 0, 0) and run the scene.

Wait — the mouse is still centered on the screen, but this has nothing to do with the mouse position. This happens because the camera script centers the camera at the target object. This is also why you see the blue background on the left, which you didn’t see before.
To fix this, open the CameraFollow script and add a distanceToTarget private variable:
private float distanceToTarget;
Then add the following code to the Start method:
distanceToTarget = transform.position.x - targetObject.transform.position.x;
This will calculate the initial distance between the camera and the target. Finally, modify the code in the Update method to take this distance into account:
float targetObjectX = targetObject.transform.position.x;
Vector3 newCameraPosition = transform.position;
newCameraPosition.x = targetObjectX + distanceToTarget;
transform.position = newCameraPosition;
The camera script will now keep the initial distance between the target object and the actual camera. It will also maintain this gap throughout the entire game.
Run the scene, and the mouse will remain offset to the left.

Generating an Endless Level
Right now playing the game for more than a few seconds isn’t much fun. The mouse simply flies out of the room into a blue space. You could write a script that adds backgrounds, places the floor and the ceiling and finally adds some decorations. However, it is much easier to save the complete room as a Prefab and then instantiate the whole room at once.
Here is an excerpt from the Unity documentation regarding Prefabs:
In other words, you add objects to your scene, set their properties, add components like scripts, colliders, rigidbodies and so on. Then you save your object as a Prefab and you can instantiate it as many times as you like with all the properties and components in place.