Cookbook: Moving Table View Cells with a Long Press Gesture
Learn how to move table view cells with a long press gesture! By Soheil Azarpour.
Cookbook: Move table view cells with a long press gesture!
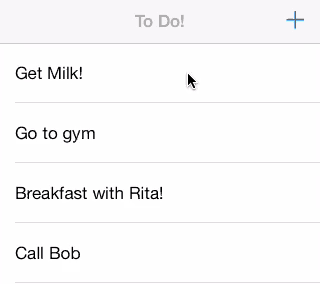
In this cookbook-style tutorial you will learn how to move a table view row by using a long press gesture, like in Apple’s Weather App.
You can either add this code directly to your project, add it to a starter project I’ve made for you, or just download the completed example.
What do you need?
- UILongGestureRecognizer
- UITableView (it can be substituted with UICollectionView)
- UITableViewController (it can be substituted with UIViewController or UICollectionViewController)
- 5 minutes.
How to do it?
Start by adding a UILongGestureRecognizer to the table view. You can do this in viewDidLoad for your table view controller.
UILongPressGestureRecognizer *longPress = [[UILongPressGestureRecognizer alloc]
  initWithTarget:self action:@selector(longPressGestureRecognized:)];
[self.tableView addGestureRecognizer:longPress];
Next add the action method for gesture recognizer. It should start by getting the location of the long press in the table view, and find the corresponding index path for the cell at that location. Remember the index path might be nil (for example, if the user taps and holds on a section header of the table view).
- (IBAction)longPressGestureRecognized:(id)sender {

  UILongPressGestureRecognizer *longPress = (UILongPressGestureRecognizer *)sender;
  UIGestureRecognizerState state = longPress.state;

  CGPoint location = [longPress locationInView:self.tableView];
  NSIndexPath *indexPath = [self.tableView indexPathForRowAtPoint:location];

  // More coming soon...
}
Next you’ll handle the UIGestureRecognizerStateBegan case. If there is a valid (non-nil) index path, get the corresponding UITableViewCell and take a snapshot view of the table view cell using a helper method. Then add the new snapshot view to the table view and center it on the corresponding cell.
For a better user experience and a more natural effect fade out the original cell, fade in the snapshot view, make the snapshot view slightly bigger, and offset its Y coordinate to align with gesture’s location Y. This way it appears as if the cell is popped out of the table view, floating over it and snapped to user’s finger.
static UIView       *snapshot = nil;        ///< A snapshot of the row user is moving.
static NSIndexPath  *sourceIndexPath = nil; ///< Initial index path, where gesture begins.

switch (state) {
  case UIGestureRecognizerStateBegan: {
    if (indexPath) {
      sourceIndexPath = indexPath;

      UITableViewCell *cell = [self.tableView cellForRowAtIndexPath:indexPath];

      // Take a snapshot of the selected row using helper method.
      snapshot = [self customSnapshotFromView:cell];

      // Add the snapshot as subview, centered at cell's center...
      __block CGPoint center = cell.center;
      snapshot.center = center;
      snapshot.alpha = 0.0;
      [self.tableView addSubview:snapshot];
      [UIView animateWithDuration:0.25 animations:^{

        // Offset for gesture location.
        center.y = location.y;
        snapshot.center = center;
        snapshot.transform = CGAffineTransformMakeScale(1.05, 1.05);
        snapshot.alpha = 0.98;

        // Fade out.
        cell.alpha = 0.0;

        } completion:^(BOOL finished) {

         cell.hidden = YES;

      }];
    }
    break;
  }
  // More coming soon...
}
// Add this at the end of your .m file. It returns a customized snapshot of a given view.
- (UIView *)customSnapshotFromView:(UIView *)inputView {

  // Make an image from the input view.
  UIGraphicsBeginImageContextWithOptions(inputView.bounds.size, NO, 0);
  [inputView.layer renderInContext:UIGraphicsGetCurrentContext()];
  UIImage *image = UIGraphicsGetImageFromCurrentImageContext();
  UIGraphicsEndImageContext();

  // Create an image view.
  UIView *snapshot = [[UIImageView alloc] initWithImage:image];
  snapshot.layer.masksToBounds = NO;
  snapshot.layer.cornerRadius = 0.0;
  snapshot.layer.shadowOffset = CGSizeMake(-5.0, 0.0);
  snapshot.layer.shadowRadius = 5.0;
  snapshot.layer.shadowOpacity = 0.4;

  return snapshot;
}
As gesture moves (the UIGestureRecognizerStateChanged case), move the snapshot view by offsetting its Y coordinate only. If the gesture moves enough that its location corresponds to a different index path, tell the table view to move the rows. At the same time, you should update your data source too:
case UIGestureRecognizerStateChanged: {
  CGPoint center = snapshot.center;
  center.y = location.y;
  snapshot.center = center;

  // Is destination valid and is it different from source?
  if (indexPath && ![indexPath isEqual:sourceIndexPath]) {

    // ... update data source.
    [self.objects exchangeObjectAtIndex:indexPath.row withObjectAtIndex:sourceIndexPath.row];

    // ... move the rows.
    [self.tableView moveRowAtIndexPath:sourceIndexPath toIndexPath:indexPath];

    // ... and update source so it is in sync with UI changes.
    sourceIndexPath = indexPath;
  }
  break;
}
// More coming soon...
Finally, when the gesture either ends or cancels, both the table view and data source are up to date. All you have to do is removing the snapshot view from table view and reverting the fadeout.
For a better user experience, fade out the snapshot view and make it smaller to match the size of the cell. It appears as if the cell drops back into its place.
default: {
  // Clean up.
  UITableViewCell *cell = [self.tableView cellForRowAtIndexPath:sourceIndexPath];
  cell.hidden = NO;
  cell.alpha = 0.0;
  [UIView animateWithDuration:0.25 animations:^{

    snapshot.center = cell.center;
    snapshot.transform = CGAffineTransformIdentity;
    snapshot.alpha = 0.0;

    // Undo fade out.
    cell.alpha = 1.0

  } completion:^(BOOL finished) {

    sourceIndexPath = nil;
    [snapshot removeFromSuperview];
    snapshot = nil;

  }];
  break;
}
That's it; build and run your project, and you can now use a long press gesture to reorder your table view cells!
You can checkout the completed project here at GitHub.
How to use this with UICollectionView?
Assuming you have already a sample project that uses UICollectionView, you can easily adopt the above code for that project. All you have to do is replacing self.tableView with self.collectionView and updating calls to get and move UICollectionViewCell.
To do an exercise, checkout the starter project of UICollectionView from GitHub and add tap-and-hold gesture to it for re-ordering cells. You can checkout the UICollectionView answer here from GitHub.
Where to go from here?
We hope you enjoyed this cookbook article! If you would like to see more cookbook-style articles like this in the future, please let us know.
Also, if you'd prefer to learn about this in video format, we have a video tutorial for that.
Also, I’d love to hear your comments or questions in the forums below!