Bullet Physics Tutorial: Getting Started
Learn how to make a simple OpenGL ES Arkanoid game have 3D physics and collision detection in this Bullet Physics tutorial! By Kirill Muzykov.
In this Bullet physics tutorial, you’re going to learn how to use the Bullet physics engine in your iOS games.
Bullet physics is a powerful open source physics engine. It has been used in many Hollywood movies like Megamind and Shrek 4, and popular games like the Grand Theft Auto series.
Bullet physics differs from other physics engines you may have heard of like Box2D, Chipmunk, or Sprite Kit’s physics engine, because this physics engine is 3D, not 2D! Bullet physics has a long list of cool features, including 3D collision detection, soft body dynamics and rigid body dynamics. If you don’t know what those things entail, you will soon!
In this tutorial, you will add Bullet physics into a very simple OpenGL iOS breakout game. Step by step, you will replace the old custom code for ball movement and collisions with new code that calls on the Bullet physics library to do a real physics simulation.
By the time you’re finished, you’ll have learned how to:
- Download and build Bullet physics engine source code.
- Set up an Xcode project to use the Bullet physics libraries.
- Set up a physics simulation, create physical objects and make them move and rotate.
- Detect collisions, get collision information and destroy objects.
This Bullet physics tutorial assumes you are familiar with at least the basics of OpenGL development on iOS. If you are completely new to OpenGL or iOS development, check out our Beginning OpenGL ES 2.0 with GLKit tutorial series first.
Getting Started with Bullet
Start by downloading the starter project for this tutorial. Unzip the project, and build and run. You will see a very simple Breakout game like the following (you can move the paddle by dragging):

After you play the game a bit, check out the sample project. Here’s a quick tour of the code:
-
RWGameScene.m: The main gameplay code for the game is in here.
initWithShader:adds all of the objects to the scene, andupdateWithDelta:performs the movement, collision handling, and win/lose detection. -
RWNode.m: This class contains the OpenGL code to render a model. It has various subclasses (
RWBall,RWPaddle, etc) that pass in a list of vertices for each model. The models were created in Blender, and Ray wrote a command-line tool to generate header files with the vertices from the OBJ files exported from Blender.
Once you have a good understanding of how this project is put together, move the starter project to your desktop so it’s in a known location. You should wind up with something like this:

Downloading the Bullet Source Code
Now let’s download some bullets. :] Well, in fact, only one Bullet, but it’s packed with all the source code.
Visit https://code.google.com/p/bullet/downloads/list and grab the latest version of Bullet. At the time of writing this tutorial, this is bullet-2.82-r2704.tgz, but it may have been updated by the time you read this so just download the latest.
Note: Make sure to get the file with the Unix line endings, since Mac OS X is Unix based.

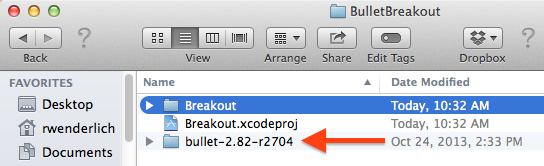
After the download is complete, unpack the archive contents to your BulletBreakout folder.
You’ll have something like this:

Installing the Build Tool
Bullet uses the CMake build tool to build its codebase, so you need to have this tool downloaded and installed. If you already have CMake, you can skip this section.
Note: You can test to see if you have cmake installed by typing cmake in a Terminal window. If you see a bunch of help output, you have it installed!
Visit http://www.cmake.org/cmake/resources/software.html and download the .dmg package called Mac OSX 64/32-bit Universal (for Intel, Snow Leopard/10.6 or later) from the Binary distributions category.

When the download completes, double-click on the cmake-2.8.12-Darwin64-universal.dmg file and it will mount a disk with the installation package.

Double-click on the installation package cmake-2.8.12-Darwin64-universal.pkg and it will open the installer.
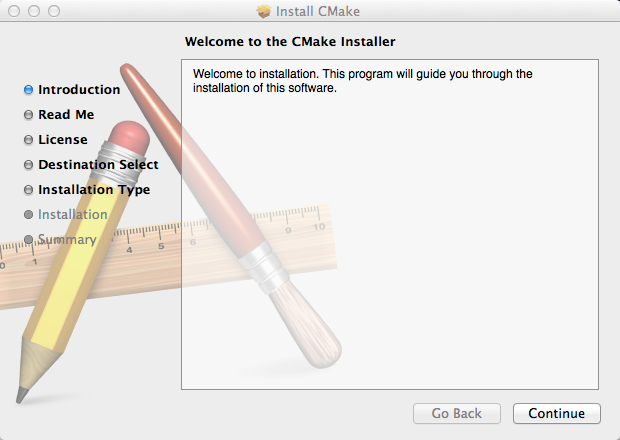
Simply follow the installation steps until the installation completes.
Now you have CMake installed and you can proceed to building the Bullet source code.
Building Bullet
To build the source code, follow these steps:
Open Terminal, and change to the build subdirectory of the bullet subdirectory inside your BulletBreakout project folder. For me, it looks like this, but if you downloaded a more recent version yours may be slightly different:
>cd ~/Desktop/BulletBreakout/bullet-2.82-r2704/build/
Then run the ios_build.sh shell script with the following command:
>./ios_build.sh
After the script finishes running, you should see a ** BUILD SUCCEEDED ** message.
That’s it! You’re ready to integrate Bullet into your game.
Adding Bullet Libraries to an Xcode Project
In this section, you’re going to add the Bullet libraries to the Breakout game project. Open the Breakout project in Xcode, and then open a Finder window next to Xcode and navigate to the build/xcode4ios folder inside your bullet subdirectory.

Drag the following projects over to the Breakout project name in Xcode:
- LinearMath.xcodeproj
- BulletDynamics.xcodeproj
- BulletCollision.xcodeproj
Here’s how it should look:

When you’re done, you should have something like this:

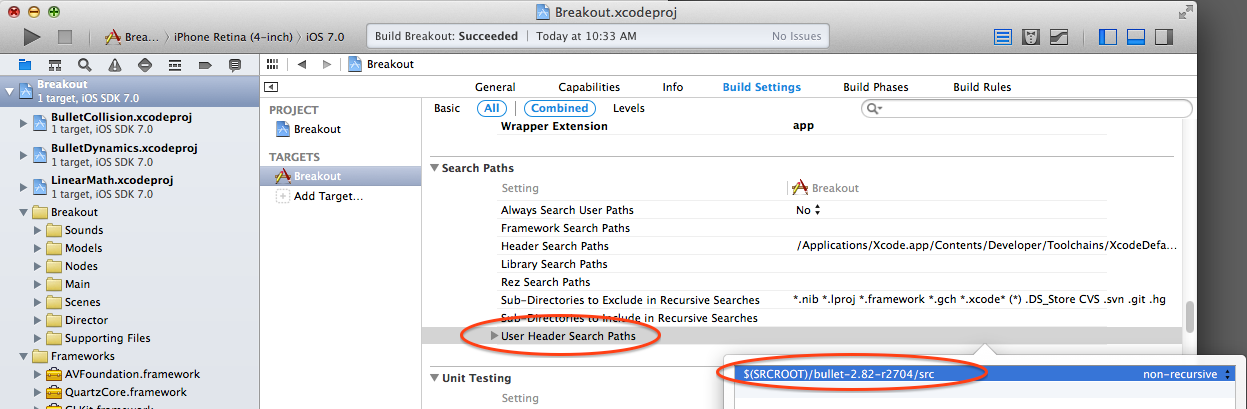
Now you need to add a header search path to the main project so your project knows where to find the Bullet headers. To do so, click your Breakout project in the project navigator, and select the Breakout target. Navigate to the Build settings tab, and double click the Search Paths\User Header Search Paths entry.
Use the + button to add a new entry, and add the path to the src subdirectory of your Bullet folder. For me, this was $(SRCROOT)/bullet-2.81-rev2613/src (don’t add quotes), but remember yours may be slightly different if you downloaded a more recent version of Bullet.
Finally, you need to link your project with the Bullet libraries. First you need to add the Bullet projects as dependencies of your project so that they will be built before you build your project. To do this, select your Breakout project and target, select the Build Phases tab, and inside the Target Dependencies section click the + button. Select the three Bullet projects, and click Add.
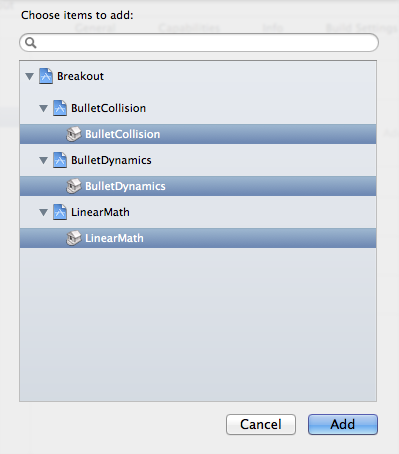
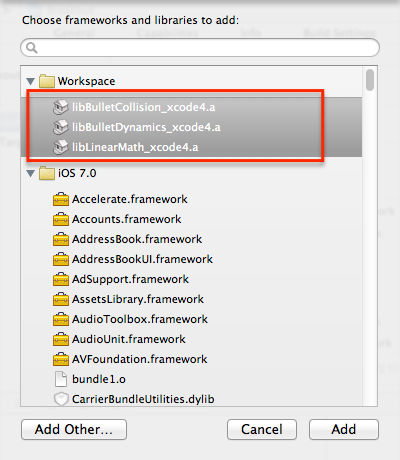
Next, still in the Build Phases tab, expand the Link Binary With Libraries section. Click the plus (+) button at the bottom of the section, as shown in the picture below.

In the pop-up dialog, select the three Bullet libraries you added earlier. You can click on the first one and then SHIFT+click on the third one to select all three. Click the Add button.
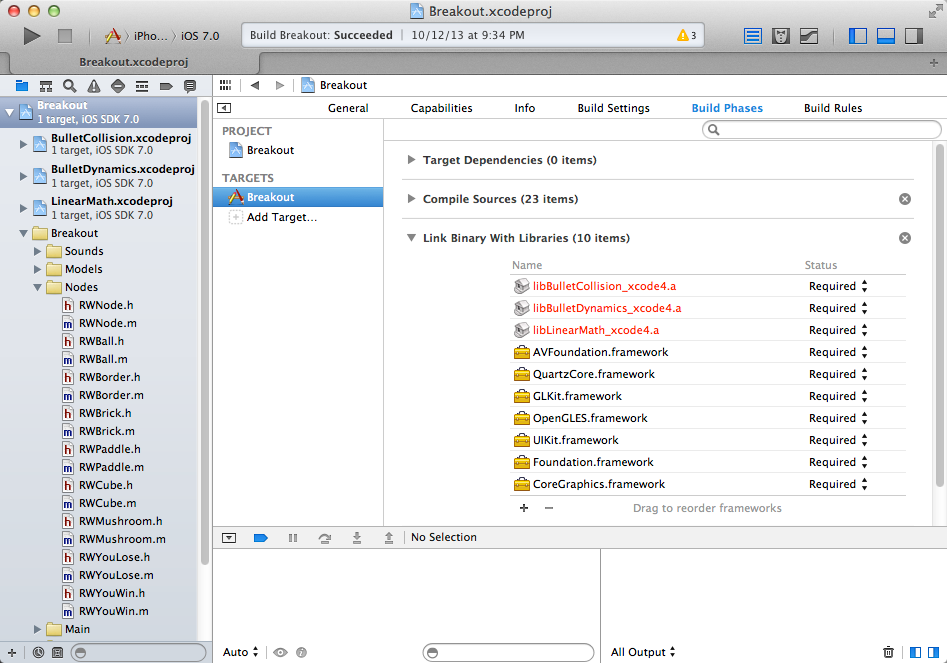
You should wind up with something like this:
Now Clean (Product/Clean) and Build the project. If you’re targeting the Simulator, you won’t have any errors, but if you’re targeting an iOS device, you may see one or more warnings that later will become errors. You’re going to fix those now.
