Using Meshroom to Insert Real Life Objects in Unity
In this article you’ll learn how to use Photogrammetry to photoscan and insert real life objects into your Unity projects with Meshroom. By Sean Duffy.
In the context of 3d models, photogrammetry is the process of making 3D models from objects you’ve scanned.
Have you ever needed some realistic 3D models for a game idea on a budget and felt helpless? Do you have an ultra-realistic game environment to create? If so, then you’ll want to read on!
With photogrammetry, you take a bunch of inputs, your photos, and run them through a pipeline, or series of methods that process them. Data from these processes, or outputs, inform the creation of the final 3D model.

In this tutorial, you’ll use several photographs of a dragon statue to create a detailed 3D model, clean it up in Blender and import the result to a dark and moody Unity Viking village scene.
Along the way you’ll learn how to:
- Choose a good object to photoscan.
- Take suitable photographs.
- Decide when and where to take the photographs.
- Cull bad photographs.
- Use Meshroom to create 3D scans.
- Import models to Blender for cleaning and touching up.
- Reduce polygon count.
- Prepare and import 3D models to Unity.
Despair no longer! Soon you’ll know the secrets of creating ultra-realistic objects for your games! :]

Getting Started
Download the project materials by clicking the Download Materials button at the top or bottom of this tutorial. Next, extract the zip file to a convenient location.
The download contains the Starter and Final project files, which you’ll get to later.
To create a good photoscan you need to capture your model from many angles. In this tutorial, you already have all the photographs you need at your disposal.
Before you get to those photos, it’s important to learn a few tricks for when you go out into the wild to do your own captures.
Finding Good Objects to Capture
Of course you’ll want to capture objects that are relevant to your environment or game idea. After this obvious priority, there are some traits that make an object easier to photoscan:
- Flat bases.
- Decent contrast in colors or tones.
- Not too dark, or difficult to see detail.
- Not too big, making it difficult to move around and capture from different angles.
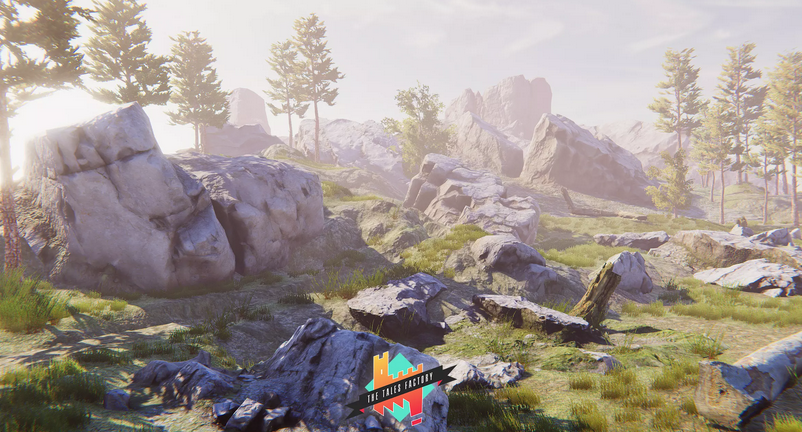
You should also consider doing photoscans of objects that would be difficult to model. For example, items in nature are challenging to model because it can be difficult to create organic materials.
These rocks from The Tales Factory on the Unity Asset Store are a good example.
When to Take Photographs
As with photography, there are certain conditions and times of the day that make for better photoscans.
If you have an indoor studio and lighting, you could model these conditions yourself with a bit of careful planning. If you don’t, you’ll need to work outside.
When working outside, keep the following in mind:
- Capture photos in daylight.
- Overcast skies are great. The clouds diffuse the light which results in more even light distribution on your model.
- Dry conditions are good and wet conditions are bad! In wet conditions, you’re likely to get more reflections on your final result. In some cases, you might also find your 3D model has a shiny gloss that detracts from the realism.
Choose a neutral looking model that could suit a variety of potential conditions. Then you could apply effects depending on the conditions in your game.
Is it raining? Throw on a shader that adds a glossy, wet effect. Or, is your game set in some post-apocalyptic world where everything is old and worn out? Add an aging or corrosion effect instead.
Capturing Photos
Download the photo collection you’ll use for this tutorial. It’s not in the Download Materials link because of its size. Click this link to begin the download:
Download dragon sculpture photos (zip file, 695 MB)
Now, extract the zip file to a convenient location and open the folder. You’ll see about 100 photos of the dragon sculpture, taken from various angles and heights.

This is what you should aim for when capturing photos. A 360 degree covering of photos from various angles and heights ensures you get the details you need.
When taking pictures, move around the object to get views from various angles. Try to move in the smallest possible increments and take photos both closeup and from a bit further away. You’re aiming to get close up details and photos that show the entire model.
Don’t move the model or turn it during your capture session as this tends to throw some software off. Instead, move around the subject, while leaving it stationary.
Camera Settings
To get a uniform looking set of photos, set your camera to manual or pro mode. Most smartphone cameras let you enter this mode, while hand-held DSLR cameras always have a manual or M mode.
- First, set a Fixed ISO mode. This changes how sensitive your digital camera’s sensor is to light. Higher numbers make it easier to capture photos in darker conditions but result in noisier images. Outdoors in good lighting, you can usually keep this down to 100 or 200. For photoscan images, always choose a fixed number.
- If you’re new to photography, use a fixed shutter or fixed aperture mode on your camera. These are sometimes called Priority modes. Doing so helps you pin down that setting and lets the camera control the other settings to maintain an even exposure. Again, this is all in the name of getting well-lit photos.
- When taking your pictures, always make sure they’re in focus. You don’t want any blurry images.
- Keep your pictures in one orientation, either landscape or portrait, throughout.
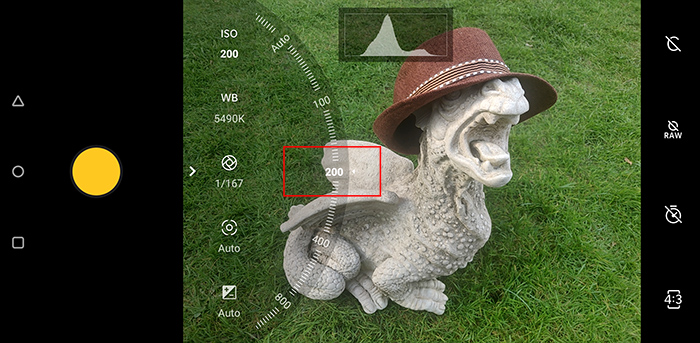
Setting the ISO to a fixed 200 worked well for middle of the day, overcast lighting in this situation.