Instant Apps: Getting Started
In this tutorial, you’ll learn how to integrate Google Play Instant with your Android project using Instant Development SDK. By Ivan Kušt.
Adding Instant Functionality
The next step is to create a new folder named instant in the app/src folder.
In the new folder, create an AndroidManifest.xml file with the following contents:
<manifest xmlns:android="http://schemas.android.com/apk/res/android"
  xmlns:dist="http://schemas.android.com/apk/distribution"
  package="com.raywenderlich.android.fromdusktilldawn"
  android:targetSandboxVersion="2">

  <dist:module dist:instant="true"></dist:module>
</manifest>
You’ll immediately notice a few differences from the usual manifest:
- The android:targetSandboxVersion property.
- The dist:module tags.
These settings will place your app in a more secure SELinux (Security-Enhanced Linux) sandbox. This lets the instant version of the app transfer data to the installed version with a higher level of security.
Select the instantDebug build variant.
Build and run the app again to make sure there are no errors.
You’ll get a prompt from Android Studio because you’re running a different version of the app. Answer the prompt with OK:

You’ll still get the installed version of the app, despite the error message.

Running instant apps using App Bundle is still not seamless in Android Studio, but don’t worry about it!
Your next task is to set up a way to easily run and test instant apps.
Testing Instant Apps
To run and test your instant app on a device or an emulator, you’ll have to go through a few steps:
- Build your app as an App Bundle.
- Create an .apks archive for your device from the bundle.
- Use ia tool to launch the instant experience on your target device or emulator.
Here’s how these steps will work.
For the first step, you’ll use Android Studio or the gradle command line tool to generate an App Bundle for the instantDebug flavor.
To create and extract the .apks archive from App Bundle, you’ll use a tool called bundletool. This is a tool developed by Google which Google Play Store uses when delivering an app to your device.
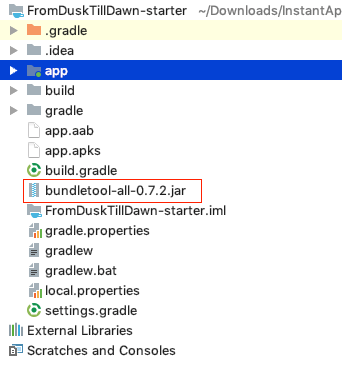
Go to the bundletool release page and download the latest version of bundletool-all-*.jar file into your project root directory:
Here’s how you call bundletool to generate an .apks archive:
$ java -jar bundletool-all-*.jar build-apks \
    //1
    --bundle=app.aab \
    //2
    --output=app.apks \
    //3
    --connected-device \
    //4
    --ks=your-keystore-path \
    //5
    --ks-pass=pass:your-keystore-password \
    //6
    --ks-key-alias=your-key-alias \
    //7
    --key-pass=pass:your-key-password
In this command line, you:
- Set where your app bundle file .aab is located.
- Set the destination for the .apks file’s output.
- Indicate that bundletool should only generate APKs for the devices connected to your development machine.
- Provide the keystore path.
- Provide the keystore password.
- Provide the keystore key alias.
- Provide the keystore key password.
You’ve seen just a small set of things you can do with bundletool. You can find more in the complete bundletool reference.
Finally, find the command line tool for launching the app, called ia, in the Android home folder, typically found in the extras/google/instantapps folder. To run the .apks archive on your device as an instant app, you would run the following command in a terminal:
$ANDROID_HOME/extras/google/instantapps/ia run app.apks
This process happens when users run instant apps published on Google Play.
When developing an app, it would be tedious to repeat all of those steps each time you want to run your instant app. So the next thing you’ll do is create gradle tasks that’ll do the grunt work for you!
There are already tasks in place to generate App Bundles for all build variants. Your next job is to create two additional gradle tasks for the second and third steps.
Open build.gradle file in the app module. Add the following code at the end of the file, after the dependencies section:
//1
project.afterEvaluate {
  //2
  android.applicationVariants.all { variant ->
    //3
    task "assembleSplits${variant.name.capitalize()}"(type: Exec, dependsOn: "bundle", group: "build") {
    }
  }
}
This will create a new task that extracts a set of .apks archives for each build variant. Take a look at this task, step by step:
- Project.afterEvaluate executes code after evaluating the project.
- Android.applicationVariants returns a collection of all build variants after evaluating the project.
- Task method creates a new task that depends on the “bundle” task for each build variant.
One more important thing to note is that new tasks are of type Exec, which is a convenience task used for calling command line tools.
The next thing to do is to call bundletool from the task.
Bundletool needs the following arguments:
- A bundle to generate from.
- A keystore path.
- A keystore password.
- A keystore key alias.
- A keystore key password.
Create a helper method for fetching the signing configuration for the build variant by adding the following code at the start of project.afterEvaluate:
ext.getSigningConfig = { variant ->
  return variant.signingConfig ?: variant.buildType.signingConfig
}
The next thing you need to do is to tell the task where to find bundletool. You’ll use the local.properties file in project root. Open the local.properties file and add the following line:
bundletool=bundletool-all-*.jar
The new bundletool property specifies the path to the bundletool .jar file relative to project root folder.
Add the following code right after the getSigningConfig() method definition:
Properties properties = new Properties()
properties.load(project.rootProject.file('local.properties').newDataInputStream())
def bundletool = properties.getProperty('bundletool')
This will read the property named “bundletool” from the local.properties file.
Now that you have everything you need, paste the following code inside the task:
//1
workingDir project.rootDir
//2
commandLine = ["java",
               "-jar", bundletool, "build-apks",
               "--bundle=${project.buildDir}/outputs/bundle/${variant.name}/app.aab",
               "--output=${project.buildDir}/outputs/splits/${variant.name}/app.apks",
               "--connected-device",
               "--ks=${getSigningConfig()?.storeFile}",
               "--ks-pass=pass:${getSigningConfig()?.storePassword}",
               "--ks-key-alias=${getSigningConfig()?.keyAlias}",
               "--key-pass=pass:${getSigningConfig()?.keyPassword}",
               "--adb=${android.getAdbExe()}"
]
//3
doFirst {
  mkdir "${project.buildDir}/outputs/splits/${variant.name}"
  println "Running bundletool:\n${commandLine.join(" ")}"
}
//4
doFirst {
  delete "${project.buildDir}/outputs/splits/${variant.name}"
}
//5
doLast {
  println "Creating splits for ${variant.name}"
}
Here’s how this process works, step by step:
- WorkingDir is a property of the Exec task type. As its name suggests, it specifies the working directory for the executed command.
- CommandLine specifies the command to execute.
- The first doFirst block puts the code to execute at the beginning of the tasks queue. First block ensures that the folder for storing the results already exists.
- The second doFirst block deletes the results folder if it exists. This is the first block executed in this task.
- The third doLast puts the code to execute at the end of the task’s queue. This will simply print to the console the name of the variant split generated.
Run the task, assembleSplitsInstantDebug, from the console. It checks that you have an app.apks file in app/build/outputs/splits.
Sync the project to make sure there are no errors.
Congrats! You’re all set for the next step!

The last step is to add tasks to run your instant app from the generated .apks. Those tasks will depend on the tasks you’ve created in the previous step.
First, you’ll create a new task type called ExecInstantApp that extends the existing Exec task. Add the following code to the end of build.gradle:
import org.gradle.api.tasks.options.Option

class ExecInstantApp extends Exec {
  //1
  @Input
  //2
  @Option(option = "androidSdk", description = "Android SDK path")
  //3
  String androidSdkPath

  @Input
  @Option(option = "apksPath", description="App apk splits path")
  //4
  String apksPath

  @Input
  //5
  @Optional
  @Option(option = "url", description = "Url to launch Instant App")
  //6
  String url

  @Override
  protected void exec() {
    if(url != null) {
      commandLine = [
          "${androidSdkPath}/extras/google/instantapps/ia",
          "--debug", "run", apksPath, "-u", url
      ]
    } else {
      commandLine = [
          "${androidSdkPath}/extras/google/instantapps/ia", "--debug", "run", apksPath
      ]
    }

    println "Running ia:\n${commandLine.join(" ")}"

    super.exec()
  }
}
Take a look at what that code does. You’ve added three new properties and three annotations to the task:
- An @Input annotation, which specifies that the property is an input property for the task.
- An @Option annotation, which specifies the option name and description.
- AndroidSdkPath, which specifies the path to Android SDK.
- ApksPath, which specifies the path to the .apks file generated in the previous step.
- An @Optional annotation, which specifies that the input property is optional.
- Url, which is an optional property to specify the URL that launches the instant app.
The original exec() method from the Exec task executes the command which the commandLine property specifies. You’ve overriden it to set commandLine property to depend on the url property.
Sync the project to make sure there are no errors.
Now you can add the tasks for running all build variants as instant apps. Add the following code at the end of the project.afterEvaluate block that you added earlier.
  android.applicationVariants.all { variant ->
    task "runinstant${variant.name.capitalize()}"(type: ExecInstantApp, dependsOn: "assembleSplits${variant.name.capitalize()}", group: "build") {
      workingDir project.rootDir
      androidSdkPath = android.sdkDirectory.path
      apksPath = "${project.buildDir}/outputs/splits/${variant.name}/app.apks"
    }
  }
This creates a new task named for each build variant, like runinstantInstantDebug, for example. Tasks are of type ExecInstantApp and depend on tasks for generating .apks files.
You’ve already done the work for running the ia command in the task, so it’s just a matter of setting the working directory, the SDK path and the .apks file path.
Sync the project again to make sure there are no errors.
You’re almost ready to run your app as an instant app! There is one more important thing to do before you can, however: Delete the FromDuskTillDawn app from the device. Otherwise, ia won’t be able to run the instant app since the installed version has higher a versionCode than the instant app.
Now run the runinstantInstantDebug gradle task:

You’ve run the app as an instant app! Even though it currently looks the same, when you exit the app you’ll notice that there is no app icon in the launcher. So you did it! Great job!