Physics-Based Animations in Android with DynamicAnimation: Getting Started
In this tutorial, you’ll learn how to use realistic, physics-based animations like fling animations and spring animations in your Android apps. By Jemma Slater.
Using Spring Animations
Now that you know how to implement fling animations, it’s time to try out the other key class contained in the DynamicAnimation library: SpringAnimation. Where fling animations are great for slowing animation gradually in one direction, spring animations work nicely in cases that need a natural bounce or a fluid feel.
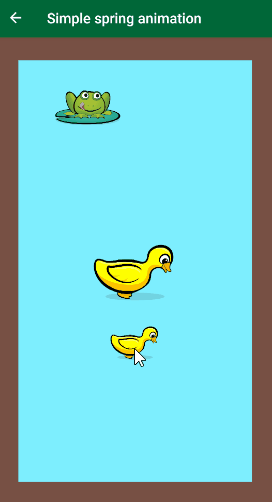
Build and run. This time, navigate to the simple spring animation screen, SpringAnimationActivity.kt. The pond here is a little busier, with a friendly frog hanging out at the top left and a mother and baby duck in the middle.

First, focus on the ducks. Here, the baby duckling wants to explore the pond but it needs to return to its mother when it’s done.
You can achieve this effect using spring animations. You’ll let the user pull the duckling away by dragging it with their finger. When the user releases the duckling, it springs back to its initial position next to its mother.
Dragging with Spring Animations
Detecting a drag event from the user doesn’t require a GestureListener, as in the previous fling example. Instead, you can use the MotionEvent passed through onTouch() of the touch listener directly.
In the project, open SpringAnimationActivity.kt. Look at detectDragOnBabyDuck() and you’ll see the baby_duck view has a touch listener set on it. The MotionEvents needed to achieve a drag effect on the baby duck are ACTION_DOWN, ACTION_MOVE and ACTION_UP.
Add the following code to each event in the when statement:
// 1
ACTION_DOWN -> {
  startPointX = event.x
  startPointY = event.y

  babyDuckSpringAnimationX?.cancel()
  babyDuckSpringAnimationY?.cancel()
}
// 2
ACTION_MOVE -> {
  baby_duck.x += event.x - startPointX
  baby_duck.y += event.y - startPointY
}
// 3
ACTION_UP -> {
  babyDuckSpringAnimationX?.start()
  babyDuckSpringAnimationY?.start()
}
Here’s what this code does:
- Here, you use
ACTION_DOWNto determine the starting position of the baby duck, as this event occurs when the user initially presses down on the view. You also cancel any existing animations here, in case the user intercepts the view while a previous animation is still running. - For
ACTION_MOVEevents, you change the position of the baby duck alongside the dragging movement of the user. This achieves the effect of dragging the view around. -
ACTION_UPevents trigger when the user releases their finger. That’s where the spring animation starts.
Build and run. Try dragging the baby duck around the pond, and see how you can change the position of the duck with your finger.
At this stage, it’s possible to drag the duckling off the screen. Don’t worry. This won’t be an issue once you’ve implemented the spring animations, enabling the duck to bounce back as soon as you release the view.

Applying Spring Forces
To implement spring animations, you need to initialize two variables: babyDuckSpringAnimationX and babyDuckSpringAnimationY. In setupBabyDuckSpringAnimations(), add the following:
babyDuckSpringAnimationX = SpringAnimation(baby_duck, DynamicAnimation.X).apply {
  spring = SpringForce(baby_duck.x).apply {
    dampingRatio = DAMPING_RATIO_HIGH_BOUNCY
    stiffness = STIFFNESS_VERY_LOW
  }
}

babyDuckSpringAnimationY = SpringAnimation(baby_duck, DynamicAnimation.Y).apply {
  spring = SpringForce(baby_duck.y).apply {
    dampingRatio = DAMPING_RATIO_HIGH_BOUNCY
    stiffness = STIFFNESS_VERY_LOW
  }
}
This code creates new SpringAnimation objects on the baby_duck view to animate the X and Y properties, similar to the FlingAnimations you created earlier.
A key difference here is that spring animations require you to set either a SpringForce or a final position before the animation starts.
SpringForce is an object from the DynamicAnimation library that sets the characteristics of the spring effect for the animation. Available characteristics are:
There are four options here: DAMPING_RATIO_HIGH_BOUNCY, DAMPING_RATIO_MEDIUM_BOUNCY, DAMPING_RATIO_LOW_BOUNCY and DAMPING_RATIO_NO_BOUNCY. The default is DAMPING_RATIO_MEDIUM_BOUNCY.
If you choose to set a custom value, be sure not to set the dampness to a negative number or your app will crash. You can, however, set the damping ratio to 0f and the view will oscillate forever!
There are four options here: STIFFNESS_HIGH, STIFFNESS_MEDIUM, STIFFNESS_LOW and STIFFNESS_VERY_LOW. The default is STIFFNESS_MEDIUM.
You can set your own float value, but this must not be negative or your app will crash.
- dampingRatio: Defines the rate to reduce the number of oscillations in the animation.
- stiffness: Defines the strength of the spring. The stiffer the spring, the more force it has and the quicker it moves the view to the final position.
- finalPosition: Sets the final position of the view after the animation.
The code above defines dampingRatio and stiffness explicitly, but passes the finalPosition in the SpringForce constructor. This is set to the initial position of the baby duck, which makes it spring back into place.
Build and run the app. Again, try dragging the baby duck around the pond. This time, the duckling bounces back to where it started when you release the view, even if you drag the view offscreen.
Try replacing the dampingRatio and stiffness values in the SpringForce objects to see what effect changing them has on the animation.
Animating Scale Changes
So far, you’ve learned to animate the X and Y properties, but these are not the only ways you can animate views.
Turn your focus to the frog now. You can use SpringAnimation to change the scaled size of a view when a user clicks on it. This is useful for drawing attention to a view when the user selects it, for example.
For your next step, you’ll use spring animation to change the size of the frog when the user clicks it.
Initialize frogSpringAnimationScaleX and frogSpringAnimationScaleY in setupFrogSpringAnimations():
val frogSpringForce = SpringForce().apply {
  dampingRatio = DAMPING_RATIO_HIGH_BOUNCY
  stiffness - STIFFNESS_VERY_LOW
}

frogSpringAnimationScaleX = SpringAnimation(frog, DynamicAnimation.SCALE_X).apply {
  spring = frogSpringForce
}
frogSpringAnimationScaleY = SpringAnimation(frog, DynamicAnimation.SCALE_Y).apply {
  spring = frogSpringForce
}
This creates a SpringForce with dampingRatio and stiffness and applies it to the two spring animation objects you created.
The properties of the frog view you want to animate are SCALE_X and SCALE_Y.
frogSpringForce is missing a finalPosition value. This should be set each time the user clicks, rather than when you initialize the animation, so it updates each time.
To do this, add this code to the frog click listener in onCreate():
val finalPosition = if (frogSpringAnimationScaleX?.spring?.finalPosition == 2f) 1f else 2f
frogSpringAnimationScaleX?.animateToFinalPosition(finalPosition)
frogSpringAnimationScaleY?.animateToFinalPosition(finalPosition)
This sets the finalPosition of the frog’s scale values to either 1f or 2f, depending on the previous finalPosition of the animation. The result is that each click on the frog makes it grow or shrink. Calling animateToFinalPosition() also starts the animation.
Build and run and tap on the frog. The spring animation gives the frog a nice bounce effect. Again, you can try out different dampingRatio and stiffness values here.
