UIKit Dynamics Tutorial: Getting Started
Learn how to make your user interfaces in iOS feel realistic with this UIKit Dynamics tutorial, updated for Swift! By James Frost.

Update note: This tutorial is an abbreviated version of a chapter from iOS 7 by Tutorials by Colin Eberhardt. It was updated for iOS 8 and Swift by James Frost, and checked against Xcode 6 beta 7.
The design goals of iOS encourage you to create digital interfaces that react to touch, gestures, and changes in orientation as if they were physical objects far beyond a simple collection of pixels. The end result gives the user a deeper connection with the interface than is possible through skin-deep skeuomorphism.
This sounds like a daunting task, as it is much easier to make a digital interface look real, than it is to make it feel real. However, you have some nifty new tools on your side: UIKit Dynamics and Motion Effects.
- UIKit Dynamics is a full physics engine integrated into UIKit. It allows you to create interfaces that feel real by adding behaviors such as gravity, attachments (springs) and forces. You define the physical traits that you would like your interface elements to adopt, and the dynamics engine takes care of the rest.
- Motion Effects allows you to create cool parallax effects like you see when you tilt the iOS 7 home screen. Basically you can harness the data supplied by the phone’s accelerometer in order to create interfaces that react to changes in phone orientation.
When used together, motion and dynamics form a powerhouse of user experience tools that make your digital interfaces come to life. Your users will connect with your app at a deeper level by seeing it respond to their actions in a natural, dynamic way.
Note: At the time of writing this tutorial, our understanding is we cannot post screenshots of iOS 8 since it is still in beta. All the screenshots here are from iOS 7, which should look very close to what things will look like in iOS 8.
Getting started
UIKit dynamics can be a lot of fun; the best way to start learning about them is to jump in feet-first with some small examples.
Open Xcode, select File / New / Project … then select iOS Application / Single View Application and name your project DynamicsDemo. Once the project has been created, open ViewController.swift and add the following code to the end of viewDidLoad:
let square = UIView(frame: CGRect(x: 100, y: 100, width: 100, height: 100))
square.backgroundColor = UIColor.grayColor()
view.addSubview(square)
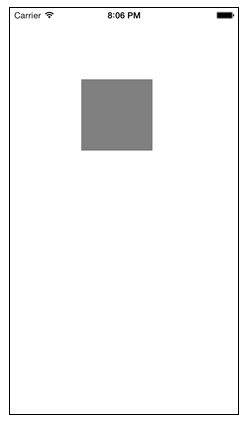
The above code simply adds a square UIView to the interface.
Build and run your app, and you’ll see a lonely square sitting on your screen, as shown below:
If you’re running your app on a physical device, try tilting your phone, turning it upside-down, or even shaking it. What happens? Nothing? That’s right — everything is working as designed. When you add a view to your interface you expect it to remain firmly stuck in place as defined by its frame — until you add some dynamic realism to your interface!
Adding gravity
Still working in ViewController.swift, add the following properties above viewDidLoad:
var animator: UIDynamicAnimator!
var gravity: UIGravityBehavior!
These properties are implicitly-unwrapped optionals (as denoted by the ! after the type name). These properties must be optional because you won’t be initializing them in our class’s init method. You can use implicitly-unwrapped optionals because we know that these properties won’t be nil after you’ve initialized them. This prevents you from having to manually unwrap their values with the ! operator each time.
Add the following to the end of viewDidLoad:
animator = UIDynamicAnimator(referenceView: view)
gravity = UIGravityBehavior(items: [square])
animator.addBehavior(gravity)
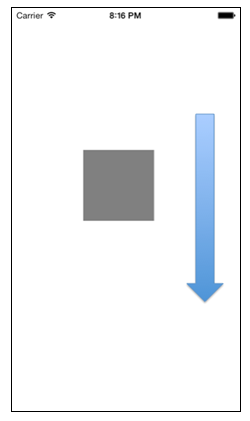
I’ll explain this in a moment. For now, build and run your application. You should see your square slowly start to accelerate in a downward motion until it drops off the bottom of the screen, as so:
In the code you just added, there are a couple of dynamics classes at play here:
-
UIDynamicAnimatoris the UIKit physics engine. This class keeps track of the various behaviors that you add to the engine, such as gravity, and provides the overall context. When you create an instance of an animator, you pass in a reference view that the animator uses to define its coordinate system. -
UIGravityBehaviormodels the behavior of gravity and exerts forces on one or more items, allowing you to model physical interactions. When you create an instance of a behavior, you associate it with a set of items — typically views. This way you can select which items are influenced by the behavior, in this case which items the gravitational forces affect.
Most behaviors have a number of configuration properties; for example, the gravity behavior allows you to change its angle and magnitude. Try modifying these properties to make your objects fall up, sideways, or diagonally with varying rates of acceleration.
NOTE: A quick word on units: in the physical world, gravity (g) is expressed in meters per second squared and is approximately equal to 9.8 m/s2. Using Newton’s second law, you can compute how far an object will fall under gravity’s influence with the following formula:
distance = 0.5 × g × time2
In UIKit Dynamics, the formula is the same but the units are different. Rather than meters, you work with units of thousands of pixels per second squared. Using Newton’s second law you can still work out exactly where your view will be at any time based on the gravity components you supply.
Do you really need to know all this? Not really; all you really need to know is that a bigger value for g means things will fall faster, but it never hurts to understand the math underneath.
Setting boundaries
Although you can’t see it, the square continues to fall even after it disappears off the bottom of your screen. In order to keep it within the bounds of the screen you need to define a boundary.
Add another property in ViewController.swift:
var collision: UICollisionBehavior!
Add these lines to the bottom of viewDidLoad:
collision = UICollisionBehavior(items: [square])
collision.translatesReferenceBoundsIntoBoundary = true
animator.addBehavior(collision)
The above code creates a collision behavior, which defines one or more boundaries with which the associated items interact.
Rather than explicitly adding boundary co-ordinates, the above code sets the translatesReferenceBoundsIntoBoundary property to true. This causes the boundary to use the bounds of the reference view supplied to the UIDynamicAnimator.
Build and run; you’ll see the square collide with the bottom of the screen, bounce a little, then come to rest, as so:

That’s some pretty impressive behavior, especially when you consider just how little code you’ve added at this point.