Introduction To UFPS: Unity FPS Tutorial
In this Unity FPS tutorial you’ll learn the basics of working with UFPS to build the basis for a solid first person shooter in Unity3D. By Anthony Uccello.
Obliterating hordes of sinister enemies with a shotgun or carefully sniping your opponent across the battlefield are immensely satisfying gaming experiences. Games that center around action-packed gun-slinging segments are defined as First-Person-Shooter (FPS). A close cousin is a third-person shooter — the difference is whether you’re looking at the character’s back or down the barrel of a gun.
When you make an FPS game, you sign yourself up for a substantial amount of work. However, you don’t have to start from scratch when you leverage the power of the Ultimate First Person Shooter Framework (UFPS)!
In this tutorial, you’ll learn what UFPS is and how to use it to create a basic Unity FPS sandbox game — “sandbox” refers to the fact that the player is limited to a contained area.
After this tutorial, you’ll be comfortable with:
- Using fundamental UFPS scripts to move the player and fire guns
- Working with
vp_FPcomponents - Adding bullet holes after a surface takes a shot
- Adding a player with standard FPS movement to a scene
- Adding a new gun and configuring some properties
- Adding a sniper rifle (which is better than just any old new gun) with zooming and cross-hair targeting
Prerequisites
You should be comfortable with scripting in C# and attaching components to GameObjects. If you’re new to Unity or need to refresh your memory, start with our getting started in Unity tutorial.
You’ll also need a license for “UFPS: Ultimate FPS” by Opsive, which you can get in the Unity Asset Store. This tutorial was written using UFPS version 1.7.
Lastly, you’ll need Unity 5.5.0 or a newer version.
Getting Started
UFPS is a Unity plugin that includes core logic to power a typical FPS game. Rather than painstakingly write scripts for every scenario, you can modify preloaded scripts to handle typical activities such as:
- Equipping guns
- Animating and firing guns
- Managing ammo and inventory
- Moving the player
- Managing the camera’s perspective
- Tracking the camera
- Managing events, such as getting hit by a ray gun
- Managing surfaces, e.g., slippery slopes and waterways
- Ragdoll and gravity physics
No amazing game was ever created in one step. The best way to build games is to focus on the basics, such as core gameplay, and then build it up from there. UFPS helps you with the basics and goes further by providing a larger framework to leverage.
Download the starter project: ReadyAimFire_Unity3D_starter.
Open the project in Unity and double-click the Main scene in the project to load the game scene.
Note: We cannot redistribute the source files for UFPS, so there is not a final project for this tutorial, nor are they part of the starter project. You will build this entire game yourself. :]
After finding UFPS in the Unity Asset Store, go to the downloads section and click the Download button. When it finishes, click the Import button, wait for it to display the package’s contents then click OK. It’s a large package so be patient.
Note: If you get the following warning about importing a complete project:

This happens when an asset includes Project Settings that will overwrite your open project settings. In this case, only Graphics and Tag settings will be overwritten, so you can safely select the Import button to continue importing UFPS.
After the import completes, you might get some warnings. These are from UFPS and can be ignored.
Select Save Scenes from the File menu to save your work. Click the Play button and marvel in the glory of a fresh project.
![A fresh project with UFPS installed :]](https://koenig-media.raywenderlich.com/uploads/2016/12/projectsetup-650x368.png)
Important Concepts
I’m sure you’re eager to get shooting (and scripting) but it’s important that you know these key concepts for the UFPS framework.
FP components
FP indicates a component belongs to a family of scripts that manage the actual first-person shooter object — aka the player. These components always begin with vp_FP. Among the most critical is the vp_FPController script that will be on the player object when it’s created.
States
States can be a confusing concept. Within many vp_FP components you’ll find a section named State. Here is an example of what it looks like:
An area where states can be added
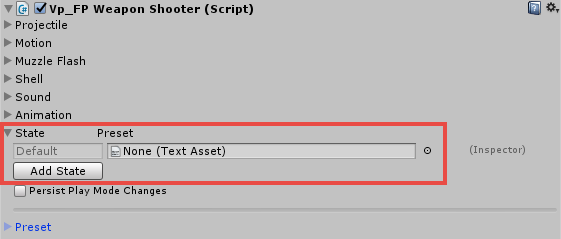
Certain vp_FP scripts have a state section that track the values that local variables should be for the state of that component at a given time. Think of it like this: when you zoom in and use a sniper rifle’s crosshairs, you would be in a “Zoom” state — the preset values for that state would raise and center the gun by changing its position and rotation. When you zoom, it’ll also animate the weapon’s movement.
Events
An event is a signal between objects that indicates something important happened and other objects might need to react. Take, for example, when something gets hit. The ‘getting hit’ part is the event — a signal, if you will. Other objects react based on how you’ve set up your game. This tutorial won’t cover events in detail.
OK, well done, partner.

Setting Up The Player Prefab
Type SimplePlayer into the Project browser’s search bar and then drag the SimplePlayer prefab into the scene in front of one of the targets.

Select the SimplePlayer GameObject in the Hierarchy and set its Position to (X = -26.6, Y = 1.3, Z = -21.3) and Rotation to (X = 0, Y = 0, Z = 0).

Delete the Camera GameObject from the Hierarchy. You don’t need it because the camera on SimplePlayer gives you a first-person perspective.

Press play and voila, you have an FPS game up and running!
Press play as soon as you fire or zoom to lock the cursor to the screen. Press Escape to regain control of the cursor.
Use the WASD keys to walk and press the left mouse button to fire the pistol and the right mouse button to zoom — you can fire while zoomed. You can also press Shift to run and Space to jump. Make sure you shoot the target :]

There is a lot of logic under the hood, but the beauty of UFPS is that it does a lot of heavy lifting for you. It lets you focus on more important matters, such as adding guns with custom behavior.
You might be surprised to learn that you don’t have to create animations for when the player moves or fires the gun. The movement you see is done with physics. That’s how UFPS does it!
UFPS starts you off with a pistol, but the starter project includes a shotgun and a sniper rifle prefab. You’ll put both to work shortly and will edit UFPS settings to perfect the animations.
Although you don’t need to animate the gun’s movement, you are on your own for hand animations. This tutorial will not cover hand animations, nor will UFPS do them for you. However, you’d want to consider them when you’re building an FPS for release.
Lastly, you do have the option to add complex animations with gun models. In that case, you’d need to include the hand with the model.