Navigation and Dynamic Features
In this tutorial, you’ll learn how to use an experimental version of Navigation Controller to navigate between dynamic feature modules. By Ivan Kušt.
DynamicNavHostFragment
You’re ready to start refactoring the sample project to use feature modules.
The next thing to do is to replace NavHostFragment with DynamicNavHostFragment. Open activity_main.xml, located in app/src/res/layout. Replace the following line:
android:name="androidx.navigation.fragment.NavHostFragment"
with:
android:name="androidx.navigation.dynamicfeatures.fragment.DynamicNavHostFragment"
Note that DynamicNavHostFragment supports everything that NavHostFragment supports, plus it can navigate to a destination from a feature module.
Build and run again. There are no visible changes yet, but you’ve laid the foundation for adding feature modules.

Migration to Dynamic Feature Modules
Now it’s time to add two dynamic feature modules:
- info: A feature module containing a screen with section details.
- notes: The feature module containing screens for adding section and garden notes.
Right-click on the app module in the project’s Hierarchy viewer and select New ▸ Module.
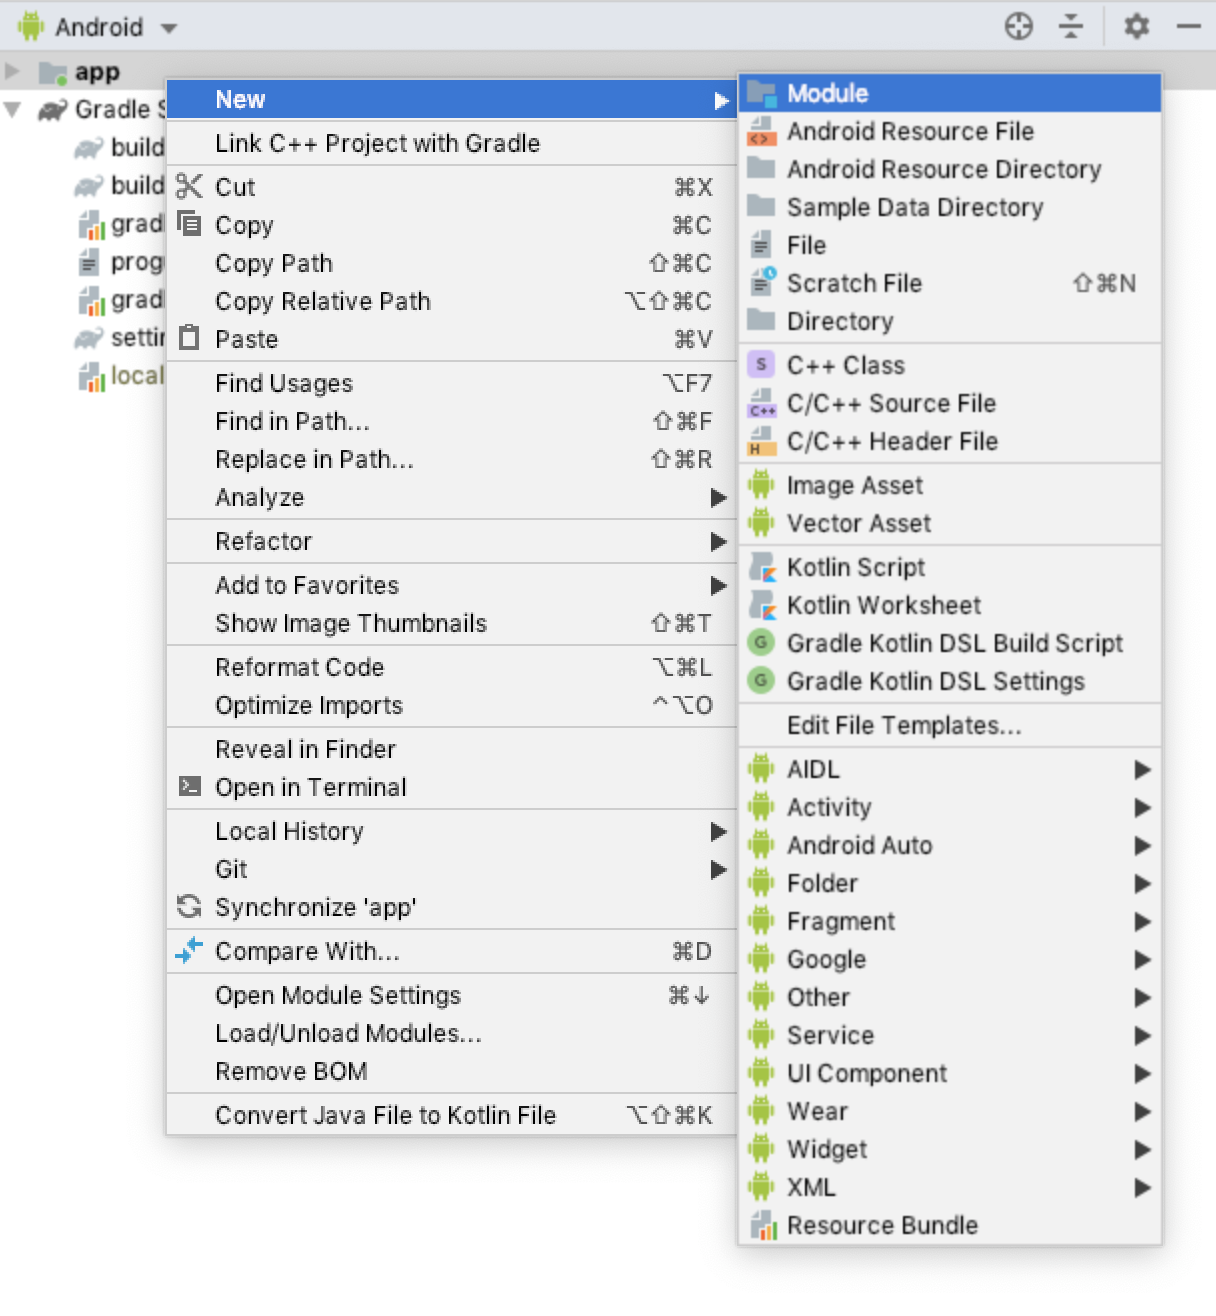
Select Dynamic Feature Module from the list and click Next.

Under Module name, enter info and under package name enter com.raywenderlich.android.gardenplanner.info.
Make sure you’ve selected API level 19 under Minimum API level to match the minimum API level in the app module. Click Next.

On the next screen, enter Info for Module title. Select Do not include module at install-time (on-demand only) under Install-time inclusion. Also check the Fusing checkbox.
This ensures that if the device is using Android version 4.4 or lower, which doesn’t support split APKs, the dynamic feature module will install immediately when app installs.

Click Finish and wait for Gradle to sync. Open build.gradle from the new module and add the following after the first apply plugin line:
apply plugin: 'kotlin-android'
apply plugin: 'kotlin-android-extensions'
This will add Kotlin support to the new feature module. Now, add the following inside the android section:
compileOptions {
  sourceCompatibility JavaVersion.VERSION_1_8
  targetCompatibility JavaVersion.VERSION_1_8
}

kotlinOptions {
    jvmTarget = "1.8"
}
This will prevent compile errors by syncing the project with the Gradle files. Sync the project.
Now, select the info package in the app module. Right-click and choose Refactor ▸ Move.

On the dialog that appears, select the second option, Move directory … to another source root and click OK.

In the Select Source Root dialog, select src/main/java from the info module and click OK.

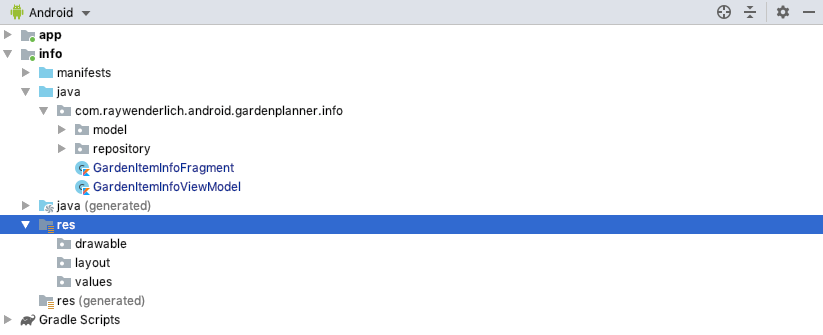
You’ll now see the contents of the info package in the info module.

Next, you’ll need to set up your layout and values folders.
To do this, right-click on the res folder in the info module and select New ▸ Directory.

For the name, type layout, then repeat the process and create another folder named values.
Now that you have these files set up in the app module, you want to create them in the info module as well.
Do this by dragging and dropping fragment_garden_item_info.xml from res/layout in the app module into the new res/layout folder in the info module. Press OK if a move dialog appears.
Then drag and drop res/values/info_string.xml from app module to res/values/ folder in info module and press OK if a move dialog appears.

You’ll have to fix imports for the resources you’ve moved, so open GardenItemInfoRepository and replace:
import com.raywenderlich.android.gardenplanner.R
with
import com.raywenderlich.android.gardenplanner.info.R
Do the same in GardenItemInfoFragment. This makes sure that you import the Resources file from the info module instead of the one from the app module.
Now, build and run to make sure there are no errors.

Before you move on to your next step, you have one more quick thing to do: Fix the screen that displays your information.
Start by opening nav_graph.xml from res/navigation.
Find the fragment tag with the following ID: gardenItemInfoFragment and add the following property to it:
app:moduleName="info"
It should now look like this:
<fragment
  android:id="@+id/gardenItemInfoFragment"
  android:name="com.raywenderlich.android.gardenplanner.info.GardenItemInfoFragment"
  app:moduleName="info" >

  <argument android:name="gardenSection"
    app:argType="com.raywenderlich.android.gardenplanner.model.GardenSection" />

</fragment>
Now build and run. You won’t see any changes when running your app from Android Studio. To test dynamic feature modules, you have to upload your app to the Play Store. You’ll do that next.
Testing Navigation and Dynamic Features
Once you’ve uploaded your app, you’re in luck! You can use Play Store to test a version of your app with dynamic features with internal app sharing.

Once you’ve uploaded a version of your app with dynamic features, you’ll get a link to use for testing. Download the app to your device using the URL and you’re ready to try your new features.
First, test downloading the info feature module on demand. To do this, tap on a tile that has a plant in it, then tap Info.

If you’re not ready to publish yet, you can set up a closed or internal test for your app. Google’s official documentation tells you how.
Including Graphs From Dynamic Features
To navigate from the main module to the dynamic feature modules, you will include the navigation graphs.
First, create a new dynamic feature module named notes. Repeat the steps you used to create the first dynamic module:
- Right-click on app module and select New ▸ Module.
- Select Dynamic Feature Module and click Next.
- Under Module name, type notes.
- Under Package name, type com.raywenderlich.android.gardenplanner.notes and click Next.
- For Module title, enter Notes and click Finish.
Again, wait for Gradle to sync. Open build.gradle in the new module and add the following after the first apply plugin line:
apply plugin: 'kotlin-android'
apply plugin: 'kotlin-android-extensions'
apply plugin: 'kotlin-kapt'
apply plugin: "androidx.navigation.safeargs.kotlin"
Add the following in the android section:
 on the Play Store
compileOptions {
    sourceCompatibility JavaVersion.VERSION_1_8
    targetCompatibility JavaVersion.VERSION_1_8
}

kotlinOptions {
    jvmTarget = "1.8"
}
Also, add the following dependencies:
implementation 'androidx.room:room-runtime:2.2.3'
implementation "androidx.room:room-ktx:2.2.3"
  kapt "androidx.room:room-compiler:2.2.3"
Select the notes package in the app module. Right-click and choose Refactor ▸ Move. Select the second option Move directory … to another source root again and click OK.
Finally, in the Select Source Root dialog, select src/main/java in the notes module and click OK.

Create three new folders in the res folder of the notes module: layout, navigation and values.

Now, you need to set up the new module, just as you did for the previous modules. To do this:
- Drag and drop res/values/notes_strings.xml to the new values folder.
- Next, drag and drop res/navigation/notes_nav_graph.xml to the new navigation folder.
- Finally, drag and drop the following layout files to the new layout folder:
- bottom_sheet_add_note.xml
- fragment_note_details.xml
- fragment_notes.xml
- item_note.xml

Finally, replace the import:
import com.raywenderlich.android.gardenplanner.R
with:
import com.raywenderlich.android.gardenplanner.notes.R
in AddNoteDialogFragment, NoteAdapter, NoteDetailsFragment and NotesFragment.
Again, you’re making sure that the app is using the files from the right module.