How to Create a Framework for iOS
Learn how to create a framework for iOS, allowing you to elegantly and efficiently package up and redistribute your code across different apps and teams By Sam Davies.
In the previous tutorial, you learned how to create a reusable knob control. However, it might not be obvious how to make it easy for other developers to reuse it.
One way to share it would be to provide the source code files directly. However, this isn’t particularly elegant. It exposes implementation details you might not want to share. Additionally, developers might not want to see everything, because they may just want to integrate a portion of your brilliant code into their own codebase.
Another approach is to compile your code into a static library for developers to add to their projects. However, this requires you to distribute public header files in tandem, which is awkward at best.
You need a simpler way to compile your code, and it needs to be easy to share and reuse across multiple projects. What you need is a way to package a static library and its headers in a single component, which you can add to a project and use immediately.
Good thing that’s the focus of this tutorial. What you’ll learn will help you solve this exact problem, by making use of frameworks. OS X has the best support for them because Xcode offers a project template which includes a default build target and can accommodate resource files such as images, sounds and fonts. You can create a framework for iOS, but it’s a touch trickier; if you follow along you’ll learn how to work around the many roadblocks.
As you work through this tutorial, you’ll:
- Build a basic static library project in Xcode
- Build an app with a dependency on this library project
- Discover how to convert the static library project into a fully-fledged framework
- Finally, at the end, you’ll see how to package an image file to go along with your framework in a resource bundle
Getting Started
The main purpose of this tutorial is to explain how to create a framework for use in your iOS projects, so unlike other tutorials on the site, there will only be a small amount of Objective-C code used throughout the tutorial, and this is mainly just to demonstrate the concepts we’ll cover.
Start by downloading the source files for the RWKnobControl available here. As you go through the process of creating the first project in the section Creating a Static Library Project, you’ll see how to use them.
All of the code, and project files you’ll create whilst making this project are available on Github, with a separate commit for each build-stage of the tutorial.
What is a Framework?
A framework is a collection of resources; it collects a static library and its header files into a single structure that Xcode can easily incorporate into your projects.
On OS X, it’s possible to create a Dynamically Linked framework. Through dynamic linking, frameworks can be updated transparently without requiring applications to relink to them. At runtime, a single copy of the library’s code is shared among all the processes using it, thus reducing memory usage and improving system performance. As you see, it’s powerful stuff.
On iOS, you cannot add custom frameworks to the system in this manner, so the only dynamically linked frameworks are those that Apple provides.
However, this doesn’t mean frameworks are irrelevant to iOS. Statically Linked frameworks are still a convenient way to package up a code-base for re-use in different apps.
Since a framework is essentially a one-stop shop for a static library, the first thing you’ll do in this tutorial is learn how to create and use a static library. When the tutorial moves on to building a framework, you’ll know what’s going on, and it won’t seem like smoke and mirrors.
Creating a Static Library Project
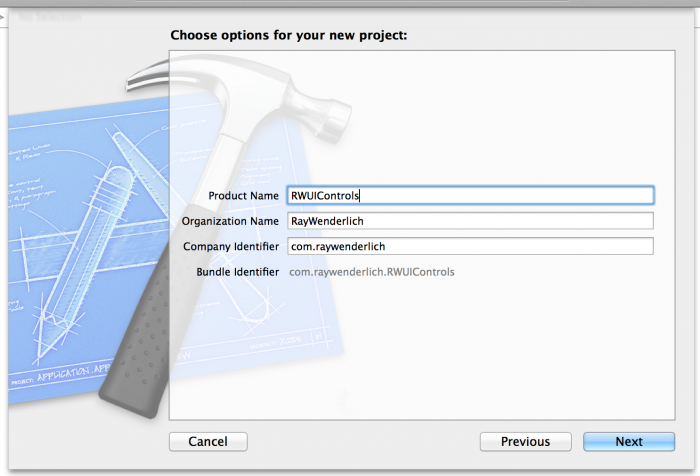
Open Xcode and create a new static library project by clicking File\New\Project and selecting iOS\Framework and Library\Cocoa Touch Static Library.

Name the product RWUIControls and save the project to an empty directory.
A static library project is made up of header files and implementation files, which are compiled to make the library itself.
To make life easier for developers that use your library and framework, you’re going to make it so they only need to import a single header file to access all the classes you wish to make public.
When creating the static library project, Xcode added RWUIControls.h and RWUIControls.m. You don’t need the implementation file, so right click on RWUIControls.m and select delete; move it to the trash if prompted.
Open up RWUIControls.h and replace the contents with the following:
#import <UIKit/UIKit.h>
This imports the umbrella header of UIKit, which the library itself needs. As you create the different component classes, you’ll add them to this file, which ensures they’ll be accessible to the libraries users.
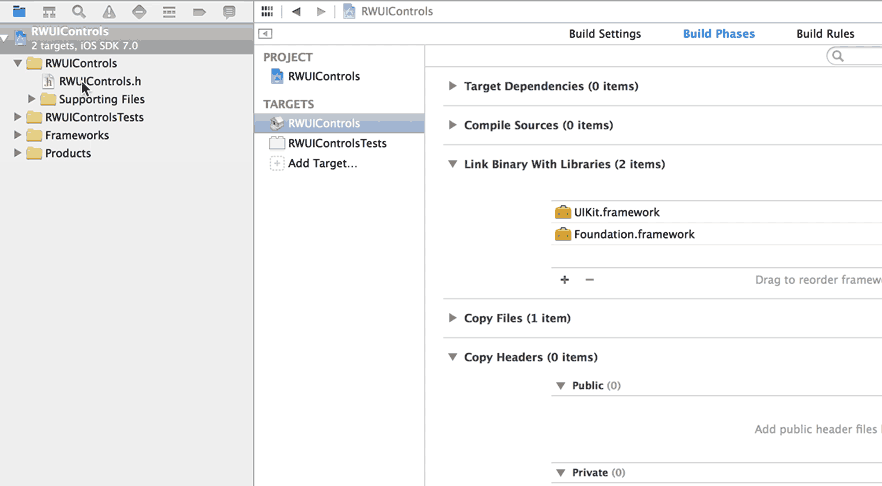
The project you’re building relies on UIKit, but Xcode’s static library project doesn’t link against it by default. To fix this, add UIKit as a dependency. Select the project in the navigator, and in the central pane, choose the RWUIControls target.
Click on Build Phases and then expand the Link Binary with Libraries section. Click the + to add a new framework and navigate to find UIKit.framework, before clicking add.

A static library is of no use unless it’s combined with header files. These compile a manifest of what classes and methods exist within the binary. Some of the classes you create in your library will be publicly accessible, and some will be for internal use only.
Next, you need to add a new phase in the build, which will collect the public header files and put them somewhere accessible to the compiler. Later, you’ll copy these into the framework.
While still looking at the Build Phases screen in Xcode, choose Editor\Add Build Phase\Add Copy Headers Build Phase.
Note: If you find the option is grayed out, try clicking in the white area directly below the existing build phases to shift the focus, and then try again.

Drag RWUIControls.h from the navigator to the Public part of the panel to place it in the public section under Copy Headers. This ensures the header file is available to anybody who uses your library.
Note: It might seem obvious, but it’s important to note that all header files included in any of your public headers must also be made public. Otherwise, developers will get compiler errors while attempting to use the library. It’s no fun for anybody when Xcode reads the public headers and then cannot read the headers you forgot to make public.