UIAppearance Tutorial: Getting Started
In this UIAppearance tutorial, you’ll learn how to make your app stand out by using Swift to customize the look and feel of standard UIKit controls. By Ron Kliffer.
Although skeuomorphism in iOS apps is a thing of the past, that doesn’t mean you’re limited to the stock appearance of controls in your iOS app.
True, you can develop your own controls and app stylings from scratch, but Apple recommends you use standard UIKit controls, and take advantage of the various customization techniques in iOS. This is because UIKit controls are highly efficient, and your customizations to the controls should be mostly future-proof.
In this UIAppearance tutorial, you’ll use some basic UI customization techniques to customize a plain Pet Finder app and make it stand out from the pack! :]
As an added bonus, you’ll learn how to automatically switch your app to a dark theme when opened at night.
Getting Started
Download the starter project for this tutorial here. The app has many of the standard UIKit controls and looks extremely vanilla.
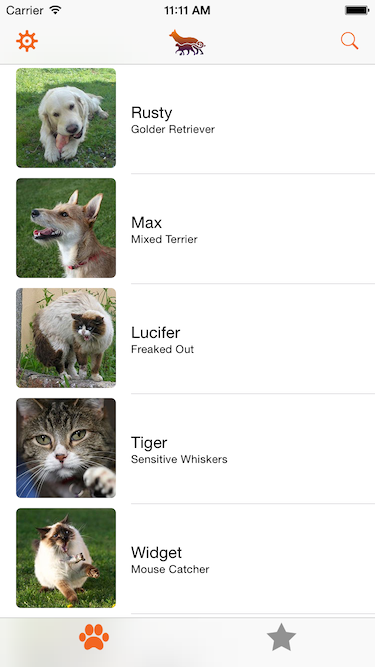
Open the project and have a look around to get a feel for its structure. Build and run the app, you’ll see the main UI elements of Pet Finder:

There’s a navigation bar and a tab bar. The main screen shows a list of pets. Tap a pet to see some details about it. There’s a search screen as well and — aha! A screen that allows you to select a theme for your app. That sounds like a pretty good place to start!
UIAppearance: Supporting Themes
Many apps don’t allow users to select a theme, and it’s not always advisable to ship an app with a theme selector. However, there are cases where themes could be very useful. You might want to test different themes during development to see which ones work best for your app. You might A/B test your app with your beta users to see which style is the most popular. Or you might want to ease your user’s eyes by adding a dark theme for night times.
In this UIAppearance tutorial, you’ll create a number of themes for your app that you can try out to see which one is most aesthetically pleasing.
Select File\New\File… and choose iOS\Source\Swift File. Click Next and type Theme as the name of the file. Finally click Create.
Replace the contents of the file with the following:
import UIKit

enum Theme: Int {
  //1
  case `default`, dark, graphical

  //2
  private enum Keys {
    static let selectedTheme = "SelectedTheme"
  }

  //3
  static var current: Theme {
    let storedTheme = UserDefaults.standard.integer(forKey: Keys.selectedTheme)
    return Theme(rawValue: storedTheme) ?? .default
  }
}
Let’s see what this code does:
- Defines three types of themes – default, dark and graphical
- Defines a constant to help you access the selected theme
- Defines a read-only computed type property for the selected theme. It uses
UserDefaultsto persist the current theme, and returns the default theme if none were previously selected.
Now you have your Theme enum set up, let’s add some style to it. Add the following code to the end of Theme before the closing brace:
var mainColor: UIColor {
  switch self {
  case .default:
    return UIColor(red: 87.0/255.0, green: 188.0/255.0, blue: 95.0/255.0, alpha: 1.0)
  case .dark:
    return UIColor(red: 255.0/255.0, green: 115.0/255.0, blue: 50.0/255.0, alpha: 1.0)
  case .graphical:
    return UIColor(red: 10.0/255.0, green: 10.0/255.0, blue: 10.0/255.0, alpha: 1.0)
  }
}
This defines a mainColor that’s specific to each particular theme.
Let’s see how this works. Open AppDelegate.swift and add the following line to application(_:didFinishLaunchingWithOptions:):
print(Theme.current.mainColor)
Build and run the app. You should the following printed to the console:
UIExtendedSRGBColorSpace 0.341176 0.737255 0.372549 1
At this point, you have three themes and can manage them through Theme. Now it’s time to go use them in your app.
Applying Themes to Your Controls
Open Theme.swift, add the following method to the bottom of Theme:
func apply() {
  //1
  UserDefaults.standard.set(rawValue, forKey: Keys.selectedTheme)
  UserDefaults.standard.synchronize()

  //2
  UIApplication.shared.delegate?.window??.tintColor = mainColor
}
Here’s a quick run-through of the above code:
- Persist the selected theme using
UserDefaults. - Apply the main color to the
tintColorproperty of your application’s window. You’ll learn more abouttintColorin just a moment.
Now the only thing you need to do is call this method.
Open AppDelegate.swift and replace the print() statement you added earlier with the following:
Theme.current.apply()
Build and run the app. You’ll see your new app looks decidedly more green:

Navigate through the app. There’s green accents everywhere! But you didn’t change any of your controllers or views. What is this black — er, green — magic?! :]
Applying Tint Colors
Since iOS 7, UIView has exposed the tintColor property. This is often used to define the primary color for interface elements throughout an app.
When you specify a tint for a view, it’s automatically propagated to all subviews in that view’s view hierarchy. Since UIWindow inherits from UIView, you can specify a tint color for the entire app by setting the window’s tintColor. That’s exactly what you did in apply() above.
Click on the Gear icon in the top left corner of your app. A table view with a segmented control slides up. When you select a different theme and tap Apply, nothing changes. Time to fix that.
Open SettingsTableViewController.swift and add these lines to applyTheme(_:), just above dismissAnimated():
if let selectedTheme = Theme(rawValue: themeSelector.selectedSegmentIndex) {
  selectedTheme.apply()
}
Here you call the method you added to Theme, which sets the selected theme’s mainColor on the root UIWindow.
Next, add the following line to the bottom of viewDidLoad(). This will select the theme persisted to UserDefaults when the view controller is first loaded:
themeSelector.selectedSegmentIndex = Theme.current.rawValue
Build and run the app. Tap the settings button, select Dark, and then tap Apply. The tint in your app will change from green to orange right before your eyes:
Eagle-eyed readers likely noticed these colors were defined in mainColor, in Theme.
But wait, you selected Dark, and this doesn’t look dark. To get this effect working, you’ll have to customize a few more things.