App Mockup Tools Reviews Part 2: Briefs, OmniGraffle, and Balsamiq
We review three of the most popular iOS app mockup tools: briefs vs omnigraffle vs balsamiq. Find out which is the best! By Riccardo D'Antoni.
Update 3/16/14: Congrats to the lucky winners who won a free copy of Blueprint or AppCooker: brente, tylerclark, quickfinga, Chamorro702, jim, grzehotnik, smick, davsys01, armilam, and vmacavero! We will be in touch to deliver your prizes soon. Thank you to everyone for entering! :]
In the first part of this series, I reviewed several popular app mockup tools:
- Blueprint
- AppCooker
- FluidUI
- Photoshop
- Handmade Sketches
These are all great tools, but there’s a lot more than that!
So in this second part of the series, we’re going to take at three more mockup tools:
- Briefs
- OmniGraffle
- Balsamiq Mockups
The special thing about these particular tools is that they can be used to make all kinds of mockups – even for desktop apps or websites.
I’ll give a review of each app, then at the end of the article I’ll share my personal recommendation on which is the best app mockup tool for you.
And best of all – we have some giveaways at the end! Keep reading to see how you can enter to win.
Briefs by MartianCraft
Briefs is a $199, first-class Mac application that makes mocking up really easy on platforms… and yes, even fun!
Like the other apps highlighted in part 1, you can create simple mockups and deliver iterations to your design. Even sharing your projects with clients can be painless with the free companion iOS app Briefscase.
Briefs is a desktop application, which presents several advantages. For example, you can enjoy the comfort of working with a bigger screen and other synergic desktop utilities. But there’s a drawback as well; you can’t make changes on the fly as you can with Blueprint or AppCooker.
MartianCraft always keeps Briefs up to date with new OS and hardware releases. The app offers several templates both for mobile and desktop platforms.

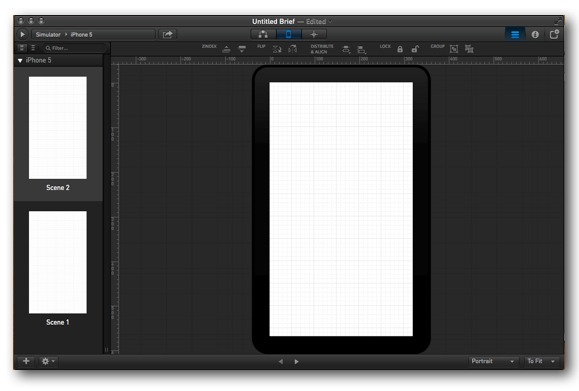
Briefs’ primary structure is a timeline with multiple scenes, each of which represent a single app visual state. In turn, they contain many actors to deal with interactions.
I’ve found Briefs’ menus to be intuitive and essential, but they don’t sacrifice functionality. In the upper right-hand corner, you’ll find the mainmenu:

It contains:
- Scene list: This allows easy visualization and navigation among scenes.
- Inspector: This allows you to change scene and actor properties.
- Assets browser: This is where to browse a sizable library of actors.
Inside the Briefs library there are four sub-libraries: Android, Blueprint, Desktop and iOS, so this is great for cross-platform projects. You’re not forced to use a style but it’s possible to mix elements in a single mockup.

With the inspector, it’s easy to tweak the settings on your actors:
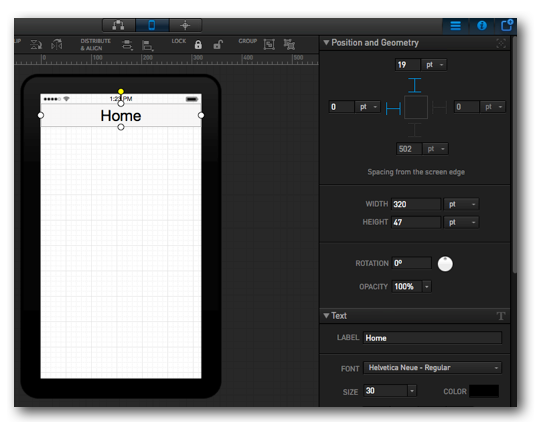
You can use a handy toolbar that allows to flip, change the actor z, flip, lock in place and even group/un-group actors.

If you can’t find a specific actor you need, there is no need to panic or declare failure, Briefs has the solution:


- Create a new folder and insert your assets
- Go into Managed Asset Folder and search for the folder you previously created, and voilà, the custom actors are ready for use!
Briefs auto-saves your project, so when it’s re-opened you’ll find the last available project. You can also save your project as a brief file and load it on another computer.
Briefs’ main menu allows you to move and interact with your mockup in an effective way. You can switch between: Timeline, Single Scene and Blueprint.

Timeline, where all your scenes and their connections are highlighted.

Single scene, where you can work in a “single view” you select from the scene list or timeline.
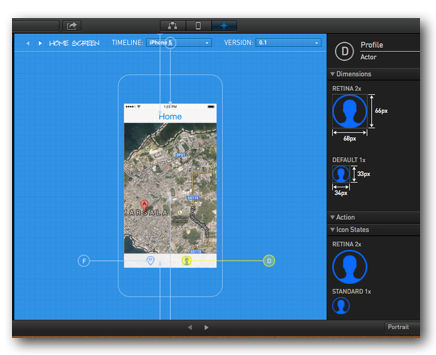
Blueprint, a great tool that will schematize all the app components (per scene) and highlight their properties: sizes, colours, fonts, spacing … both for non-retina and retina display.
It’s a phenomenal method to communicate your design to clients and other developers in a clear way. In addition, versioning features allow you to track documents with ease.
How about this for useful? You can generate a PDF automatically, to contain all of this information, which can be a super-handy way to communicate to pixel-precision between developers and designers. Just do this: File > Export as PDF.

Example Blueprint PDF file download
You can also add interactivity to your mockups, which you can then preview in the companion app Briefscase. This is a great way to show off your mockups to clients or friends. You can do this in two ways:
Select Actor > Add action

Select Actor > New Hotspot Actor

- Select an actor and the option from the main menu:
- Create a hotspot (imagine it as a touch sensitive area)
Then just decide what kind of action to trigger and set up its properties (delay, duration, type of transition …).

How Does Briefs Stack Up?
It took me 25 minutes to get used to Briefs’ dynamics and finish the mockup of my sample app without watching any tutorials. Initially, like with what happened with Groosoft’s Blueprint, I struggled a bit with actions and scenes linkage, but I figured it out after a while.
This tool is outstanding and makes sharing projects really easy. Either use classic sharing mediums, like email, IM or AirDrop, or download the free iOS app Briefscase for real-time interaction and the ability to get immediate feedback on your design!
If you want to learn more about Briefs and Briefscase, check out this cool demo video I made showing off the final results from the sample app:

Briefs – More Info
- Briefs is a PAID app that costs $199, and includes a full functional demo.
- Briefscase is the free Briefs companion iOS app that lets you view mockups created with Briefs.
OmniGraffle 6 by Omni Group

OmniGraffle is so much more than a wireframing tool. You can use it to draft, chart, brainstorm, and much more! It’s one of the four productivity apps from Omni Group.
OmniGraffle comes in two flavors:
- iPad version: The iPad version has fewer functionalities but gives you the power of working on the go. You can find it on the iOS App Store costs $49.99.
- Mac version: The Mac version comes in two flavors – a normal version and a Pro version (read about the differences here). You can find it on the Mac App Store for $99.99, with the possibility to upgrade to Pro with $89.99 via in-app purchase. Alternatively, you can buy these directly from the Omni Store, which has the advantage of considerable volume discounts.
Since OmniGraffle is quite vast, for the sake of simplicity I will cover only those functionalities that will help me to build my simple tracking app mockup.
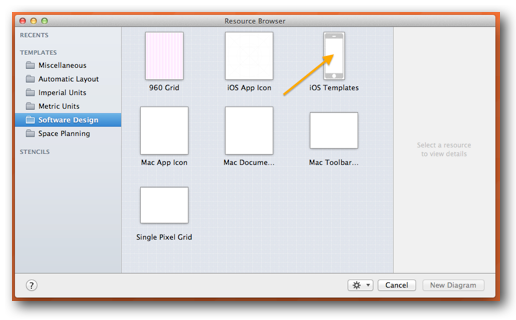
Every time you open the app for a new project, the Resource Browser prompts you to choose a suitable template. Note that you can create your own templates, in order to start with documents configured to meet your needs. For this article, we’ll go with the iOS template.
At a first glance, I thought Omni reached the right balance between function, overall aesthetic and usability. However, I personally prefer the Briefs’ darker UI colour, because I think it lets you focus more on your mockup contents.
Menus are intuitive and the main interface is dividable into four principal parts:
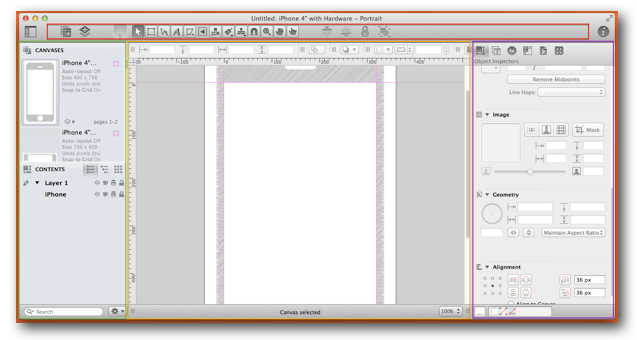
- In yellow, the canvas is where you interact with your mockups elements
- In red, the toolbar is where to find the main tools to customize and facilitate your work (zoom, shape and line tools, text tool, bring to front and send to back options …)
- In green, the sidebar is where to find and organize canvasses and their individual layers
- In purple, the inspector tunes the mockup element’s basic properties (fill, stroke, shapes, lines, images, alignments). Here you also add stencils, modify the project typography and set up other advanced properties
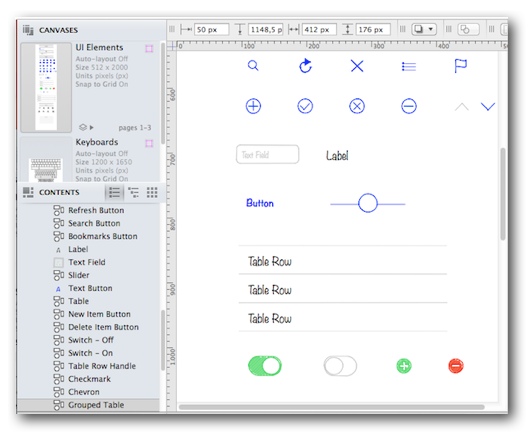
The inspector has a Stencils Library, which contains a plethora of elements for your wireframes.

If you feel inclined to add other elements, simply drag and drop custom images from your desktop. Another option is to go to Graffletopia and subscribe to their service. It costs only $24 dollars a year, and you’ll be able to use hundreds of stencils on your both Mac and iPad. If you’re more of a minimalist, then just buy single stencil kits.
In spite of the variety of stencils, I’ve found AppCooker and Blueprint libraries more comprehensive for iOS-only projects. However, with OmniGraffle you can reach a higher level of elements customization, and integrating elements from outside sources is as easy as dragging and dropping.
All in all, I found working with OmniGraffle rather enjoyable, because the software acted as I expected, and it helped me with repeating tasks. Here is an example that highlights its usefulness. This happened while I was positioning arrows for the tableview below:
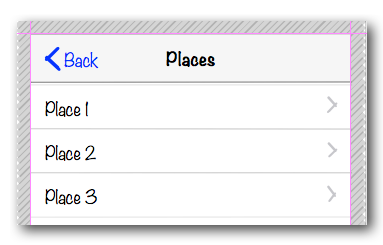
- I dragged and dropped the first arrow
- I copied and positioned the second arrow
- I copied the third, and *Puff* it was already in the right place, since it noticed the first two arrows aligned! :D
It might seem to be a simple thing, but try to imagine this kind of behavior in a bigger project, or in every day design tasks — it will save you a lot of time and repetitive click-click-clicking.
Going forward, the sidebar will help you interact quickly with your canvasses:

You can add new canvasses and layers easily, while keeping your whole project organized.
Much like Photoshop, elements layer from back to front; you can hide, lock and edit them granularly. If you need to print the project, you can define if a specific layer should print. One stellar feature is shared layers (represented in orange), so when you add or modify something in that layer, it’s shared automatically across canvasses.
I must admit that I would love to see more iOS components built into OmniGraffle. For instance, it was difficult to find the iOS7 segmented control, so I had to add it externally. However, OmniGraffle compensated for this deficiency with the ability to customize stencils libraries extensively.
When the canvasses are ready, you can start to link them via actions.

When you click on an element from the advanced properties inside the inspector, you’ll find the sub-menu actions. That is where to choose which action to perform when an element is clicked, and it allows you to add basic interactivity to your wireframe. You can choose from different actions:
- Open a URL
- Open a File
- Run a Script
- Jump Elsewhere
- Show or Hide Layers
With the help of the option Jumps Elsewhere, it’s possible to create a prototype from your wireframe. For mobile prototypes, it can also be useful to use Show or Hide Layers. For instance, if you need to show an alert view when the user performs a specific action.
Last but not least, OmniGraffle projects are very portable and exportable to a variety of different formats.
