Android Debug Bridge (ADB): Beyond the Basics
In this tutorial, you’ll learn how to communicate with your device using Android Debug Bridge (ADB). By Lance Gleason.
ADB Over Wi-Fi
One common scenario is connecting to a phone or tablet over Wi-Fi. For example, if you’re using the Linux support for Chromebooks, it’s the only way you can use ADB on physical devices.
If you’re on a public network, make sure your device doesn’t have any sensitive data. If you’re on a private network with a device that has sensitive data, remote ADB will be enabled on any network you join until you restart your device.
Make sure your physical device is connected to the same network as your development machine. With the device connected to your machine via USB, type ./adb tcpip 5555 in your terminal and execute it.
Behind the scenes, the daemon on your device will restart and if needed, ask for ADB authorization.
Next, get the device’s IP address. Type ./adb shell ifconfig and execute (or ./adb shell ip addr if it is running a version of Android older than M/API 23):
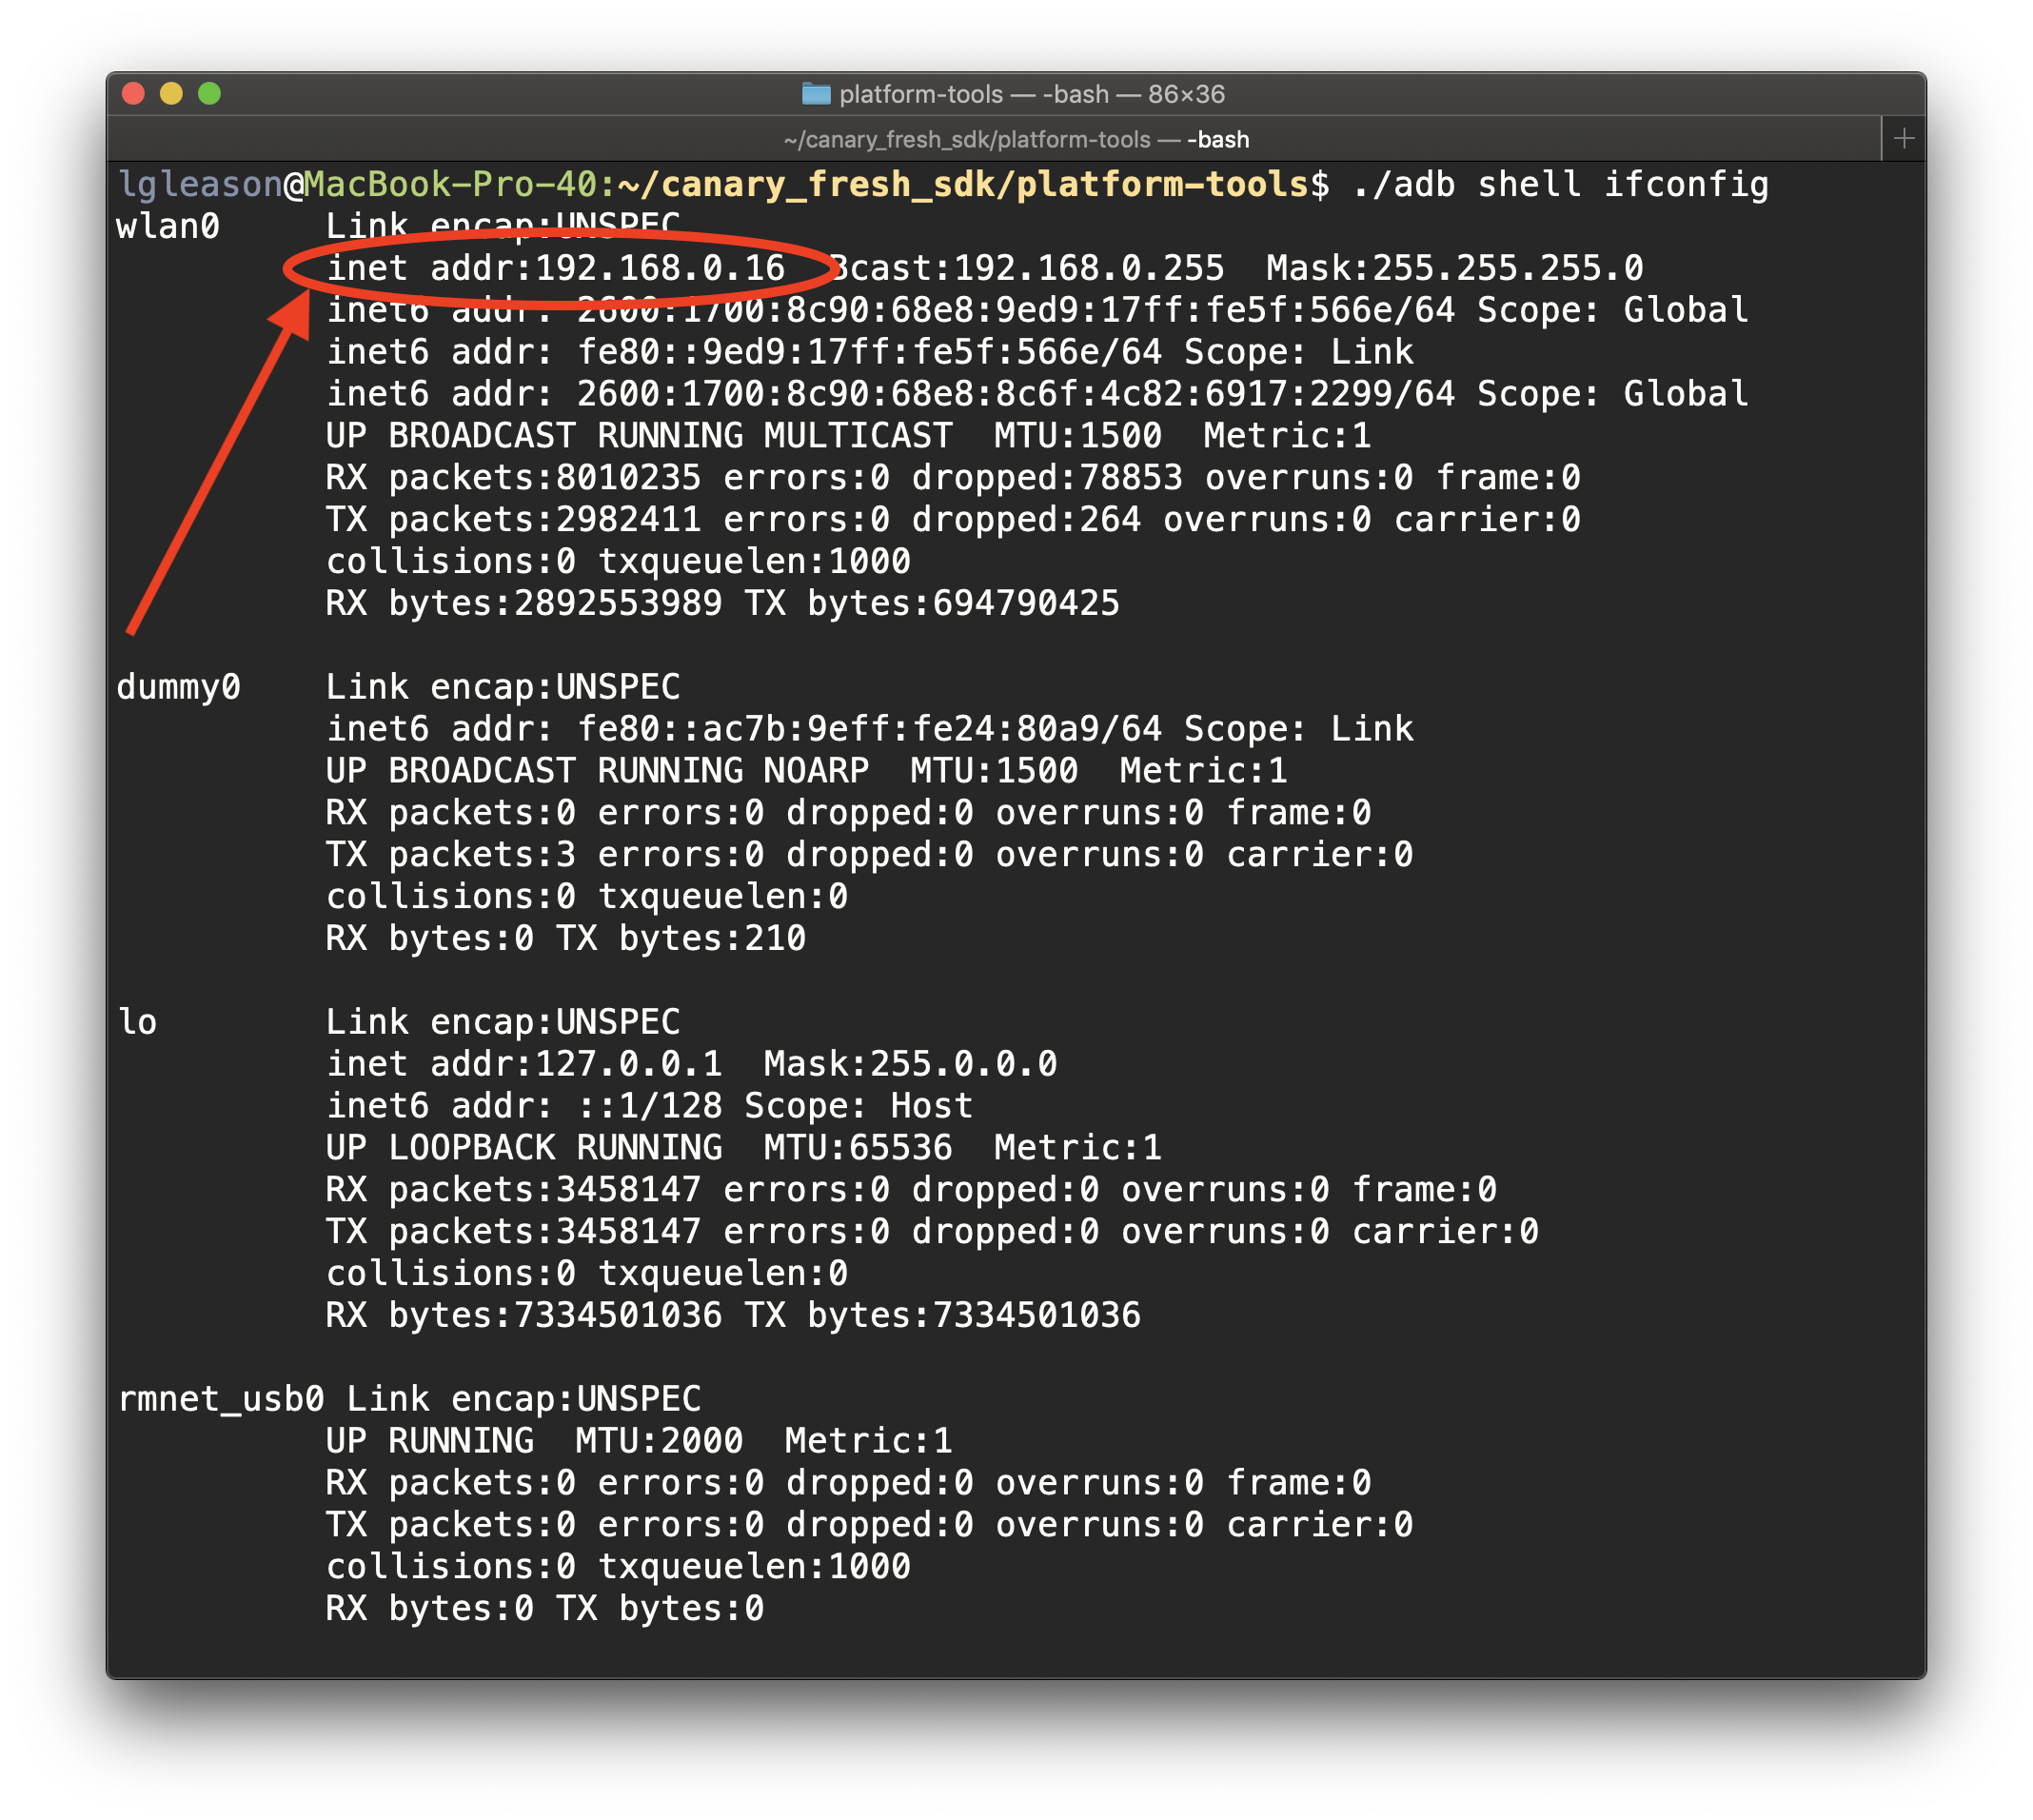
The Wi-Fi controller will usually be your wlan0 controller. Use the value for inet addr:, which in this case is 192.168.0.16.
Unplug your device, type ./adb connect {your device IP address} and execute it:

If your device isn’t set up to automatically authenticate ADB from your machine, the command will come back with a message stating that it failed to authenticate on your device. Your device will display a message asking you to authenticate.

Once you hit OK, you’ll have an authorized connection. To verify this, type ./adb devices and execute it:

You’ve now fully attached your device. Congrats! You’re amazing!
Open Android Studio, execute any project and you’ll see your device connected via Wi-Fi:

ADB Over Virtual Devices on a Remote Machine
Android virtual devices make it easy to test many different device configurations without needing to have multiple phones to test on. However, many virtual device configurations will take one to two gigabytes of memory and increase the host machine’s CPU usage.
To get around this, run your virtual devices on a remote machine.
If you don’t have the remote machine, following along will help you to better understand the concepts surrounding Android virtual devices, and you can leave the exercise for another time.
- A ssh client and server.
- Android Studio.
- At least two configured virtual devices.
- The ability to remotely access ports in the range of 5000 to 7000.
When you run a virtual device, it uses two ports. The Android Console uses the first port to perform commands on the virtual device such as restarting it or shutting it down. The second port is for ADB commands.
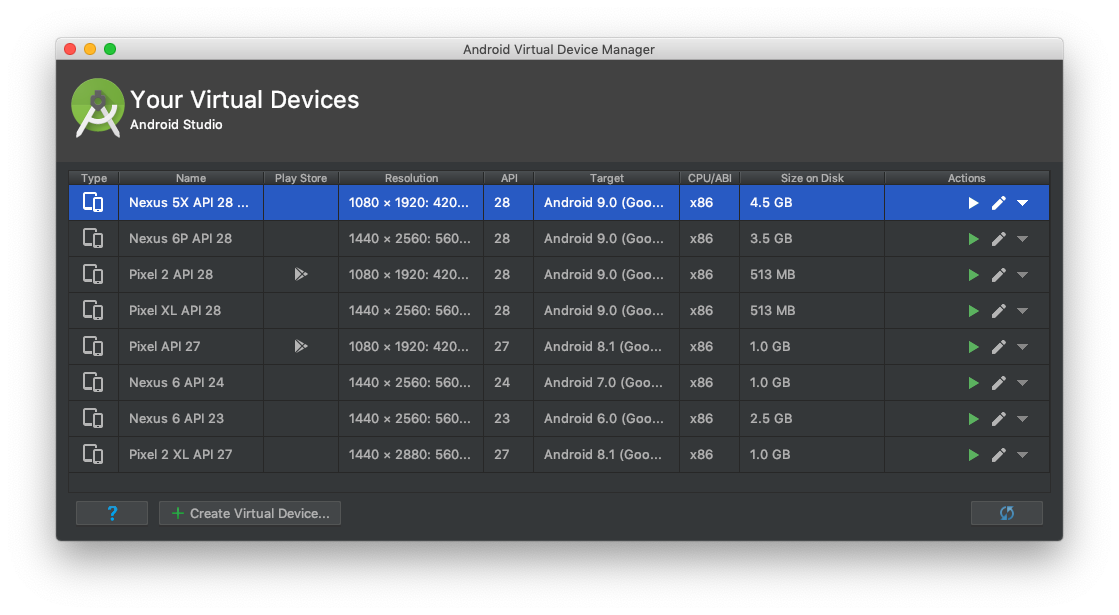
First, prepare your remote machine by closing any open virtual devices. Next, open the Android Virtual Device Manager by selecting Tools ▸ AVD Manager:
After launching the emulator, select the Settings using the ... button:

At the top of the settings window, you’ll see the emulator name along with :5554, in this case. That’s the port for an Android Console. Your ADB port will be that number plus one. For the emulator above, it’s 5555.
Now, start another virtual device and open its settings:

This will have am Android Console port of 5556 and an ADB port of 5557. As you open more virtual devices, these numbers will continue to increase.
Now, perform an ssh port forward from this remote machine back to your development machine.
To start, get the IP address of your development machine. Then, on your remote machine, perform an ssh port forward by typing ssh -R 6554:localhost:5554 -R 6555:localhost:5555 {your username}@{your dev machine IP address} and executing it:

This is a technique called SSH tunneling. In essence, you’re creating a tunnel that’s going through an encrypted SSH connection.
While the SSH connection is active, requests on port 6554 and 6555 on your development machine will forward to port 5554 and 5555 on your remote machine.
To get a feel for how the console works, on your development machine, type telnet localhost 6554 and execute it:

You’re now in the Android Console. Now that you’re in here you can execute commands to control your virtual device. Things you can do with this include simulating hardware events, simulating crashes etc. Check out the emulator console documentation to learn about the the various things you can do to control your console.
Type exit to exit the console:

Use the ./adb connect localhost:6555 command to connect to your tunneled remote virtual device:

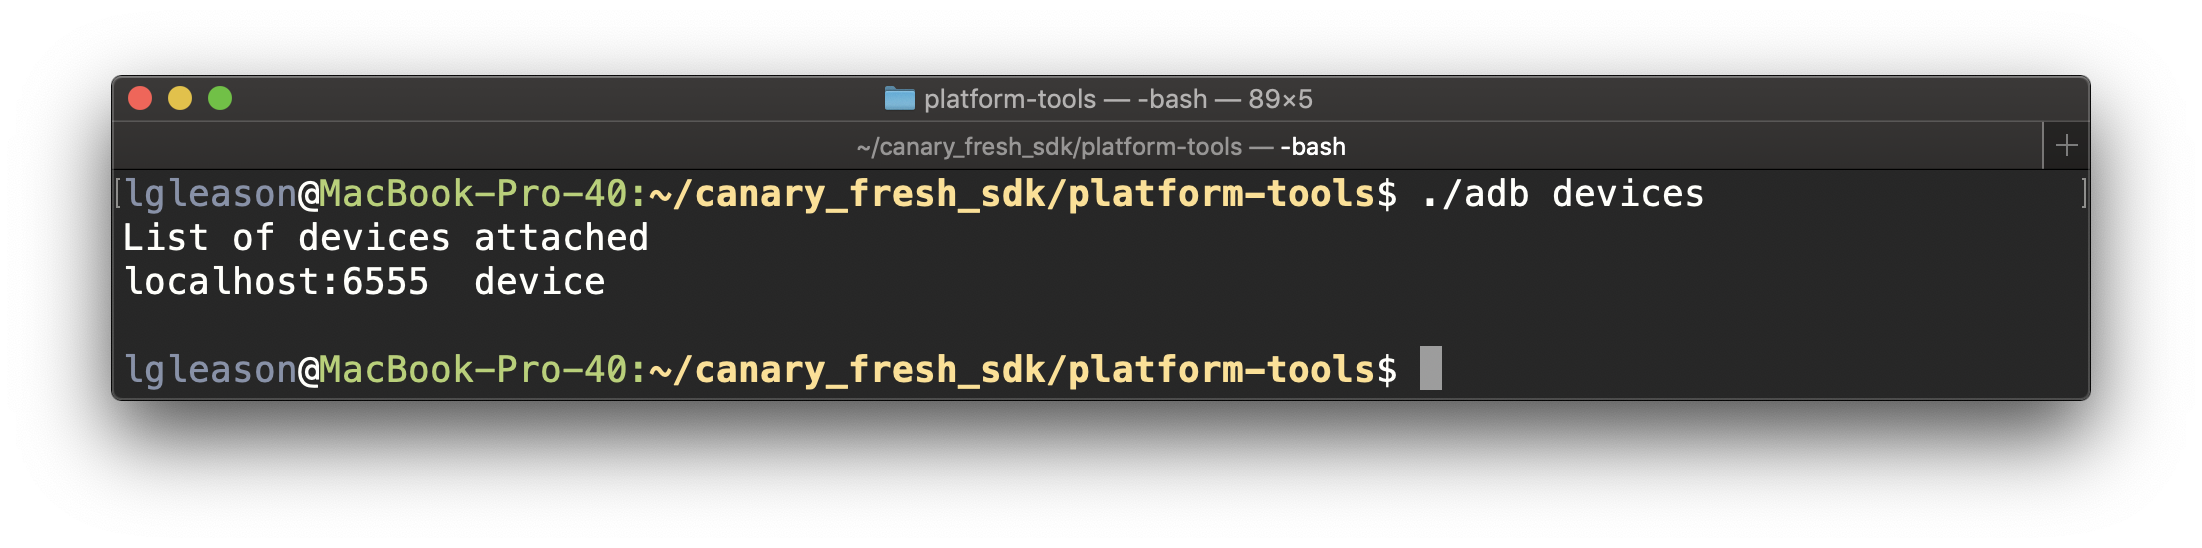
Verify that it’s connected with ./adb devices:
In this tutorial, you learned a lot about ADB. Consider these exercises to take your ADB skills further:
- Try out some other shell commands such as pinging another network device from a device or poking around the filesystem to see what else is there.
- Root a device and use some shell commands to explore system levels on your device.
For more details on related topics, visit the Android Developers Site and check out the ADB Shell, which has great information about ADB and shell commands.
Pluimet’s ADB Useful Commands List is another list with useful tips.
I hope you enjoyed this introduction to ADB. If you have any comments or questions, please join the forum discussion below!