How to Make an AR Game Using Vuforia
Augmented reality (AR) is suddenly the buzzword on everyone’s tongue. Thanks to Vuforia, developers can easily augment the physical world with digital content. Although the launch of ARKit and ARCore have helped raise the awareness of augmented reality, many other platforms and SDKs have been on the go for a while now. One of these […] By Ben MacKinnon.
Augmented reality (AR) is suddenly the buzzword on everyone’s tongue. Thanks to Vuforia, developers can easily augment the physical world with digital content.
Although the launch of ARKit and ARCore have helped raise the awareness of augmented reality, many other platforms and SDKs have been on the go for a while now. One of these is Vuforia; and recently, Unity partnered with Vuforia and integrated the AR platform into the Unity game engine.
In this tutorial, you’ll make an AR game using the Vuforia SDK that comes integrated with the Unity game engine. Along the way, you’ll learn the key components of:
- Setting up an augmented camera feed
- Image tracking — what it is and how it works
- Attaching your digital content to a physical object
- Creating custom interactions triggered by what the camera sees
- What topping goes best on a pizza :]
Developing AR Games in Unity
There are many AR headsets on the market, but the primary target of AR apps is within the mobile space, like iOS and Android. This is where a combination of Unity and Vuforia is convenient — cross-platform development. Another perk is that you can test your app in the editor. To do this, all you need is a webcam! :]
Before getting started, download the latest version of Unity and install the Vuforia Augmented Reality Support component. If you’re using the Unity Hub, you can add this component to an already installed version of Unity.

Getting Started
Now that you have Unity, Vuforia and a webcam, you need to download the sample project. You can do that by clicking one of the Download Materials buttons at the top or bottom of this tutorial.
Once downloaded, extract the files and open the How to Make an AR Game Using Vuforia Starter project in Unity. With the project loaded, open the Starter scene in the Scenes folder, and look at the Hierarchy window:

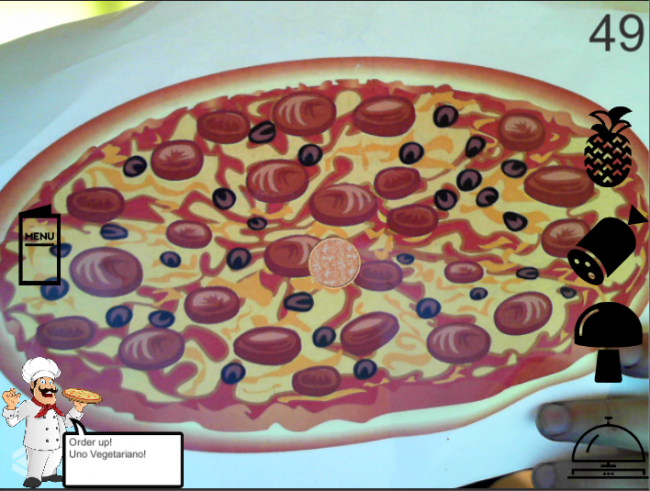
After a quick review of what’s there, hit the Play button in the editor and get ready to fulfill some orders in this pizza-related game.

Cool, that was some mean pizza play right there, but the real challenge is to turn this into an AR game.
Introducing the Sous Chef, Vuforia
To do this, you will make the virtual pizza appear on a tracker image that you can hold in the real world. Once you have added the toppings for the order, you will physically “serve” the pizza by moving it out of view of the camera :]
First things first, you need to swap the Main Camera for an AR Camera. Delete the Main Camera from the scene, then right click in the Hierarchy.
Next, add Vuforia -> AR Camera. When you do, you’ll get this pop-up:

Click Import and wait for the Vuforia Package to import into the project, which adds quite a few files. 
You can ignore the new files in the Editor and Streaming Assets folders. Those files are just template files; the ones you need were included with the project.
The Vuforia folder holds all of the prefabs and scripts the Vuforia platform uses, which you’re about to use.
The last file worth mentioning is VuforiaConfiguration, located inside the Resources folder. This file is included because you need a license to develop a Vuforia application. However, if you’d like, you can obtain a free developer license using the Vuforia Developer Portal.
Now that you have the AR Camera in the scene, there’s just one more thing you need to do. Turn on Augmented Reality!
Go to Edit -> Project Settings -> Player. Scroll down to the bottom where the XR Settings are located, and verify the Vuforia Augmented Reality Supported checkbox is checked.
Push Play in the editor, and say hello to yourself!

Introduction to Image Recognition
I’m sure you look lovely, but what happened to the pizza game?
The default way Vuforia works is with Image Recognition. Image Recognition, also called Tracker Recognition or Image Tracking, is the process by which the camera detects a predetermined image and knows what to do with it, such as rendering some content on top of it. This works best when the tracking image matches the content in some way, for example, floor-plans to render a building might work well on top of a picture of a building.
For this tutorial, an image and a tracking database have already been set up. The pizza image file is in the Materials folder you downloaded earlier. Ideally, you should print this out. Alternatively, you can put it on some digital device that you can then “show” to the camera. Here’s what the image looks like in the Vuforia Tracker Database:
![]()
As you can see, there is a good distribution of feature points. Also, it’s a pizza! That’s handy. :]
Adding Image Targets to the Scene
![]() It’s time to make some magic! You’re going to make the virtual pizza appear on top of the image of this pizza. Using the Create menu in the Hierarchy again, choose Vuforia -> Image.
It’s time to make some magic! You’re going to make the virtual pizza appear on top of the image of this pizza. Using the Create menu in the Hierarchy again, choose Vuforia -> Image.
Now you’ll have an Image Target GameObject in the scene. Look at this target in the inspector and you’ll see a number of components. The key ones are Image Target Behavior and Default Trackable Event Handler. You’ll dive into the second one later, but for now, make sure the drop-down options of Image Target Behavior are set up as below:

Remember the files that were added to the project earlier that I said you could ignore? You’ve found them! Vuforia adds a bunch of sample Image Target databases for you to begin developing and using their samples with — such as the one that you’ll be using, already included in the materials.
Now that you have an AR Camera and an Image Tracker set up in the scene, you have everything you need to make augmented reality work! Press the Play button in the editor and hold your printed image up to the camera.
Somewhere, there’s a pizza!