Speech Recognition Tutorial for iOS
Learn how to transcribe live or pre-recorded audio in your iOS app with the same engine used by Siri in this speech recognition tutorial for iOS. By Jeff Rames.
The engine is fast and accurate and can currently interpret over 50 languages and dialects. It even adapts results to the user using information about their contacts, installed apps, media and various other pieces of data.
Audio fed to a recognizer is transcribed in near real time, and results are provided incrementally. This lets you react to voice input very quickly, regardless of context, unlike Keyboard Dictation, which is tied to a specific input object.
Speech Recognizer creates some truly amazing possibilities in your apps. For example, you could create an app that takes a photo when you say “cheese”. You could also create an app that could automatically transcribe audio from Simpsons episodes so you could search for your favorite lines.
In this speech recognition tutorial for iOS, you’ll build an app called Gangstribe that will transcribe some pretty hardcore (hilarious) gangster rap recordings using speech recognition. It will also get users in the mood to record their own rap hits with a live audio transcriber that draws emojis on their faces based on what they say. :]

The section on live recordings will use AVAudioEngine. If you haven’t used AVAudioEngine before, you may want to familiarize yourself with that framework first. The 2014 WWDC session AVAudioEngine in Practice is a great intro to this, and can be found at apple.co/28tATc1. This session video explains many of the systems and terminology we’ll use in this speech recognition tutorial for iOS.
The Speech Recognition framework doesn’t work in the simulator, so be sure to use a real device with iOS 10 (or later) for this speech recognition tutorial for iOS.
Getting Started
Download the sample project here. Open Gangstribe.xcodeproj in the starter project folder for this speech recognition tutorial for iOS. Select the project file, the Gangstribe target and then the General tab. Choose your development team from the drop-down.

Connect an iOS 10 (or later) device and select it as your run destination in Xcode. Build and run and you’ll see the bones of the app.
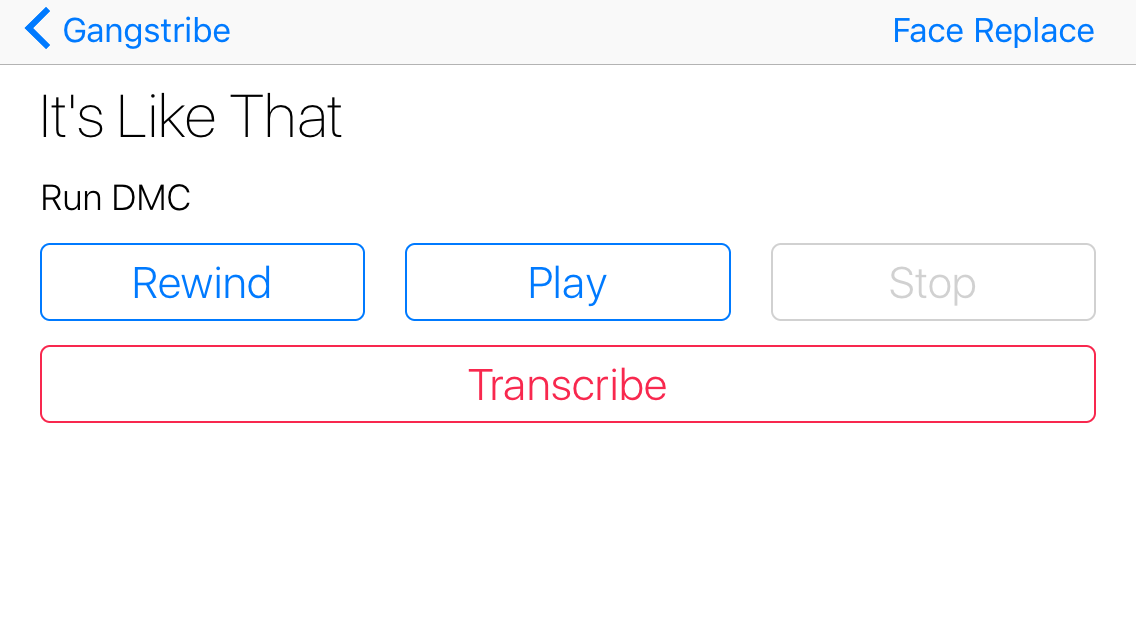
From the master controller, you can select a song. The detail controller will then let you play the audio file, recited by none other than our very own DJ Sammy D!
![]()
The transcribe button is not currently operational, but you’ll use this later to kick off a transcription of the selected recording.
Tap Face Replace on the right of the navigation bar to preview the live transcription feature. You’ll be prompted for permission to access the camera; accept this, as you’ll need it for this feature.
Currently if you select an emoji with your face in frame, it will place the emoji on your face. Later, you’ll trigger this action with speech.

Take a moment to familiarize yourself with the starter project. Here are some highlights of classes and groups you’ll work with during this speech recognition tutorial for iOS:
- MasterViewController.swift: Displays the list of recordings in a table view. The recording model object is defined in Recording.swift along with the seeded song data.
-
RecordingViewController.swift: Plays the pre-recorded audio selected in the master controller. You’ll code the currently stubbed out
handleTranscribeButtonTapped(_:)to have it kick off file transcription. - LiveTranscribeViewController.swift: Handles the Face Replace view, which leverages the code included in the FaceReplace folder. It currently displays live video and a collection view of emojis, attaching the selected emoji to any face in the live view. This is where you’ll add code to record and transcribe audio.
- FaceReplace: Contains a library provided by Rich Turton that places emojis over faces in live video. It uses Core Image’s CIDetector — but you don’t need to understand how this works for this speech recognition tutorial for iOS. However, if you’d like to learn more, you can read about CIDetector here: apple.co/1Tx2uCN.
You’ll start this speech recognition tutorial for iOS by making the transcribe button work for pre-recorded audio. It will then feed the audio file to Speech Recognizer and present the results in a label under the player.
The latter half of the speech recognition tutorial for iOS will focus on the Face Replace feature. You’ll set up an audio engine for recording, tap into that input, and transcribe the audio as it arrives. You’ll display the live transcription and ultimately use it to trigger placing emojis over the user’s face.
You can’t just dive right in and start voice commanding unicorns onto your face though; you’ll need to understand a few basics first.
Transcription Basics
There are four primary actors involved in a speech transcription:
-
SFSpeechRecognizeris the primary controller in the framework. Its most important job is to generate recognition tasks and return results. It also handles authorization and configures locales. -
SFSpeechRecognitionRequestis the base class for recognition requests. Its job is to point theSFSpeechRecognizerto an audio source from which transcription should occur. There are two concrete types:SFSpeechURLRecognitionRequest, for reading from a file, andSFSpeechAudioBufferRecognitionRequestfor reading from a buffer.
-
SFSpeechRecognitionTaskobjects are created when a request is kicked off by the recognizer. They are used to track progress of a transcription or cancel it. -
SFSpeechRecognitionResultobjects contain the transcription of a chunk of the audio. Each result typically corresponds to a single word.
Here’s how these objects interact during a basic Speech Recognizer transcription:

The code required to complete a transcription is quite simple. Given an audio file at url, the following code transcribes the file and prints the results:
let request = SFSpeechURLRecognitionRequest(url: url)
SFSpeechRecognizer()?.recognitionTask(with: request) { (result, _) in
  if let transcription = result?.bestTranscription {
    print("\(transcription.formattedString)")
  }
}
SFSpeechRecognizer kicks off a SFSpeechRecognitionTask for the SFSpeechURLRecognitionRequest using recognitionTask(with:resultHandler:). It returns partial results as they arrive via the resultHandler. This code prints the formatted string value of the bestTranscription, which is a cumulative transcription result adjusted at each iteration.
You’ll start by implementing a file transcription very similar to this.
Audio File Speech Transcription
Before you start reading and sending chunks of the user’s audio off to a remote server, it would be polite to ask permission. In fact, considering their commitment to user privacy, it should come as no surprise that Apple requires this! :]
You’ll kick off the the authorization process when the user taps the Transcribe button in the detail controller.
Open RecordingViewController.swift and add the following to the import statements at the top:
import Speech
This imports the Speech Recognition API.
Add the following to handleTranscribeButtonTapped(_:):
SFSpeechRecognizer.requestAuthorization {
  [unowned self] (authStatus) in
  switch authStatus {
  case .authorized:
    if let recording = self.recording {
      //TODO: Kick off the transcription
    }
  case .denied:
    print("Speech recognition authorization denied")
  case .restricted:
    print("Not available on this device")
  case .notDetermined:
    print("Not determined")
  }
}
You call the SFSpeechRecognizer type method requestAuthorization(_:) to prompt the user for authorization and handle their response in a completion closure.
In the closure, you look at the authStatus and print error messages for all of the exception cases. For authorized, you unwrap the selected recording for later transcription.
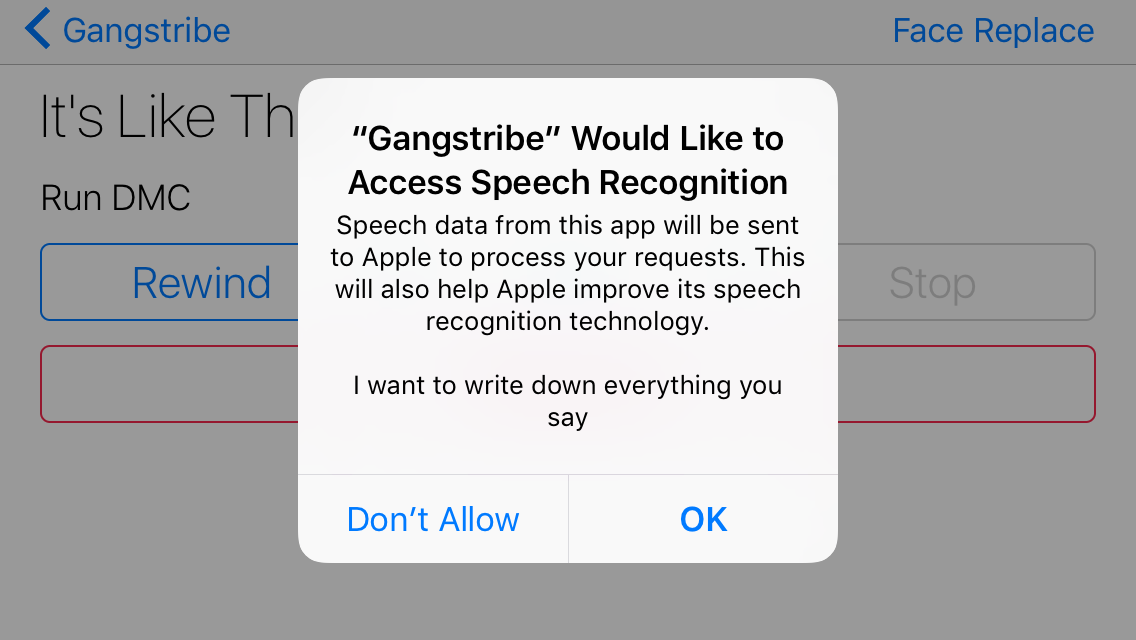
Next, you have to provide a usage description displayed when permission is requested. Open Info.plist and add the key Privacy - Speech Recognition Usage Description providing the String value I want to write down everything you say:

Build and run, select a song from the master controller, and tap Transcribe. You’ll see a permission request appear with the text you provided. Select OK to provide Gangstribe the proper permission:
Of course nothing happens after you provide authorization — you haven’t yet set up speech recognition! It’s now time to test the limits of the framework with DJ Sammy D’s renditions of popular rap music.