Command Line Programs on macOS Tutorial
Discover how easy it is to make your own terminal-based apps with this command line programs on macOS tutorial. Updated for Xcode 9 and Swift 4! By Eric Soto.
Displaying Errors
Finally, you will add some code to display error messages in red.
Open ConsoleIO.swift and in writeMessage(_:to:), replace the two case statements with the following:
    case .standard:
      // 1
      print("\u{001B}[;m\(message)")
    case .error:
      // 2
      fputs("\u{001B}[0;31m\(message)\n", stderr)
Taking each numbered line in turn:
- The sequence
\u{001B}[;mis used in the standard case to reset the terminal's text color back to the default. - The sequence
\u{001B}[0;31mare control characters that cause Terminal to change the color of the following text strings to red.
[;m at the beginning of the output might look a bit awkward. That's because the Xcode Console doesn't support using control characters to colorize text output.
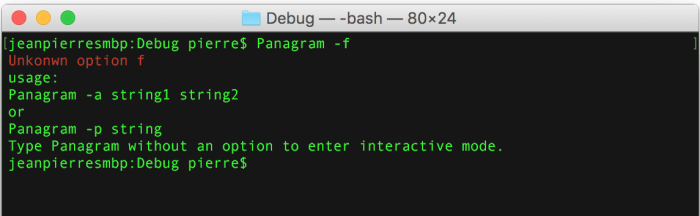
Build and run, this will launch Panagram in Terminal. Type f for option, the Unknown option f error message will display in red:
Where to Go From Here?
You can download the final project for this tutorial here.
If you want to write more command-line programs in the future, take a look at how to redirect stderr to a log file and also look at ncurses, which is a C library for writing "GUI-style" programs for the terminal.
You can also check out the article Scripting in Swift is pretty awesome if you're interested in Swift for scripting.
I hope you enjoyed this Command Line Programs on macOS tutorial; if you have any questions or comments, feel free to join the forum discussion below!