Live Templates in Android Studio: Getting Started
In this tutorial, you’ll learn how to use and create live templates in Android Studio so you can write code more quickly. By Victoria Gonda.
If you’ve spent time programming, you might have realized that there are some tasks you end up completing over and over again. This may be as simple as creating a function or building up a commonly used architecture. Either way, these tasks can start to feel tedious after so many repetitions. Shouldn’t you be using your brainpower to solve problems rather than type in the boilerplate code for a ViewModel again? In comes Live templates to the rescue.
Live templates are a feature that JetBrains thoughtfully included in IntelliJ, and by extension, Android Studio. By using them, you can quickly and intelligently add frequently used code patterns and constructs to your code, letting the IDE do the tedious work for you. This can help improve your productivity by providing some autocomplete and removing some of the cognitive burdens of boilerplate.
In this tutorial you’ll learn how to:
- Use the live templates included in Android Studio.
- Create custom templates.
- Customize your templates for your needs.
- Apply your new knowledge to generate entire files.
Time to get started!
Getting Started
To practice using and creating live templates you’ll be completing an app called What to Watch. This app will show you a random trending movie to take the time-consuming decision making out of your plans to watch a movie.
To get started, download the starter project using the Download Materials button at the top or bottom of this tutorial. Load the starter project into Android Studio and start to look around. Looks like you can’t build it yet! The MainActivity hasn’t implemented all the required interface methods. This is your task to complete throughout this tutorial. When you complete the app, it will look like this:

This app follows a Model-View-Presenter or MVP architecture. While not the most recommended architecture, it’s a great playground for practicing using live templates. The main file you’ll be working in is MainActivity.kt. Get familiar with the following files before diving in:
- MainActivity.kt: This activity is the main view of the app and implements an interface the presenter uses to instruct what to display.
-
MainView.kt: This file defines the interface that the
MainActivityimplements and theMainPresentercalls. -
MainPresenter.kt: This class makes API calls through the
MovieService, using the resulting data to call the view’s interface methods. - MovieService.kt: Here you use Retrofit to interface with the Trakt API to fetch some trending movies.
With that understood, you can get started building.
Generating an API Key
As with many API’s, you need an API key to use Trakt.

To start, go to trakt.tv to sign in or create an account.

Then you need to create an app. The name and redirect URI are required, everything else is optional. Fill in the form, and click Save App.

Finally, copy the Client ID for your app.

Paste your client ID in app ‣ build.gradle where it says YOUR KEY HERE, leaving the surrounding escaped quotation marks:
debug {
  // ADD YOUR API KEY HERE
  buildConfigField "String", "TRAKT_API_KEY", "\"YOUR KEY HERE\""
}
This puts your key where the MovieService can find it to use and find those movies. Sync your gradle file to make this new key available.
Now you’re all set to begin the work of finishing the MainActivity using live templates!
What is a Live Template?
As mentioned towards the beginning of this tutorial, a live template is a tool in Android Studio and IntelliJ that allows you to insert frequently used bits of code into your file. You may have even run into some by accident before. You’ll soon learn how customizable these can be!
You can use these templates anywhere you find yourself repeating the same patterns over and over. By learning them, you can spend less time typing and more time problem-solving!
Using Live Templates
To use a live template you start by typing in that template’s abbreviation. As you type, in the same way you have code completion, you will see live template abbreviations show up in a dropdown.
Simple Templates
Pick a Kotlin file such as MainActivity.kt to do some experimentation. At the bottom of the file, outside of the class, start typing the abbreviation psvma. Then, once you have the abbreviation typed or selected from the drop-down, hit Tab or Enter to insert a main method.
The result should look like this:
fun main(args: Array<String>) {

}
Congrats! You just used a live template! Pretty painless, huh? Practice again by using the abbreviation sout to add a print statement to your main() method.
println("Hello World")
Notice how the cursor ends in just the right place after you insert the template? When you added the main() method it was in the body of the function, and when you added the print statement it was in the parenthesis. It may seem like movie magic, but there’s a simple way to learn how this is happening.
Viewing Templates
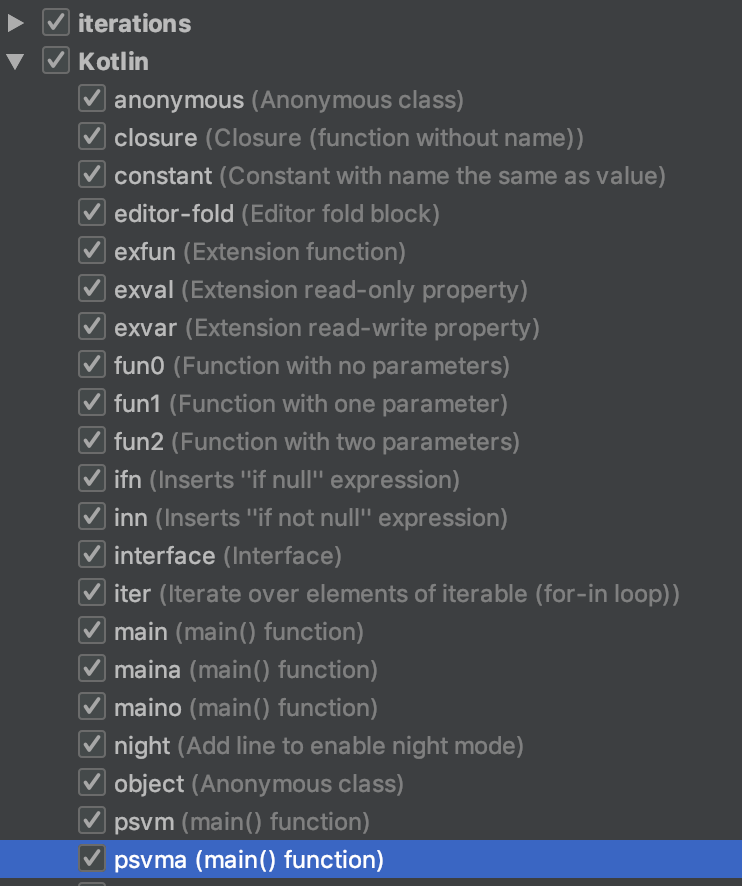
You can see the list of all live templates right in Android Studio. Go to Preferences ‣ Editor ‣ Live Templates. This is where you can find and explore all the live templates available to you. You’ll see a list with collapsed items. Navigate to Kotlin ‣ psvma.
Some interesting things popped up on the bottom of the window when you selected that abbreviation. The abbreviation itself, a description, and the template text.
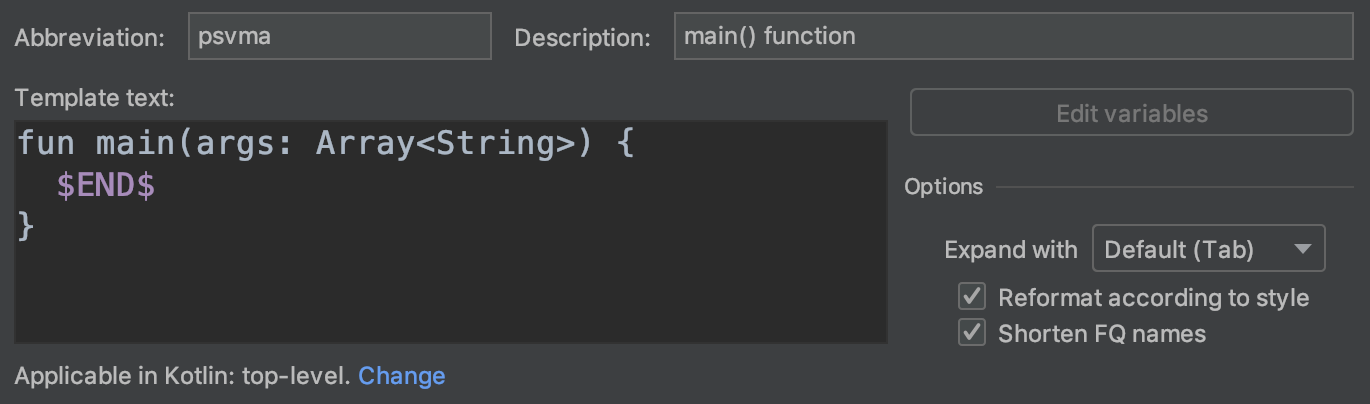
In the template text, you see all the code that was inserted plus the text $END$. This is a special variable that signifies where the cursor should be after the text is inserted. Not all templates have this, but you can see how helpful it is to have. If you look at sout, you’ll see it there too.
This is great, but not all code is that simple. You won’t name all functions main() and not all statements are to print things. Variables are powerful things to help with this, which you’ll start learning next.
Parameterized Templates
At the end of the file again, outside any function or class, insert the live template with the abbreviation fun2 to insert a function that takes two parameters. You’ll see something new: the opportunity to add your own input! To add a value for each input, type in the value, then press Tab to move to the next one until complete.
Use this template to create an add() function. Use the template, and don’t copy/paste:
fun add(a: Int, b: Int): Int {
  return a + b
}
Curious how this works? Open back up the list of live templates and find fun2 in the Kotlin list. The template you see will look a lot like this:
fun $NAME$($PARAM1$ : $PARAM1TYPE$, $PARAM2$ : $PARAM2TYPE$) : $RETURN$ {
$END$
}
There are so many more places where you see the pattern $<name>$. These are all variables. Unlike the special variable, $END$, these others are custom and allow user input. You can also use these to calculate the value instead of having the user enter it, but more on that later.
Surround Templates
One other thing you can do with templates is surround existing code. In your add() function, highlight a + b. Hit Alt-Cmd-J or Ctrl-Alt-J on Windows to bring up a popup where you can choose to surround your selection with parenthesis.
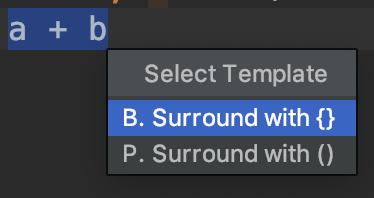
Use the arrows keys to select Surround with () from the list, and hit Enter to use it. This surrounds your highlighted code with parenthesis!
You can find this template in the live template list under surround ‣ P. Similar to $END$, it uses a new special variable: $SELECTION$.
($SELECTION$)
This special variable can be used to surround some code with something else. You can take a look at the list of other surround templates to get an idea of how you can use it.
Now that you have this knowledge, you can use it to finish writing the MainActivity. Delete the scrap code you’ve been practicing with so you can get to the real deal.