Database Migrations with Vapor
In this Server-Side Swift tutorial, see how to perform various migrations on your Vapor application database, using PostgreSQL running on Docker. By Jonathan S Wong.
Update the Room Migration
At your startup, you quickly realize that engineers aren’t going to want to locate conference rooms by a UUID and would much rather have a name for the room. This sounds like it’s time to update your Room model!
In Xcode, create a new folder in the Sources/App directory called Migrations. Within this new folder, create a file called 0001_AddRoomName.swift. It’s best to have some sort of way to preserve the order your migrations need to be run in. Two options are to use the date of your migration or just to number them in order. Here you’ve chosen the latter.
In 0001_AddRoomName.swift, update the code to the following:
import FluentPostgreSQL
import Vapor

struct AddRoomName: Migration {

}
Notice the name of the struct does not include the 0001_ prefix. That’s just used to keep track of your migrations, but does not need to be part of the struct. Migrations are typically written as a struct when updating an existing model. Migrations require you to provide three things:
- Fluent needs to know the type of database the migration can run on.
- A function
prepare(on:)used to change the database. In your case, you’ll add the propertynameto theRoommodel. - A function
revert(on:)that is the reverse ofprepare(on:). This is how Fluent knows how to undo a migration. In your case, removing thenameproperty would undo the adding of thenameproperty.
Add the following to AddRoomName:
// 1
typealias Database = PostgreSQLDatabase

static func prepare(on connection: PostgreSQLConnection) -> Future<Void> {
  // 2
  return Database.update(Room.self, on: connection) { builder in
    // 3
    builder.field(for: \.name)
  }
}

// 4
static func revert(on connection: PostgreSQLConnection) -> Future<Void> {
  return Database.update(Room.self, on: connection) { builder in
    builder.deleteField(for: \.name)
  }
}
In the code above, you:
- Tell Fluent that the database type is PostgreSQL.
- Tell Fluent which model to update. Notice you use
updatehere. If you were creating a new model in a migration, you’d usecreate. - Use the
SchemaBuilderobject to change your database schema. In this case, you are adding a fieldnamefor yourRoommodel. - In
revert(on:), you do the opposite of what you did inprepare(on:)anddeletethe field name.
The name property does not exist on your Room model yet. In Room.swift, add the following to the Room class:
var name: String

init(name: String) {
  self.name = name
}
Now everything should compile, but in order for this migration to be run, you need to add it to the set of migrations to run in configure.swift. Below the previous migration you added and before services.register(migrations), add:
migrations.add(migration: AddRoomName.self, database: .psql)
Build and run. Refresh the view in Postico and you should see a new column name of type text was added for the Room table”

Seeding Your Database
You have a set of conference rooms that are ready to be used, but they aren’t in the database yet. In this migration, you’ll seed the database with data. Create a new file in the Migrations directory called 0002_AddRooms.swift that you’ll use to add the rooms.
In 0002_AddRooms.swift, start by changing the contents to the following:
import FluentPostgreSQL
import Vapor

struct AddRooms: Migration {
  typealias Database = PostgreSQLDatabase
}
This creates the AddRooms migration using PostgreSQL as the database.
You start to think about what you want to name your conference rooms and decide on using Apple frameworks as their names. In AddRooms, add prepare(on:):
static func prepare(on connection: PostgreSQLConnection) -> Future<Void> {
  let room1 = Room(name: "Foundation")
  let room2 = Room(name: "UIKit")
  let room3 = Room(name: "SwiftUI")
  _ = room1.save(on: connection).transform(to: ())
  _ = room2.save(on: connection).transform(to: ())
  return room3.save(on: connection).transform(to: ())
}
This creates three Room models. You call save(on:) for each of the models in order to save the Room to the database. Because you don’t care about the result of the Future that’s returned, you can call transform(to: ()) on it.
Then add the following code that can be used to reverse the changes:
static func revert(on connection: PostgreSQLConnection) -> Future<Void> {
  let futures = ["Foundation", "UIKit", "SwiftUI"].map { name in
    return Room.query(on: connection).filter(\Room.name == name)
      .delete()
  }
  return futures.flatten(on: connection)
}
In revert(on:), you use Fluent’s query and filter methods to find the Rooms with the names you created in prepare(on:). Once you find them, you call delete() to remove those Rooms. Since you are waiting here for multiple futures to complete, you use flatten(on:).
In configure.swift, add this new migration after migrations.add(migration: AddRoomName.self, database: .psql) and before services.register(migrations):
migrations.add(migration: AddRooms.self, database: .psql)
Build and run. If you view the content of your Room table, you should see something similar to:

There should be three rows for the three Rooms you added in your migration.
Reverting Your Migration
So far, you’ve been adding fields and data to your Room table by calling prepare(on:) in your migrations. But how does revert(on:) work?
To revert the migrations, you need to add CommandConfig. At the bottom of the function in configure.swift, below services.register(migrations), add the following:
// 1
var commandConfig = CommandConfig.default()
// 2
commandConfig.useFluentCommands()
// 3
services.register(commandConfig)
-
CommandConfigallows you to register commands to your container. - This adds Fluent commands to the
CommandConfig. Currently these are the migration commandsrevertandmigrate. - Registers the
commandConfigservice.
In order to run the revert command to revert your last migration, you need to add the revert option as a command-line argument. Edit your Run Scheme from the scheme chooser, or press Command-Option-R. This should look like:
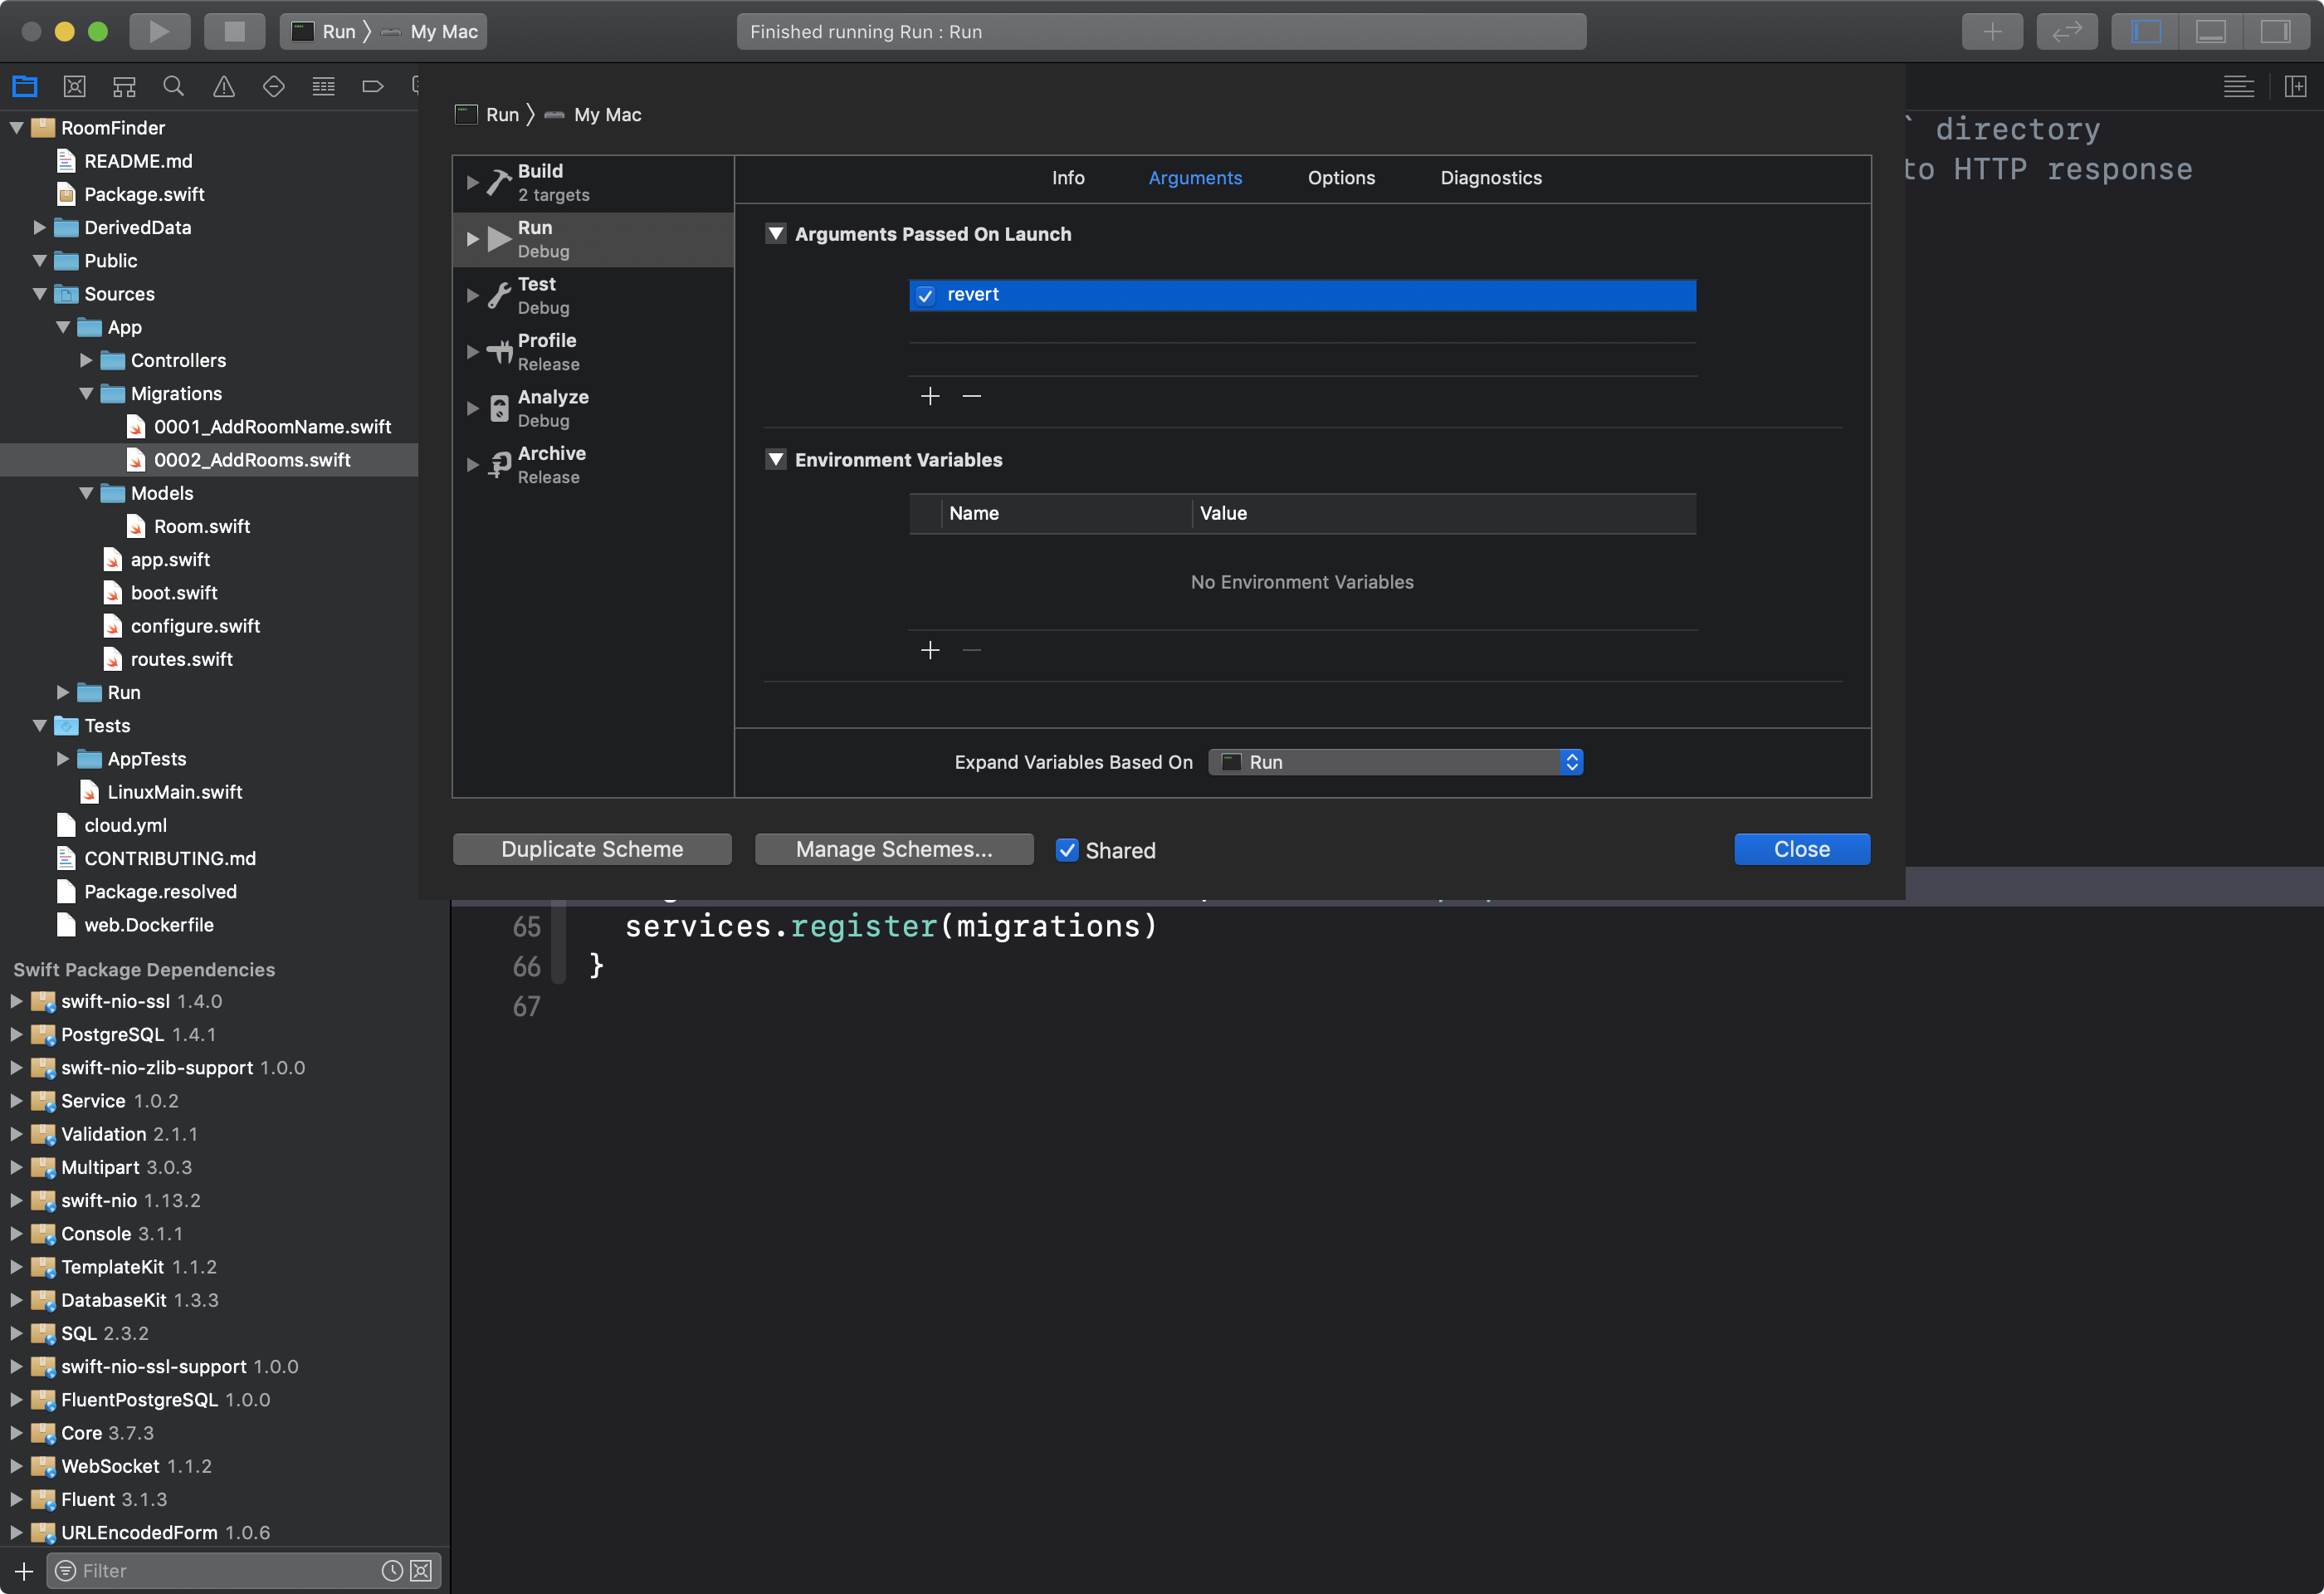
Then run your app. Since you are passing the revert argument on launch, in the console, Fluent asks if you want to revert the last back of migrations. Enter y and press Enter.
Now if you look at your Room table, you’ll see it’s empty:

And if you check your Fluent table, you see that it removed the last migration:

This is how you can revert a single migration. If you want to revert all of your migrations, you can pass revert --all.
Since you actually want the room data, remove the revert command-line argument and run the app again. You should once again now have three rooms in your Room table (you may need to hit the refresh button in Postico to see them).