How to Save and Load a Game in Unity
Learn how to save and load a game in Unity using PlayerPrefs, Serialization and JSON. Complete your user’s experience by allowing them to save their game. By Anthony Uccello.
Saving The Game
Using PlayerPrefs was pretty simple wasn’t it? With it, you will be able to easily store other settings in there such as the player’s graphic settings, or login info (perhaps Facebook or Twitter tokens), and whatever other configuration settings make sense to keep track of for the player. However, PlayerPrefs is not designed to keep track of game saves. For that, you will want to use serialization.
The first step to creating a save game file is creating the save file class. Create a script named Save and remove the MonoBehaviour inheritance. Remove the default Start() and Update() methods as well.
Next, add the following variables:
public List<int> livingTargetPositions = new List<int>();
public List<int> livingTargetsTypes = new List<int>();

public int hits = 0;
public int shots = 0;
In order to save the game you will need to keep track of where existing robots are and what types they are. The two lists accomplish this. For the number of hits and shots you are just going to store those as ints.
There is one more very important bit of code you need to add. Above the class declaration, add the following line:
[System.Serializable]
This is known as an attribute and it is metadata for your code. This tells Unity that this class can be serialized, which means you can turn it into a stream of bytes and save it to a file on disk.
[SerializeField] and [System.Serializable] attributes so that it knows what to write when serializing the object. Other uses for attributes include settings for unit tests and dependency injection, which are way beyond the scope of this tutorial but well worth investigating.The entire Save script should look like this:
using System.Collections;
using System.Collections.Generic;
using UnityEngine;

[System.Serializable]
public class Save
{
  public List<int> livingTargetPositions = new List<int>();
  public List<int> livingTargetsTypes = new List<int>();

  public int hits = 0;
  public int shots = 0;
}
Next, open the Game script and add the following method:
private Save CreateSaveGameObject()
{
  Save save = new Save();
  int i = 0;
  foreach (GameObject targetGameObject in targets)
  {
    Target target = targetGameObject.GetComponent<Target>();
    if (target.activeRobot != null)
    {
      save.livingTargetPositions.Add(target.position);
      save.livingTargetsTypes.Add((int)target.activeRobot.GetComponent<Robot>().type);
      i++;
    }
  }

  save.hits = hits;
  save.shots = shots;

  return save;
}
This code creates an instance of the Save class you made earlier and then sets the values from the existing robots. It also saves the players shots and hits.
The Save button has been hooked up to the SaveGame method in the Game script, but there is no code in SaveGame yet. Replace the SaveGame function with the following code:
public void SaveGame()
{
// 1
Save save = CreateSaveGameObject();
// 2
BinaryFormatter bf = new BinaryFormatter();
FileStream file = File.Create(Application.persistentDataPath + "/gamesave.save");
bf.Serialize(file, save);
file.Close();
// 3
hits = 0;
shots = 0;
shotsText.text = "Shots: " + shots;
hitsText.text = "Hits: " + hits;
ClearRobots();
ClearBullets();
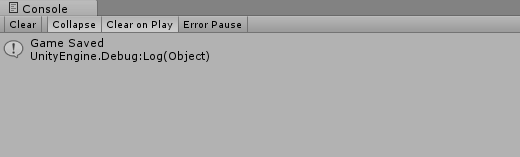
Debug.Log("Game Saved");
}
Taking it comment-by-comment:
- Create a Save instance with all the data for the current session saved into it.
- Create a BinaryFormatter and a FileStream by passing a path for the Save instance to be saved to. It serializes the data (into bytes) and writes it to disk and closes the FileStream. There will now be a file named gamesave.save on your computer. The .save was just used as an example, and you could use any extension for the file save name.
- This just resets the game so that after the player saves, everything is in a default state.
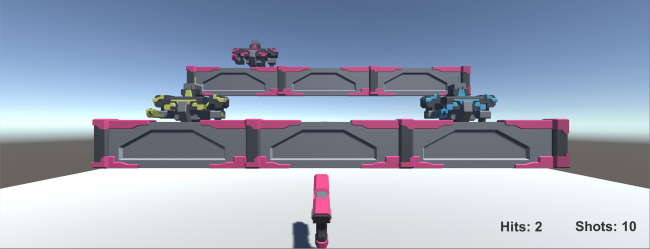
To save the game, press Escape at any time during play and click the Save button. You should notice everything resets and the console output displays a note that the game has been saved.
LoadGame in the Game script is connected to the Load button. Open the Game script and locate the LoadGame function. Replace it with the following:
public void LoadGame()
{
  // 1
  if (File.Exists(Application.persistentDataPath + "/gamesave.save"))
  {
    ClearBullets();
    ClearRobots();
    RefreshRobots();

    // 2
    BinaryFormatter bf = new BinaryFormatter();
    FileStream file = File.Open(Application.persistentDataPath + "/gamesave.save", FileMode.Open);
    Save save = (Save)bf.Deserialize(file);
    file.Close();

    // 3
    for (int i = 0; i < save.livingTargetPositions.Count; i++)
    {
      int position = save.livingTargetPositions[i];
      Target target = targets[position].GetComponent<Target>();
      target.ActivateRobot((RobotTypes)save.livingTargetsTypes[i]);
      target.GetComponent<Target>().ResetDeathTimer();
    }

    // 4
    shotsText.text = "Shots: " + save.shots;
    hitsText.text = "Hits: " + save.hits;
    shots = save.shots;
    hits = save.hits;

    Debug.Log("Game Loaded");

    Unpause();
  }
  else
  {
    Debug.Log("No game saved!");
  }
}
Looking at this in detail:
- Checks to see that the save file exists. If it does, it clears the robots and the score. Otherwise it logs to the console that there is no saved game.
- Similar to what you did when saving the game, you again create a BinaryFormatter, only this time you are providing it with a stream of bytes to read instead of write. So you simply pass it the path to the save file. It creates the
Saveobject and closes the FileStream. - Even though you have the save information, you still need to convert that into the game state. This code loops through the saved robot positions (for living robots) and adds a robot at that position. It also sets it to the right type. For simplicity, the timers are reset, but you can remove this if you prefer. This prevents the robots from disappearing right away and gives the player a few seconds to get oriented in the world. Also, for simplicity, the animation of the robot moving up is set to finished, which is why robots partly moving up when you saved will be shown as fully up when a game is loaded.
- This updates the UI to have the right hits and shots set, and it sets the local variables so that when the player fires or hits a target it continues to count up on the value that was previously. If you didn’t do this step, the next time the player fires or hits a target the displayed values would get set to 1.
Click Play, play the game for a bit then save. Click the Load button and you will see it load the enemies as they were set up before when you saved the game. It also properly sets your score and the shots you’ve fired.