New Course: Your First Swift 4 & iOS 11 App
Check out our new 47-part Swift 4 and iOS 11 video course for complete beginners! By Ray Wenderlich.
As part of our iOS 11 Launch Party, we are releasing a ton of new and updated courses for raywenderlich.com subscribers.
Today we are happy to release our first new course: Your First Swift 4 & iOS 11 App! This is our course for complete beginners to iOS development – or to programming in general.
This epic 47-video course is a complete overhaul of our previous Beginning iOS course. This time, we’ve made the videos shorter, more polished, and more fun.
If you’re a beginner to iOS development (or if you know someone who is), this is the place to start. Let’s take a look at what’s inside.
Section 1: Basic Controls
In this section, you will learn how to add basic controls like labels, buttons, and sliders into a Swift 4 and iOS 11 app.
This section contains 10 videos:
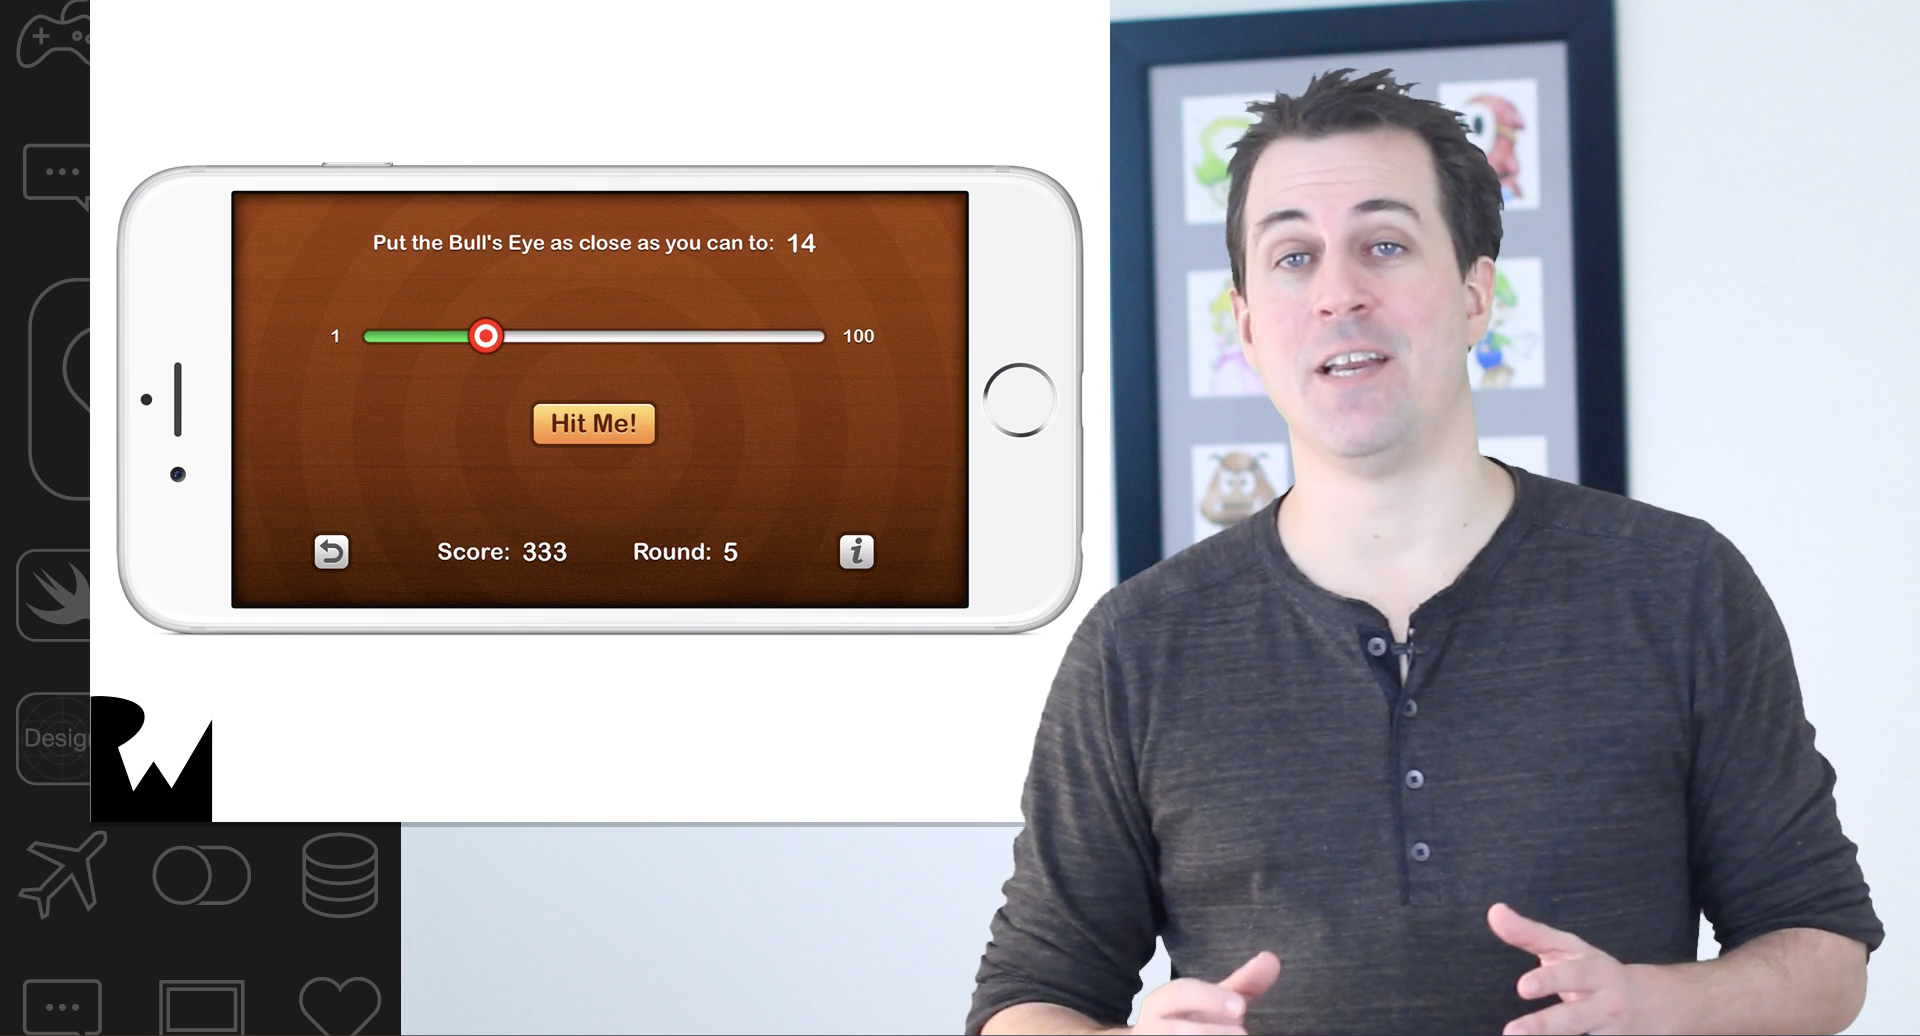
- Introduction: Learn about the first app you’ll build – a simple but fun game called Bull’s Eye – and get a preview of all the things you’ll learn throughout this section.
- Making a Programming to-do list: Make a programming to-do list of all the things you’ll need to do to build the game. This helps build a good programming practice of gathering requirements first!
- Buttons and Actions: Learn how to add a button to the app and connect it to some Swift 4 code that prints a message to the console.
- Alerts: Learn how to make the app display a popup alert when you tap a button.
- Solving Problems: Learn how to solve problems beginners frequently run into.
- Challenge: Connecting Actions: Practice connecting an action performs on a button – such as a tap – to some Swift code that you write.
- How Does an App Work: Learn how apps actually work under the hood.
- Portrait vs. Landscape: Learn how to convert your app from portrait to landscape mode.
- Challenge: Basic Controls: Practice adding basic controls like sliders, buttons, and labels into your app by creating the basic layout for the Bulls-eye game.
- Conclusion: Let’s review where you are with your programming to-do list, and discuss what’s next.
Section 2: Outlets
You will learn how to access the controls you added to your app in the previous section – like labels, buttons, and sliders – from your own Swift code.
This section contains 8 videos:
- Introduction: Let’s review what you’ll be learning in this section, and why it’s important.
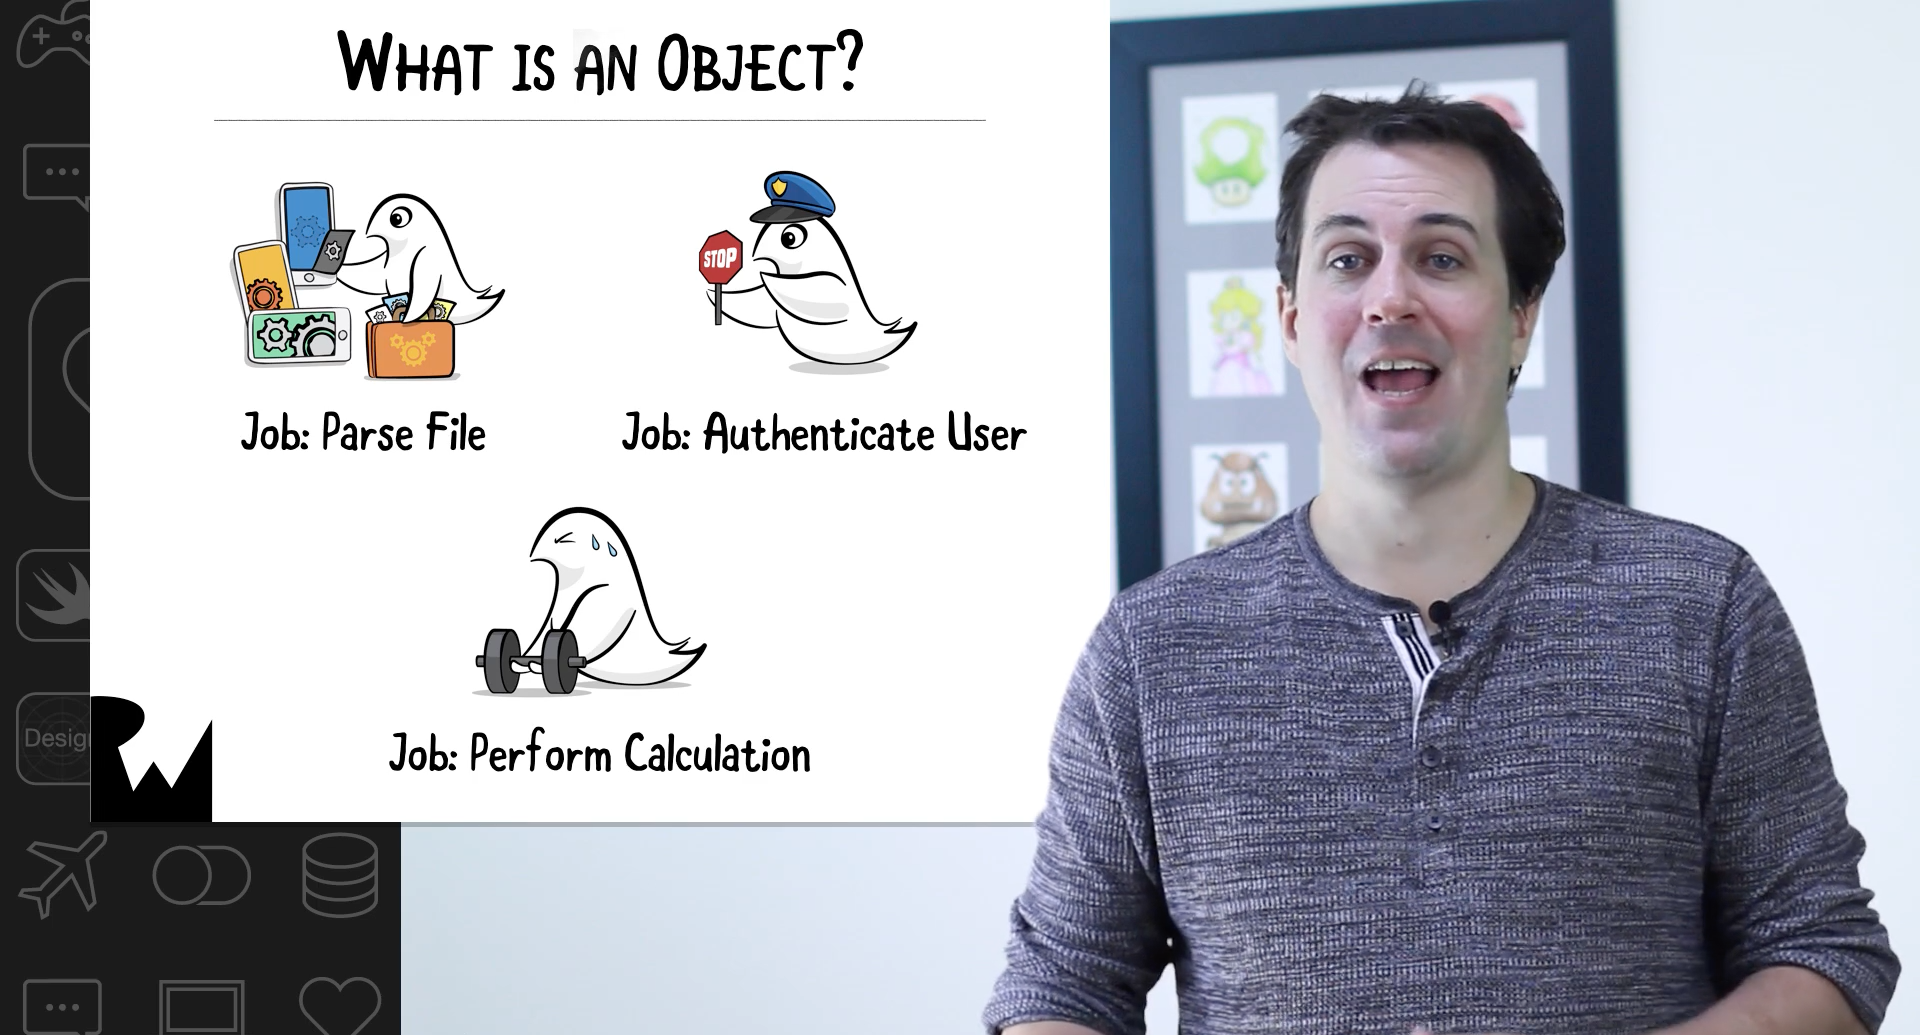
- Objects, Data, and Methods: Learn the basics of object-oriented programming, so you can better understand the Swift 4 code you are writing.
- Strings and Variables: Learn how to detect when the user moves the slider, and how to store the result in a variable. Along the way, you’ll learn the basics of using Swift 4 strings.
- Challenge: Your First Bug: In this challenge, you’ll come across your first bug – and you’ll try and fix it.
- Connecting Outlets: Learn about one of the fundamental techniques in iOS development: connecting views like buttons or labels from your storyboard to outlets in your code.
- Writing Methods: Learn how to add multiple rounds into Bulls-Eye, and how to write your own methods along the way.
- Challenge: Connecting Outlets: Get some more practice connecting views from your storyboard to outlets that you can access from Swift code.
- Conclusion: Let’s review where you are with your programming to-do list, and discuss what’s next.
Section 3: Coding Basics
You will learn the basics of programming in Swift, as you finish adding the rest of the gameplay for Bull’s Eye.

This section contains 11 videos:
- Introduction: Let’s review what you’ll be learning in this section, and why it’s important.
- Challenge: How to Calculate the Difference: See if you can figure out an algorithm to calculate the positive difference between the target value and the slider value.
- Calculating the Difference: Implement the algorithm you just designed to calculate the difference using Swift.
- Variables vs. Constants: Finalize the difference algorithm and score calculation, and learn about an important Swift concept: the difference between variables and constants.
- Challenge: Calculating the Difference: Try improving the algorithm to calculate the difference so it is written in less lines of code.
- Type Inference: Add the ability to track the user’s total score, and learn about something cool called Swift type inference along the way.
- Challenge: Showing the Score: Practice some coding basics by modifying Bull’s Eye to display the player’s total score.
- Challenge: Tracking Rounds: It’s time for an even bigger challenge: modifying Bull’s Eye to keep track and report the current round of the game.
- Adding Polish: Polish the app by telling the player how well they did each round.
- Challenge: Adding Polish: Get some final practice with coding basics by giving the user bonus points if they are very close to the target.
- Conclusion: Let’s review where you are with your programming to-do list, and discuss what’s next.
Section 4: Coding Practice
You will get more practice coding in Swift, by adding the final few features to Bull’s Eye.

This section contains 7 videos:
- Introduction: Let’s review what you’ll be learning in this section, and why it’s important.
- Challenge: Local vs. Instance Variables: Try this challenge to make sure you understand the difference between local and instance variables, which is a common point of confusion for beginners to programming.
- Closures: Learn how to use an important construct in Swift called closures, which you often use to provide a block of code that is executed some time in the future.
- Challenge: Starting Over: Get some more coding practice by implementing the “Start Over” button in Bull’s Eye.
- Adding Extra Screens: Learn how to add multiple screens to your iOS apps, by adding an About screen into Bull’s Eye.
- Challenge: Adding Extra Screens: Practice adding multiple screens into your iOS apps, by adding an About the Author screen into Bull’s Eye.
- Conclusion: Let’s review where you are with your programming to-do list, and discuss what’s next.
Section 5: Styling the App
You will learn how to style your apps to make them look great, and run your app on your own iPhone.
This section contains 11 videos:
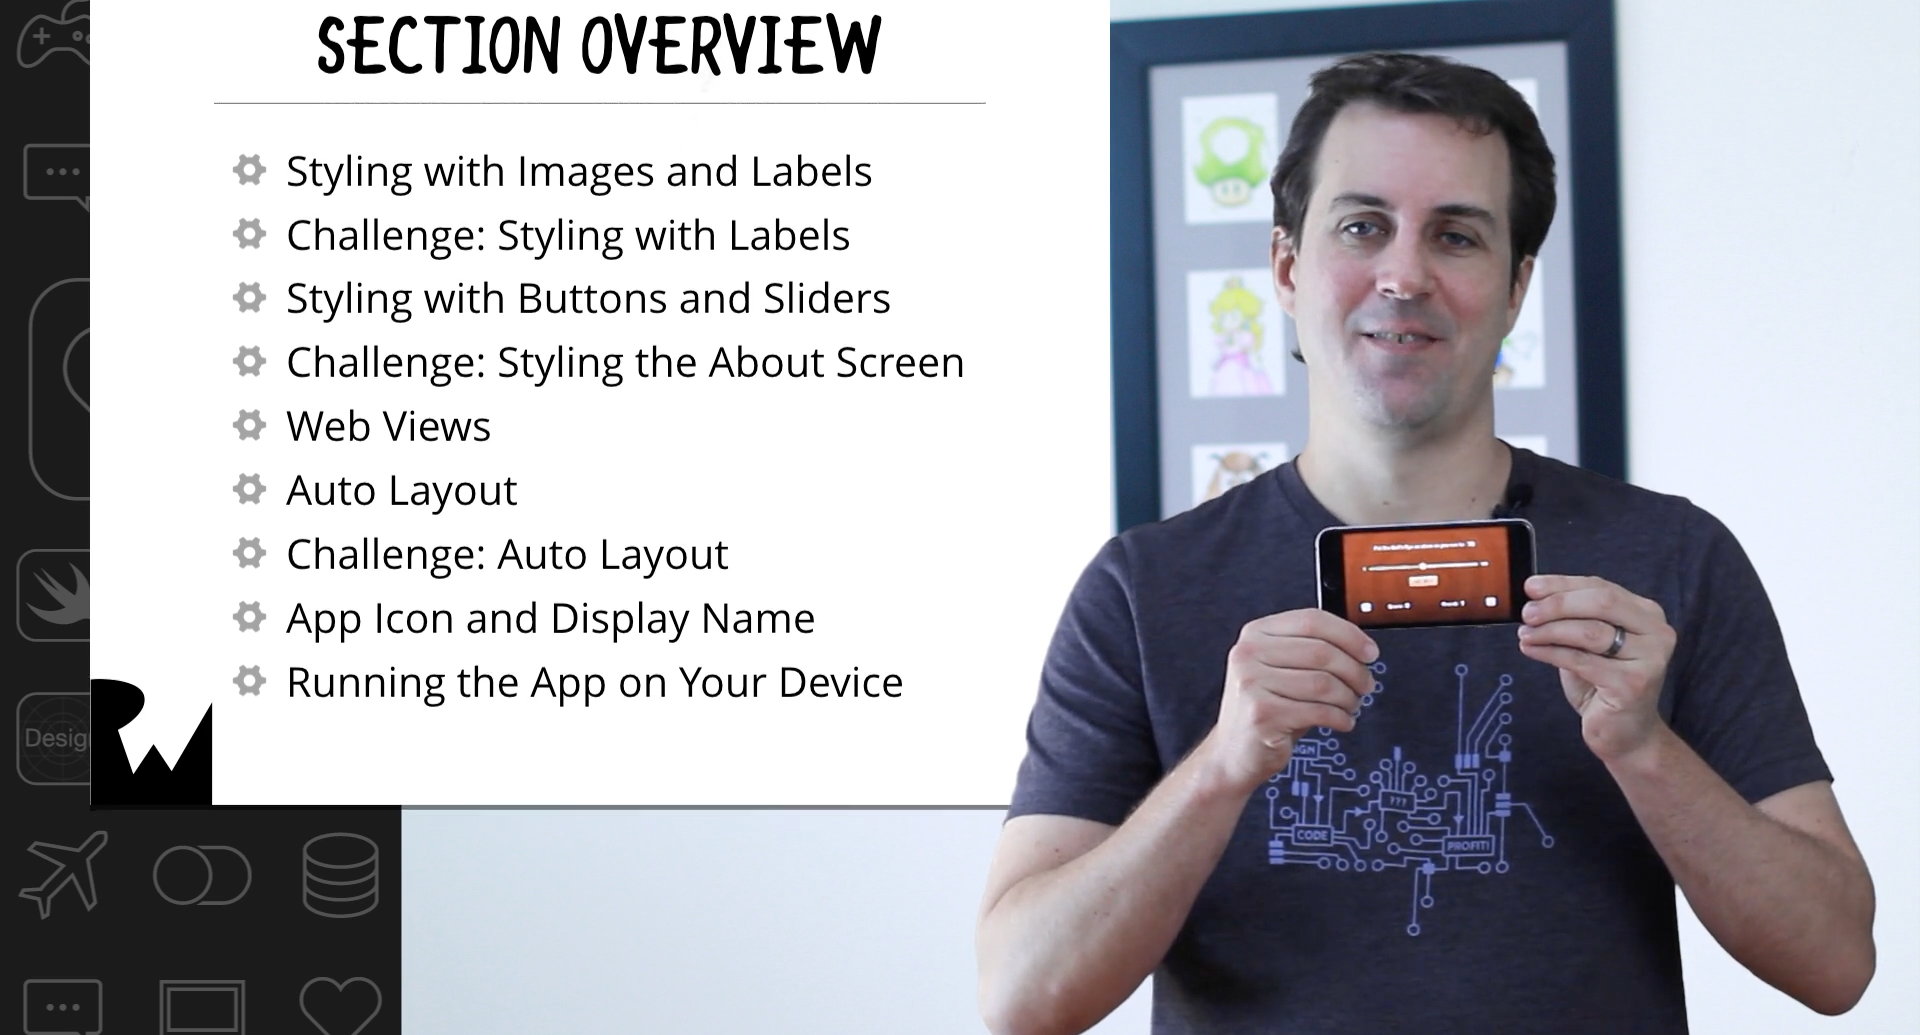
- Introduction: Let’s review what you’ll be learning in this section, and why it’s important.
- Styling with Images and Labels: Learn how to add a background image to your app, and style labels.
- Challenge: Styling with Labels: In this challenge, you’ll style the rest of the labels in Bull’s Eye.
- Styling with Buttons and Sliders: Learn how to style buttons to use custom images, and style sliders to use custom thumb images.
- Challenge: Styling the About Screen: In this challenge, you’ll get practice with styling your apps by improving the look of the About screen.
- Web Views: Learn how to add web views into your apps to display web pages.
- Introduction to Auto Layout: Learn how to use Auto Layout, a core UIKit technology that makes it easy to support many different screen sizes.
- Challenge: Introduction to Auto Layout: In this challenge, you’ll get practice with auto layout by setting up Auto Layout on the About screen.
- App Icon and Display Name: Learn how to set up your app icon, and change the display name of your app.
- Running the App on Your Device: Learn how to run your app on your own physical device.
- Conclusion: Let’s review where you are with your programming to-do list, and discuss what’s next.