Unreal Engine 4 Audio Tutorial
In this Unreal Engine 4 audio tutorial, you will learn how to play audio in 3D space using different methods, and control audio volumes through a UI. By Tommy Tran.
4.7 (20) · 1 Review
Creating a Sound Cue
First, navigate back to the Audio folder. You will use S_Pop as the sound effect so you will need to create a Sound Cue for it. To do this, right-click on S_Pop and select Create Cue.

This will create a new Sound Cue asset named S_Pop_Cue. Double-click on S_Pop_Cue to open it in the Sound Cue editor.
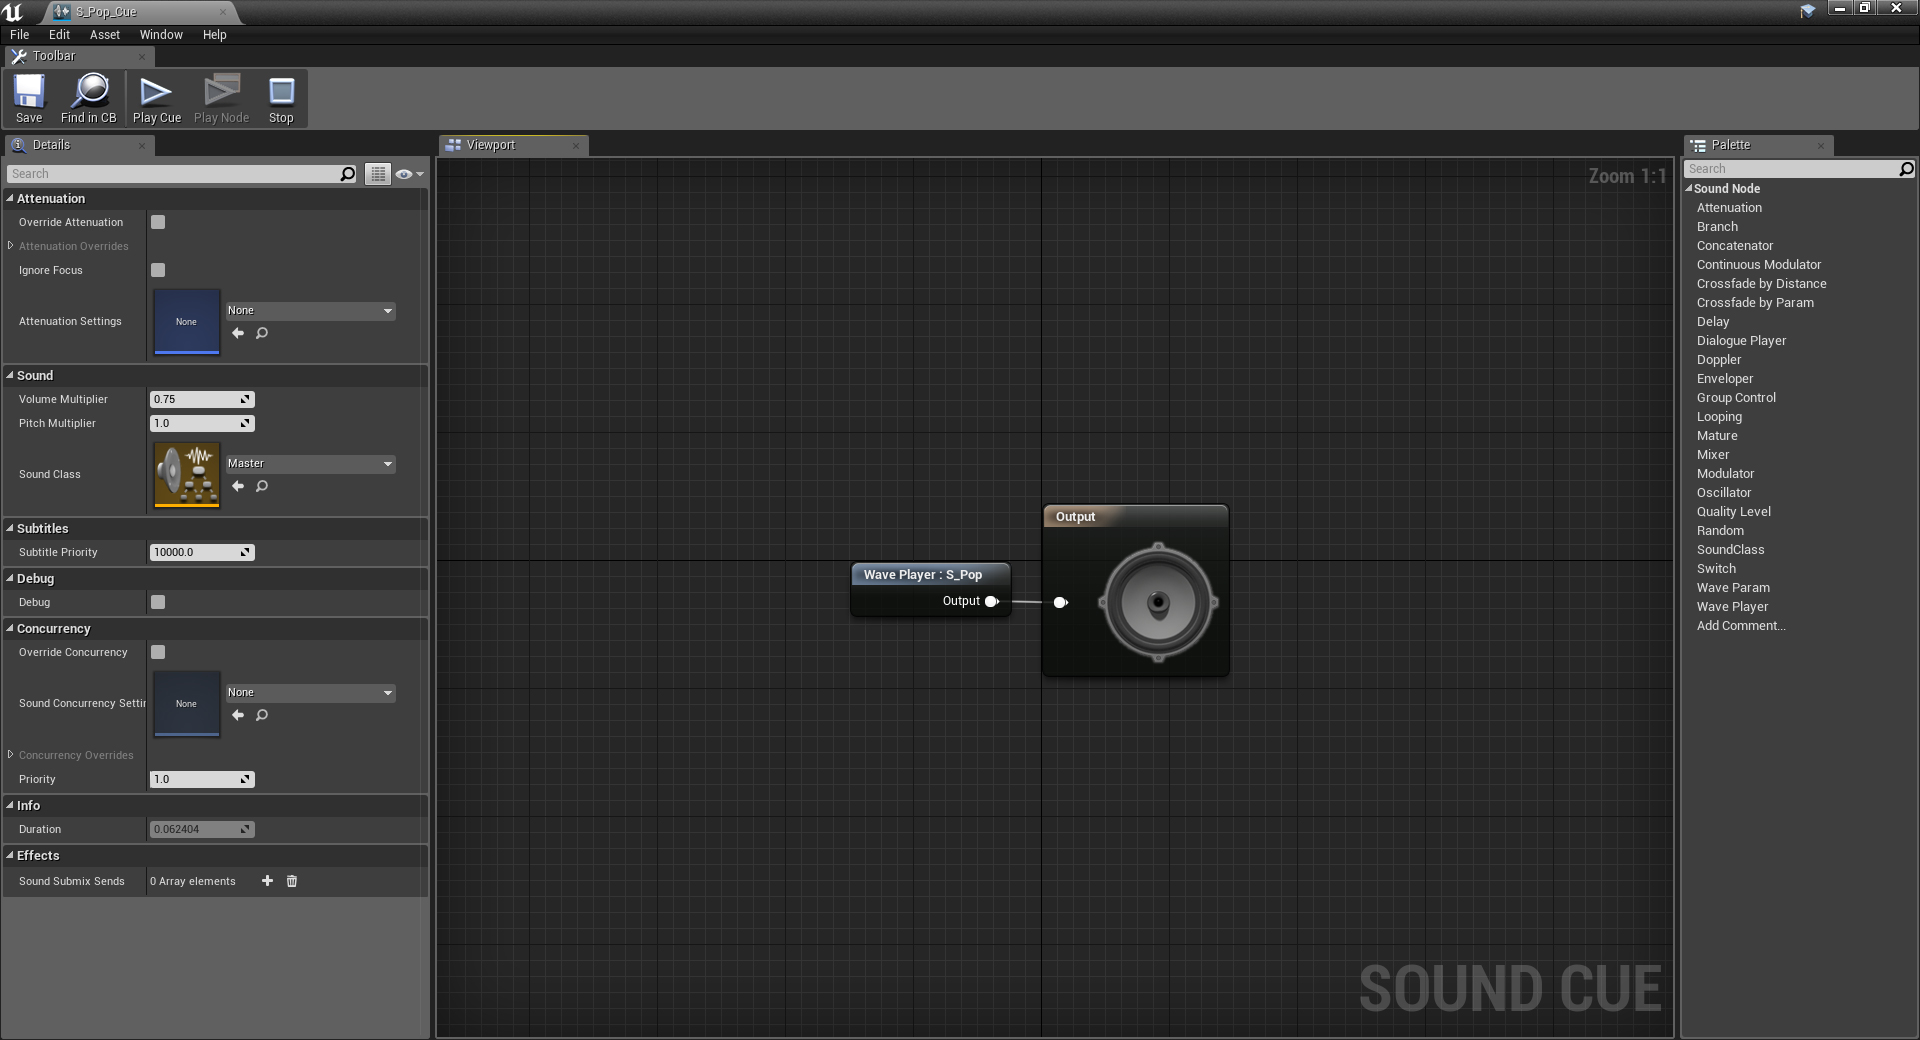
In the graph, you will see two nodes: Wave Player: S_Pop and Output. The Sound Cue will play whatever you connect to the Output node (in this case, it will play the S_Pop sound). You can listen to the Sound Cue by going to the Toolbar and clicking Play Cue.

Next, you will learn how to change the pitch of a sound.
Changing the Pitch of a Sound
To change the pitch of a sound, you need to use a Modulator node. Create one and connect it like so:

Now, you need to define how much the pitch can change. Select the Modulator node and then go to the Details panel. You will see two fields relating to pitch: Pitch Min and Pitch Max. Values less than 1 indicate the pitch can be lowered and vice versa. A value of 1 indicates the pitch will stay the same.
For this tutorial, the pitch should only be able to be raised. Set Pitch Min to 1.0 and Pitch Max to 2.0.

Now, every time you play the Sound Cue, the sound will have a pitch between the original pitch and double the original pitch.
Next, you need to play the Sound Cue when the player touches a cloud.
Playing a Sound Cue
Go back to the main editor and navigate to the Blueprints folder. Open BP_Cloud and then open the CloudTouched function. This function executes whenever the player touches a cloud so it is the perfect place to play the Sound Cue.
There are two nodes you can use to play a sound:
- Play Sound 2D: Plays a sound without any attenuation or spatialization (you will learn about these later in the tutorial). Use this node for sounds that don’t "exist" in the game world such as music and UI sounds.
- Play Sound at Location: Plays a sound at a location in 3D space. Use this node if you want the sound to change depending on the player’s location and orientation.
Since the cloud exists in the game world, the sound should also exist within the game world. Add a Play Sound at Location node to the end of the node chain.

Afterwards, set Sound to S_Pop_Cue.

Now, whenever the player touches a cloud, S_Pop_Cue will play.
Click Compile and then go back to the main editor. Press Play and start playing the game. Every time you touch a cloud, you should hear the same sound but at different pitches.

The sound’s pitch changes but it doesn’t sound like it is in 3D space. To enable this you need to spatialize the sound.
What is Spatialization?
Spatialization is a process performed to give the impression that the audio exists in 3D space. Sounds coming from the left will be heard in the left ear and vice versa.

In addition to increasing immersion, spatialization can also help aid gameplay. In competitive games like Overwatch and Counter-Strike, spatialized audio can help players discern the location of other players.
In this tutorial, you will use spatialization to pan the cloud’s sound based on its location.
Enabling Spatialization
There are two ways to enable spatialization for a Sound Cue:
- Sound Attenuation asset: This asset contains settings relating to attenuation and spatialization. You can assign this asset to different sounds to make sure they all have the same settings.
- Override Attenuation: Instead of using a Sound Attenuation asset, you can specify the settings within the Sound Cue. This allows you to create settings for individual sound cues.
For this tutorial, you will use the second method. Open S_Pop_Cue and then go to the Details panel. Locate the Attenuation section and enable Override Attenuation. This will enable the Attenuation Overrides section.

To check if spatialization is enabled, click the arrow next to Attenuation Overrides. The Spatialize setting will indicate if your sound is spatialized.

That’s it for the settings so go ahead and close S_Pop_Cue. Next, you need to specify where the sound is in 3D space.
Playing a Sound in 3D Space
Open BP_Cloud and then create a GetActorLocation node. Afterwards, connect it to the Location pin of the Play Sound at Location node.

Now, the sound will play at the same location as the cloud.
Click Compile and then go back to the main editor. Press Play and start touching clouds. You should hear sounds seemingly coming from different locations.

You may have noticed that some of the clouds have rain. But it’s not really a rain cloud if it doesn’t sound like it’s raining! Next, you will add a rain sound and use attenuation to change its volume depending on how far away it is.
Adding the Rain Sound
Instead of using a node to play the rain sound, you can use an Audio component instead. One of the advantages to using a component is that it will automatically play at the cloud’s location.
Open BP_Cloud and then go to the Components panel. Add a new Audio component and name it RainAudio.
Go to the Details panel and locate the Sound section. Change Sound to S_Rain.

The rain sound should not play for normal clouds. This means you need to deactivate RainAudio for normal clouds. To do this, scroll down to the Activation section and disable Auto Activate.

Now, you need to activate RainAudio for rain clouds. A good place to do this is the EnableRain function. This function executes if the cloud should be a rain cloud. Open the EnableRain function and add the highlighted nodes:

Next, you need to enable attenuation and define the attenuation settings