Triggering Alarms Tutorial for Android: Getting Started
Learn how to set up alarms in your Android apps using the AlarmManager API, and find out about the exact and inexact alarm types as well as best practices. By Denis Buketa.
When you hear the word “alarm”, it’s easy to immediately think about buzzing and ringing and that feeling when you’re comfy in bed, but it’s time to get up. But in Android, scheduling an alarm means scheduling your app to trigger at some point in the future. There are two important things you need to care about when defining an alarm: an action and a time in the future when that action should execute.
In this tutorial, you’ll play with a simple app called Studdy. Use it to schedule reminders to work or study, but also to take a break from those sessions. You’ll learn:
- What inexact and exact alarms are.
- How to schedule and cancel an alarm.
- What Doze mode is and how it affects scheduled alarms.
- How to preserve an alarm across device restart.
- Best practices when working with alarms.
For this tutorial, you need Android Studio and an Android device or emulator.
Getting Started
To start, download the materials using the Download Materials button at the top or bottom of this tutorial. Open the starter project in Android Studio. Once the project opens, let it build and sync, and you’re ready to go!
Run the app and check its features, but keep in mind this is a starter version of the app, so features aren’t complete:
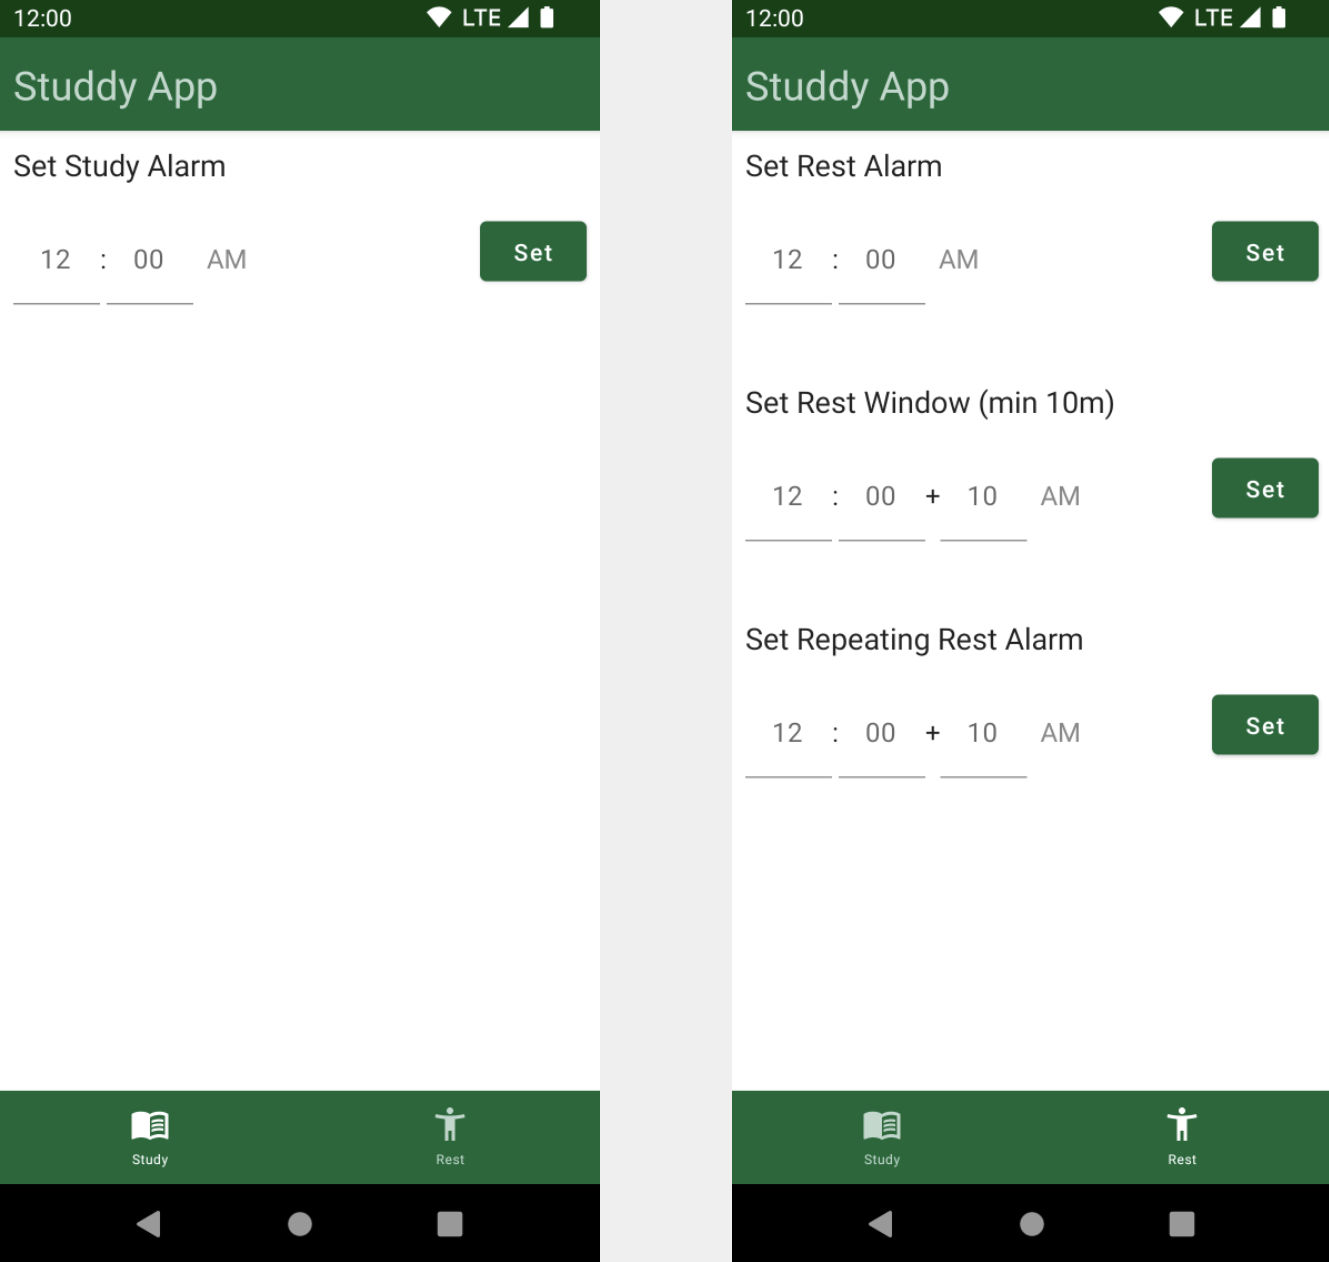
The complete app has two screens and the following features:
- Study screen: This allows you to set a reminder for a study time. The reminder is implemented as an exact alarm.
- Rest screen: This allows you to schedule three different types of reminders to rest and stretch a bit during your session:
- Regular inexact alarm.
- Window alarm.
- Repeating alarm for longer sessions.
- Regular inexact alarm.
- Window alarm.
- Repeating alarm for longer sessions.
Once you schedule an alarm by tapping Set, the Clear button will appear. You’ll use it to cancel the scheduled alarm.
When specifying the time, choose between AM and PM options by tapping a button beside the time picker. This button is hidden if your device is set to the 24-hour format. To change it, check the Date & Time section in the device Settings.
When the alarm fires, you’ll see a notification and you’ll hear a ringtone. To stop the ringtone, dismiss the notification or tap it to open the app and cancel the ringtone from there.
Triggering an Exact Alarm
Triggering an exact alarm happens in a precise moment in the future when the device time is exactly the same as the alarm time.
With this definition in mind, you’ll start working on the app’s first feature: Study Reminder. It’s important that the study starts sharply on time, so it makes perfect sense to implement it with an exact alarm.
Defining an AlarmManager Instance
Open ExactAlarmsImpl.kt. On top of ExactAlarmsImpl, replace TODO (1) with:
private val alarmManager = context.getSystemService(Context.ALARM_SERVICE) as AlarmManager
This code line creates an alarmManager instance. To get the AlarmManager instance, you use getSystemService() with a specific tag.
AlarmManager provides access to the system alarm services instance, and you’ll use it to manage alarms in the app.
Declaring a Permission
Now, open AndroidManifest.xml. Above the application tag, you’ll find TODO (2). Replace it with this:
<uses-permission android:name="android.permission.SCHEDULE_EXACT_ALARM" />
This prepares your app for using exact alarm APIs. All apps that target Android 12 (API level 31) or higher have to obtain the Alarms & reminders special app access by declaring SCHEDULE_EXACT_ALARM permission. This behavior change encourages apps to preserve system resources. Scheduling an exact alarm without declaring this permission would produce a SecurityException error.
Checking Your App’s Permissions
Go back to ExactAlarmsImpl.kt, and look for canScheduleExactAlarms(). Replace the return statement with:
return if (Build.VERSION.SDK_INT >= Build.VERSION_CODES.S) {
  alarmManager.canScheduleExactAlarms()
} else {
  true
}
Keep in mind that before scheduling an exact alarm, you need to confirm the app still has the special app access when targeting Android 12 (API level 31) or higher. You do this by calling canScheduleExactAlarms(). For lower SDK versions, you don’t have to perform this check.
Opening the Alarms & Reminders Screen
Next, you’ll add code for starting the screen you’ll be interested in the most.
Go to MainActivity.kt and find openSettings(). Replace TODO (4) with the following code:
if (Build.VERSION.SDK_INT >= Build.VERSION_CODES.S) {
  startActivity(Intent(ACTION_REQUEST_SCHEDULE_EXACT_ALARM))
}
If the user has revoked the special app access and tries to schedule an exact alarm, this code opens the Alarms & reminders screen in the system settings to grant it again.
When you revoke Alarms & reminders special app access, the system stops your app and cancels all future exact alarms. When special app access is granted to your app, the system sends the ACTION_SCHEDULE_EXACT_ALARM_PERMISSION_STATE_CHANGED broadcast. This lets you reschedule any exact alarms your app needs. However, you won’t implement this functionality in this tutorial. You need to leave something for the next time. :]
Handling App Permission
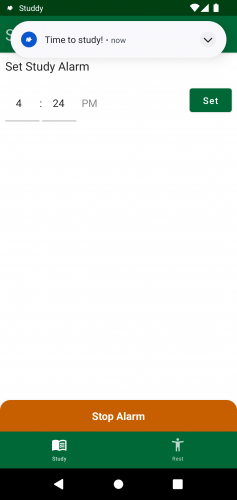
Run the app on a device or emulator with Android 12 (API level 31) or higher. On the main screen, enter a time in the future and tap Set. You’ll see something like this:

The app saved exact alarm data in SharedPreferences and updated the UI. You still haven’t implemented the code that’ll schedule an exact alarm with AlarmManager, but this demo confirms that you’ve successfully set the permission because canScheduleExactAlarms() returns true.
Next, revoke special app access to verify the app opens the Alarms & reminders screen. In the Studdy app’s App info screen, switch off the Allow setting alarms and reminders option.

Now, go back to the app and try to schedule an exact alarm with the same steps as before, and you’ll see this:

In this case, canScheduleExactAlarms() returned false and resulted in the app opening the Alarms & reminders screen. That happened because you didn’t allow scheduling alarms from the Studdy app.