Android App Widgets Tutorial
Learn how to give your users fast access to the most important functions of your Android app, right from their home screen, using App Widgets. By Matei Suica.
Run your Widget
The Widget you’ve created is beautiful, but it’s not doing anything quite yet. Build and run your app to make sure there’s no error in the XML. Just to be sure everything is fine, add the widget to the screen. If you’ve never added a widget to your Home screen before, here are the steps:
- Go to the Home screen
- Long press on an empty space
- Select “Widgets”
- Long press on the Coffee Log Widget
- Drop it wherever you like on the screen
Your widget looks like this:
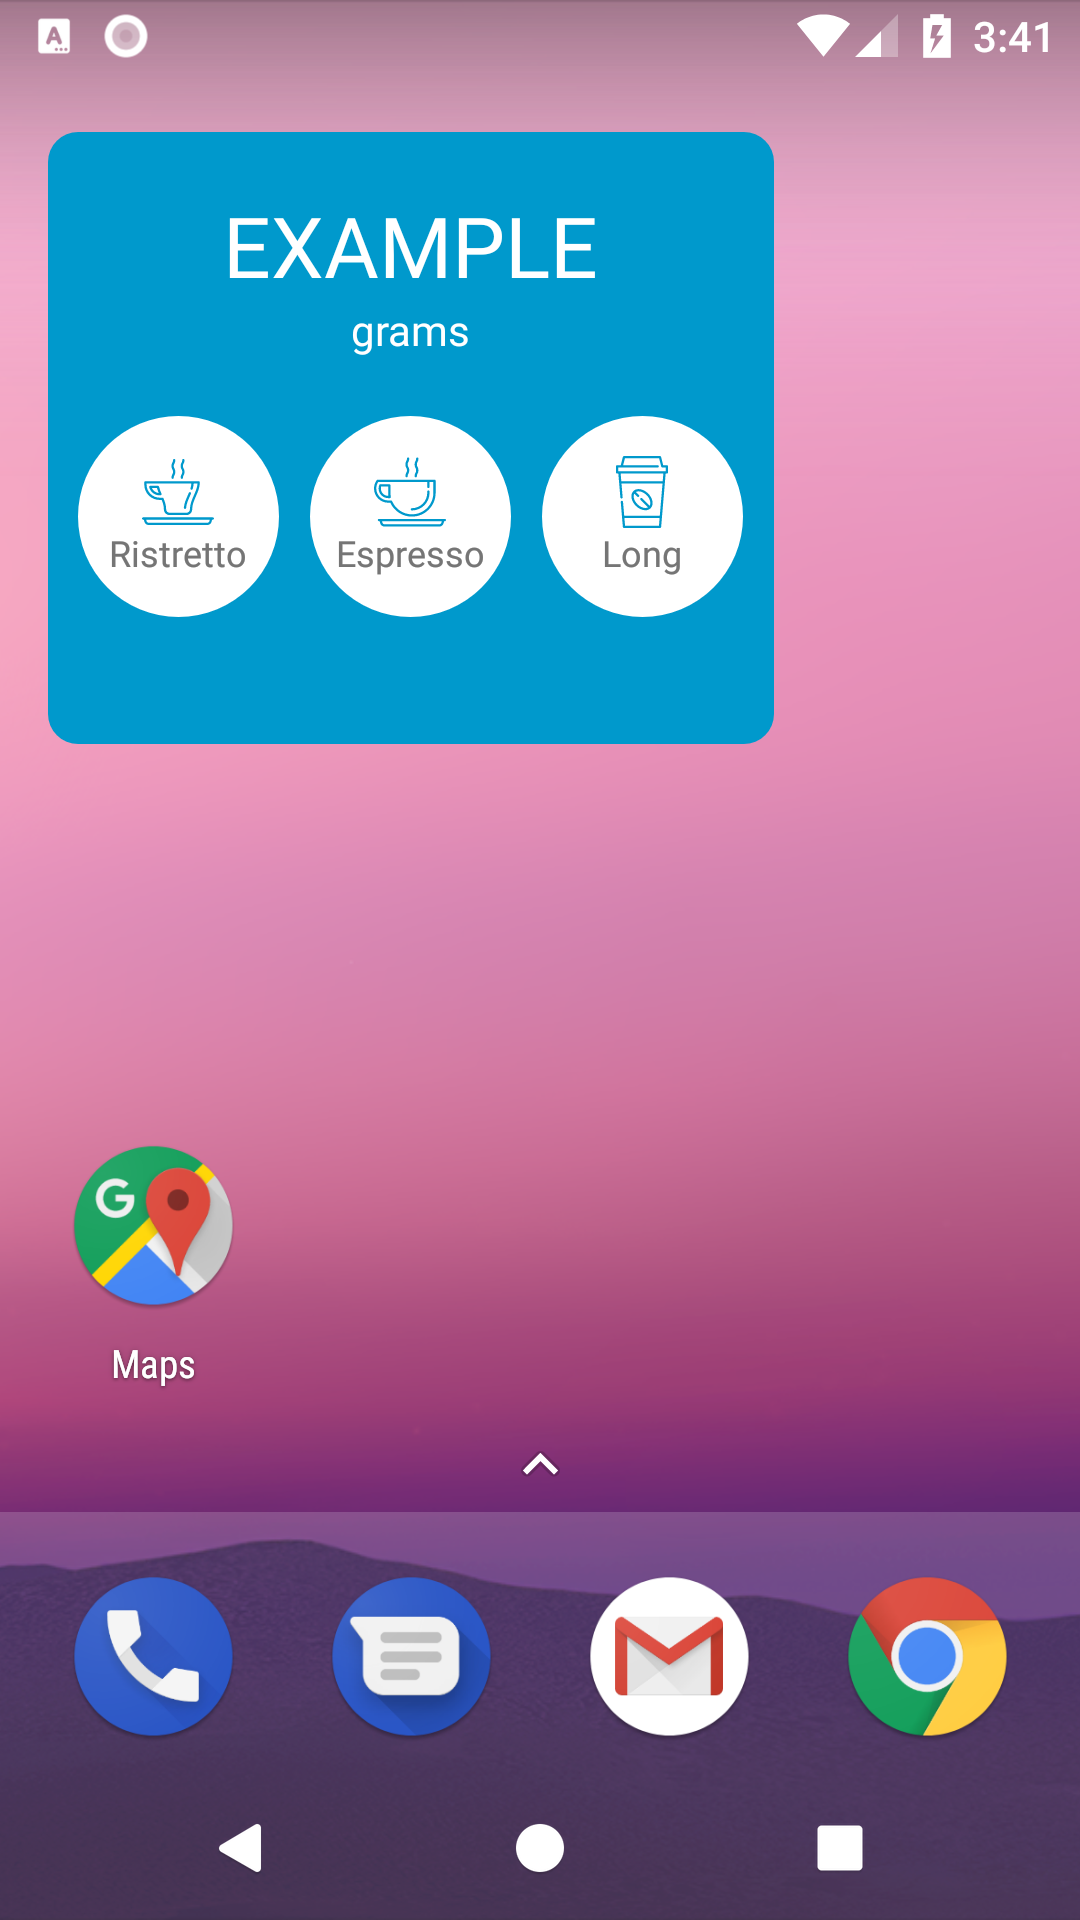
Notice how the autogenerated code populated the first TextView with “EXAMPLE”. Later in this tutorial, you will update it with the right number of coffee grams.
Performing actions
Now it’s time to add some interactivity to the Widget. When the user selects a button, you’ll have to open MainActivity, passing information about the selected coffee in order to update the total number of grams in today’s record.
Unfortunately, launching a simple Intent is not enough, because we have to remember that our Widget is running in an application that is different from ours and runs in another Android process. The Android platform has a solution for this called PendingIntent that is basically a way to ask another application to launch an Intent for you.
Open then the CoffeeLoggerWidget.kt file and add this utility function at the end of the companion object:
private fun getPendingIntent(context: Context, value: Int): PendingIntent {
  //1
  val intent = Intent(context, MainActivity::class.java)
  //2
  intent.action = Constants.ADD_COFFEE_INTENT
  //3
  intent.putExtra(Constants.GRAMS_EXTRA, value)
  //4
  return PendingIntent.getActivity(context, value, intent, 0)
}
This Kotlin function has the responsibility of creating a PendingIntent for a given coffee:
- First you define the
Intentto launch as usual using the destination class as argument; in your case it’s theMainActivityclass. - The
MainActivitycan be launched in different ways, and you need something that identifies how much to vary the coffee content. To do this you use an actionMainActivitycan recognise. - You also need to put into the
Intentthe quantity to add. Remember,MainActivitydoesn’t know what button was pressed on the Widget! - Create the
PendingIntentand return it to the caller of the function
Since you now have the action prepared, attach them to the buttons. Go to the updateAppWidget() function in the companion object and add the following code just before its last instruction appWidgetManager.updateAppWidget(...):
views.setOnClickPendingIntent(R.id.ristretto_button,
    getPendingIntent(context, CoffeeTypes.RISTRETTO.grams))
views.setOnClickPendingIntent(R.id.espresso_button,
    getPendingIntent(context, CoffeeTypes.ESPRESSO.grams))
views.setOnClickPendingIntent(R.id.long_button,
    getPendingIntent(context, CoffeeTypes.LONG.grams))
It is worth noting that updateAppWidget() is a convenience method the Android Studio wizard created in order to encapsulate the update logic for a given Widget. Looking at the same Kotlin class, you see that it’s invoked in the onUpdate() method for each Widget that requires an update. This call also happens when the Widget appears in the hosting application for the first time.
override fun onUpdate(context: Context, appWidgetManager: AppWidgetManager, appWidgetIds: IntArray) {
  // There may be multiple widgets active, so update all of them
  for (appWidgetId in appWidgetIds) {
    updateAppWidget(context, appWidgetManager, appWidgetId)
  }
}
The RemoteViews class
Now your code should look like this:
internal fun updateAppWidget(context: Context, appWidgetManager: AppWidgetManager,
                                 appWidgetId: Int) {
  //1
  val widgetText = context.getString(R.string.appwidget_text)
  //2
  val views = RemoteViews(context.packageName, R.layout.coffee_logger_widget)
  //3
  views.setTextViewText(R.id.appwidget_text, widgetText)
  //4
  views.setOnClickPendingIntent(R.id.ristretto_button,
      getPendingIntent(context, CoffeeTypes.RISTRETTO.grams))
  views.setOnClickPendingIntent(R.id.espresso_button,
      getPendingIntent(context, CoffeeTypes.ESPRESSO.grams))
  views.setOnClickPendingIntent(R.id.long_button,
      getPendingIntent(context, CoffeeTypes.LONG.grams))
  // 5
  appWidgetManager.updateAppWidget(appWidgetId, views)
}
Here’s what’s going on:
- You’re using the
Contextin order to access a string resource. - An instance of the
RemoteViewsclass is created and given the widget’s layout id. ARemoteViewsis basically a mirror image of what you’re going to display in the Widget. - You set the previous string as content of the
TextViewwith idR.id.appwidget_text. It’s very important to note that you can’t access theTextViewdirectly and that only some operations are allowed using theRemoteViews; in this case you’re setting a text. - Using the
RemoteViewsinstance, you register aPendingIntentto use when the user clicks on a each Widget button. - The last instruction binds the specific instance of
RemoteViewsto the specific instance of the Widget.
Build and run now. You won’t see any difference in the widget, but clicking the Widget buttons will open the app with an updated value of grams. Great job!
Updating the Widget
Widgets should always display the lastest available information, and the update frequency depends on the specific type of data. A Weather Widget doesn’t need a very frequent update, unlike the score of a football match or the price of a specific stock.
You need a way to invoke the previous onUpdate() method at a specific time interval in order to create the new RemoteViews with the new data.
The following drawing gives you an idea of the process:

The problem is how to send the “I need a refresh!” message to the Widget.
Widget configuration
When the update frequency you need is longer than 30 minutes, you don’t need to write any code and you can simply rely on the configuration file coffee_logger_widget_info.xml Android Studio generated in the res\xml folder.
<?xml version="1.0" encoding="utf-8"?>
<appwidget-provider xmlns:android="http://schemas.android.com/apk/res/android"
  android:initialKeyguardLayout="@layout/coffee_logger_widget"
  android:initialLayout="@layout/coffee_logger_widget"
  android:minHeight="110dp"
  android:minWidth="180dp"
  android:previewImage="@drawable/example_appwidget_preview"
  android:resizeMode="horizontal|vertical"
  android:updatePeriodMillis="86400000"
  android:widgetCategory="home_screen">
  </appwidget-provider>
The Widget refresh rate is the one defined in the attribute android:updatePeriodMillis. The default value is one day in milliseconds.
Managing updates requests
If you understand how the Android platform manages updates to your Widget, you can replicate the same thing at will. The Android Studio wizard created the CoffeeLoggerWidget class that extends AppWidgetProvider, but we didn’t realize that this was a particular implementation of a BroadcastReceiver.
You can see that by looking at the updates the wizard made to the AndroidManifest.xml file:
<?xml version="1.0" encoding="utf-8"?>
<manifest xmlns:android="http://schemas.android.com/apk/res/android"
    package="com.raywenderlich.android.coffeelogs">

  - - - -

  <receiver android:name=".CoffeeLoggerWidget">
    <intent-filter>
      <action android:name="android.appwidget.action.APPWIDGET_UPDATE" />
    </intent-filter>

    <meta-data
      android:name="android.appwidget.provider"
      android:resource="@xml/coffee_logger_widget_info" />
  </receiver>

  - - - -

</manifest>
Based on the specific Intent‘s action, the AppWidgetProvider dispatches the call to a different methods. Launching an Intent with the android.appwidget.action.APPWIDGET_UPDATE action results in the invocation of the onUpdate() function.
This is exactly what the Android system does at the interval set in the coffee_logger_widget_info.xml configuration file. This means that the updateAppWidget() function is the perfect place for the code to execute on every update.
So add the following line to the beginning of the function:
val coffeeLoggerPersistence = CoffeeLoggerPersistence(context)
and change widgetText to take the value from there:
val widgetText = coffeeLoggerPersistence.loadTitlePref().toString()
Good! Build and run and you’ll see that the widget is periodically updating the “grams” value. Seems like someone had a little too much coffee:
