SwiftUI Testing With ViewInspector for iOS
Learn how to use the ViewInspector framework to write UI tests for SwiftUI apps. By Warren Burton.
When you build an app, you want it to look great for your customers, and you want it to keep looking great as time passes and you add new features. One of your tools for this is testing the UI for consistency.
Apple doesn’t provide any testing framework for SwiftUI, but fortunately Alexey Naumov — a very talented Swift developer — has created a SwiftUI testing framework called ViewInspector, which allows you to both inspect the runtime state of your views and perform actions like pressing buttons.
In this tutorial, you’ll:
- Install ViewInspector as a Swift Package.
- Use ViewInspector to write your first UI tests.
- Learn to write asynchronous UI tests.
- Test a custom
ButtonStyle. - Learn to control the search direction when finding UI elements.
To get the most out of the tutorial, you should be familiar with SwiftUI. If you’re not, get started here.
Time to get going!
Getting Started
Download the project using the Download Materials link at the top or bottom of the tutorial.
You’ll work with an app called StepByStep — it’s an app that lets you collect recipes for your favorite meals and snacks.
Open the Xcode project in StepByStep-starter and look around. The architecture is model-view-controller (MVC) with a main-detail-based view stack, and the model and persistence layer use CoreData.
If you’d like to learn more about CoreData, fortunately we have a lot of tutorials available for you on this site. :]
First Run
Select the Simulator iPhone 12 Pro:
![]()
Build and run to see the starting state of the project:

You can see the view is plain with no decoration. During this tutorial, you’ll add styles and transform the app into something you’d be proud to present to a customer. You’ll test these changes using ViewInspector and XCTest.
Your first step is to install ViewInspector in the project so you can start testing.
Installing ViewInspector
Before adding ViewInspector, you need to add a test target to your project.
Adding a Test Target to Your Project
To add a test target:
- Select the project in the Project navigator.
- Click the Add a target control at the bottom of the target list.

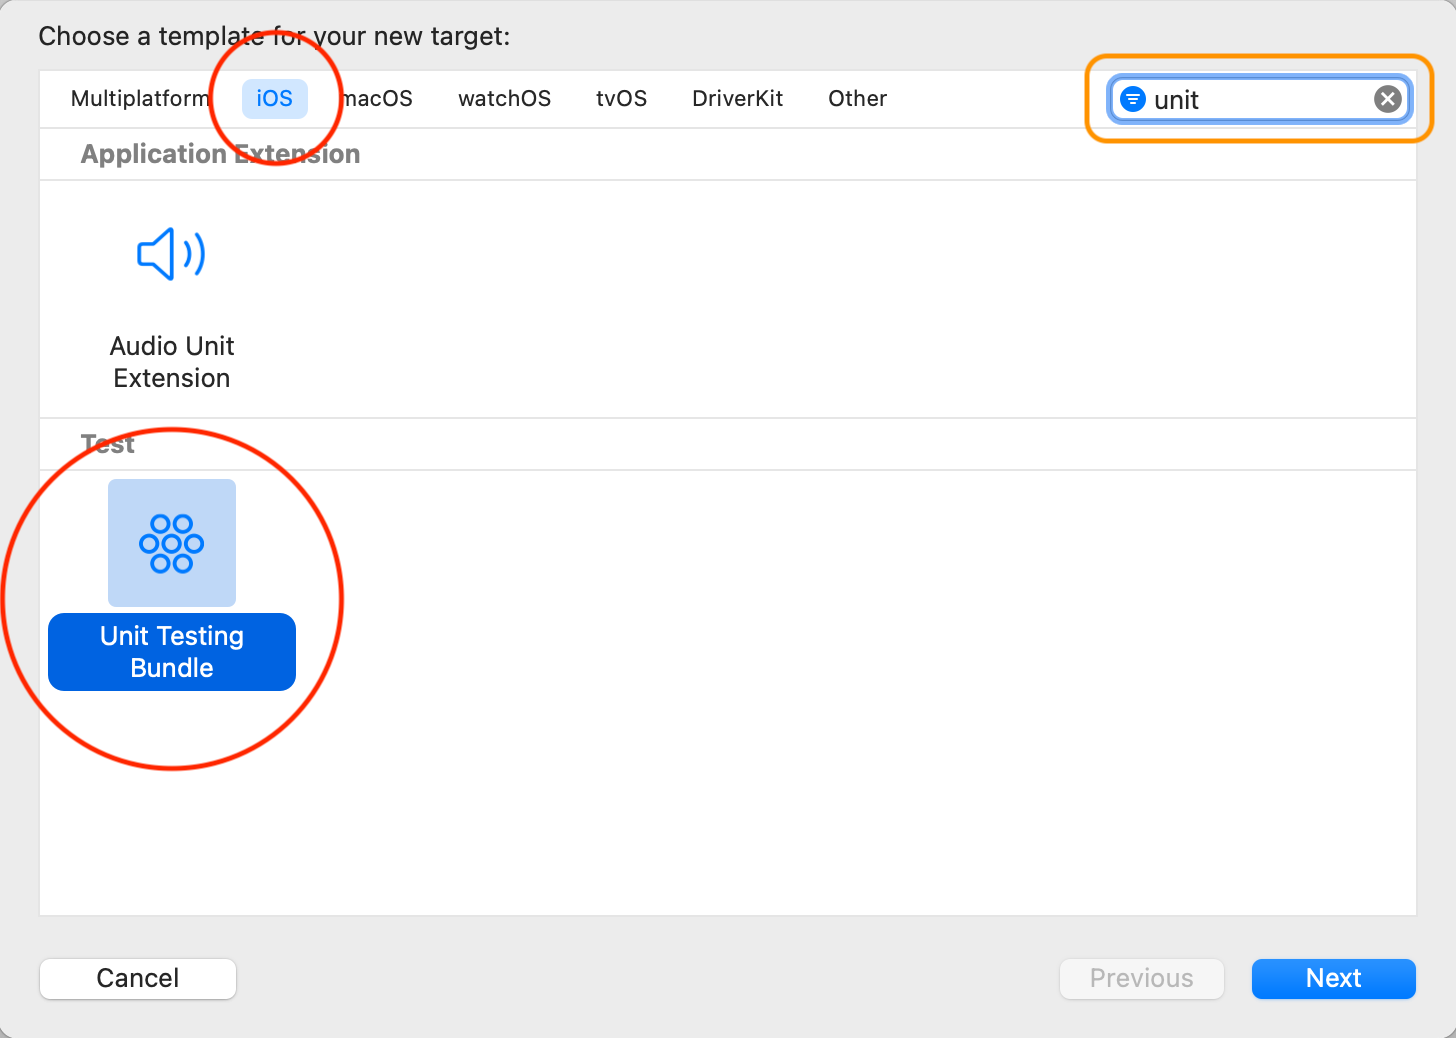
Next, choose Unit Testing Bundle for iOS and click Next. You can filter the view to make it easier to find the right template:
Finally, set the Team to None and the Organization Identifier to com.raywenderlich, then click Finish:

Your target list will have a StepByStepTests target in the list:

Next, you’ll add the ViewInspector framework to the new StepByStepTests target using Swift Package Manager (SPM).
Adding the ViewInspector Framework to Your Test Target
To add the ViewInspector framework, you:
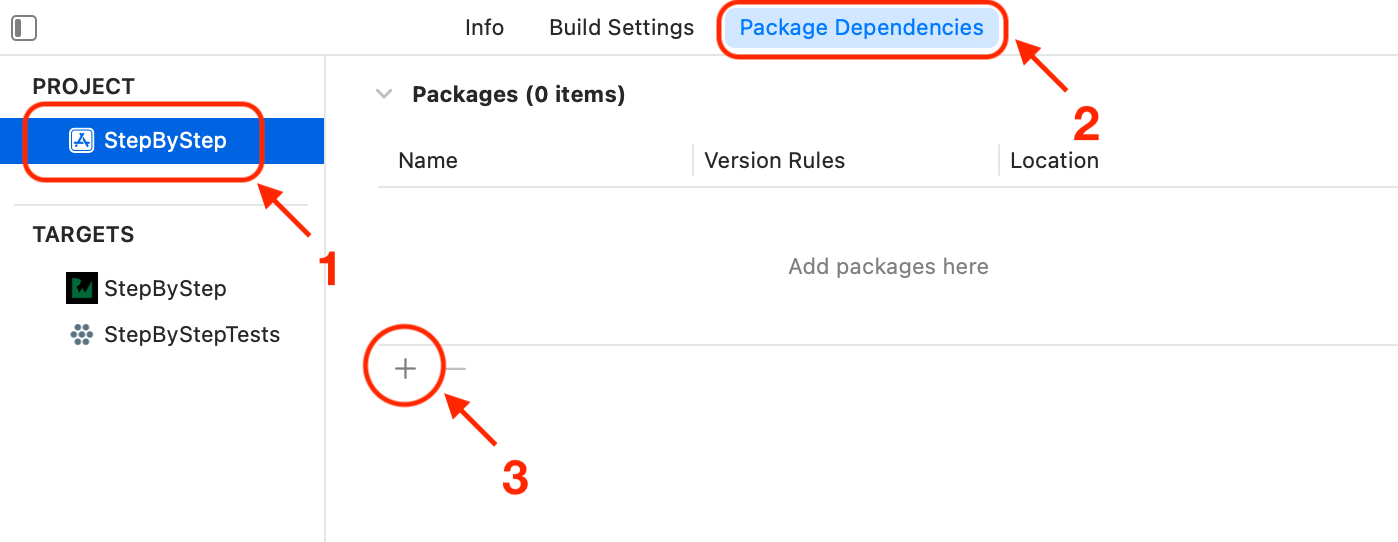
- Select the StepByStep project in the project view.
- Select the Package Dependencies tab.
- Click the Add Package Dependency control to reveal a window.
Enter the URL https://github.com/nalexn/ViewInspector into the search bar, and you’ll see the package description appear:

Use Exact Version for the Dependency Rule and select version 0.9.1.
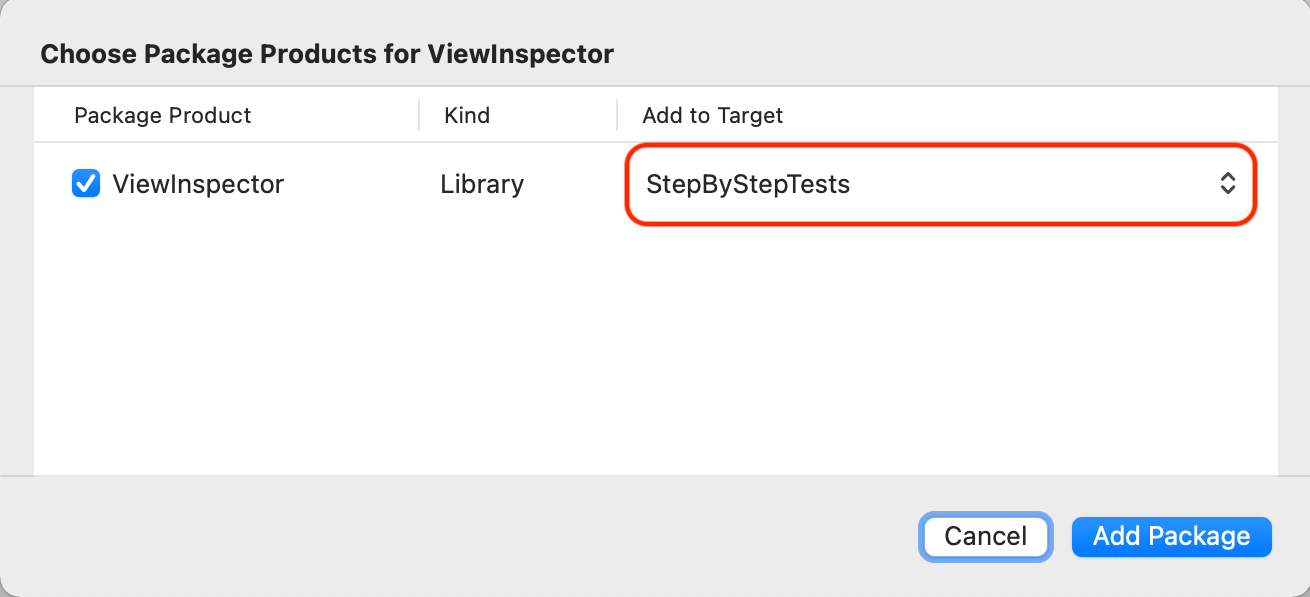
Click Add Package to load the package from the remote repository. When the Choose Package Products window appears, select StepByStepTests as the destination target:
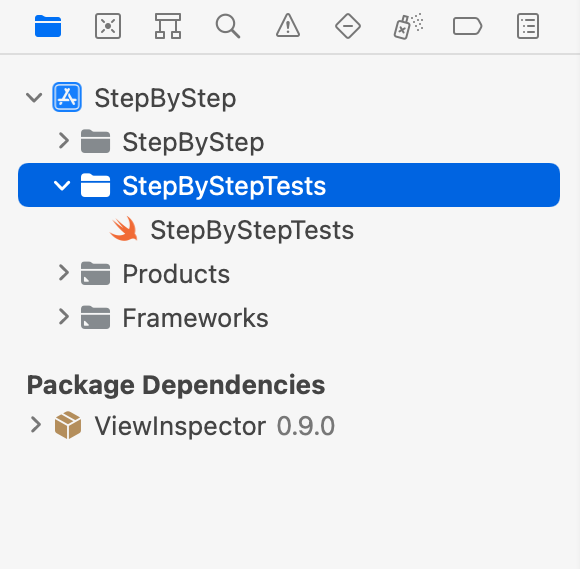
Click Add Package to complete the process. The project view will now show ViewInspector in your package list.

Well done! You’ve now done everything you need to start testing with ViewInspector. Next, you’ll write your first test.
Writing ViewInspector Tests
The first test you write will be a baseline test to ensure that everything is working with ViewInspector.
Writing a Baseline Test
In the project navigator, you’ll find a folder called StepByStepTests that Xcode creates when you add a test target. In that folder, open StepByStepTests.swift:
You’ll see the declaration for StepByStepTests. Delete everything that Xcode supplied inside the class, so you’re left with an empty body. Here’s how the file should look:
import XCTest

class StepByStepTests: XCTestCase {

}
Next, add these imports to the top of the file, just below import XCTest:
import SwiftUI
import ViewInspector
@testable import StepByStep
The last line is very important, as using the @testable modifier allows you to test your module. Your app is a Swift module.
Inside the body of StepByStepTests, add the following function:
func testViewInspectorBaseline() throws {
  let expected = "it lives!"
  let sut = Text(expected)
  let value = try sut.inspect().text().string()
  XCTAssertEqual(value, expected)
}
In this test, you create a Text view. Then, using syntax provided by ViewInspector, you verify that the inspected text matches what you initialized it with.
Build and test from the menu Product ▸ Test or use the key shortcut Command-U. Soon, you’ll see the test navigator light up green:
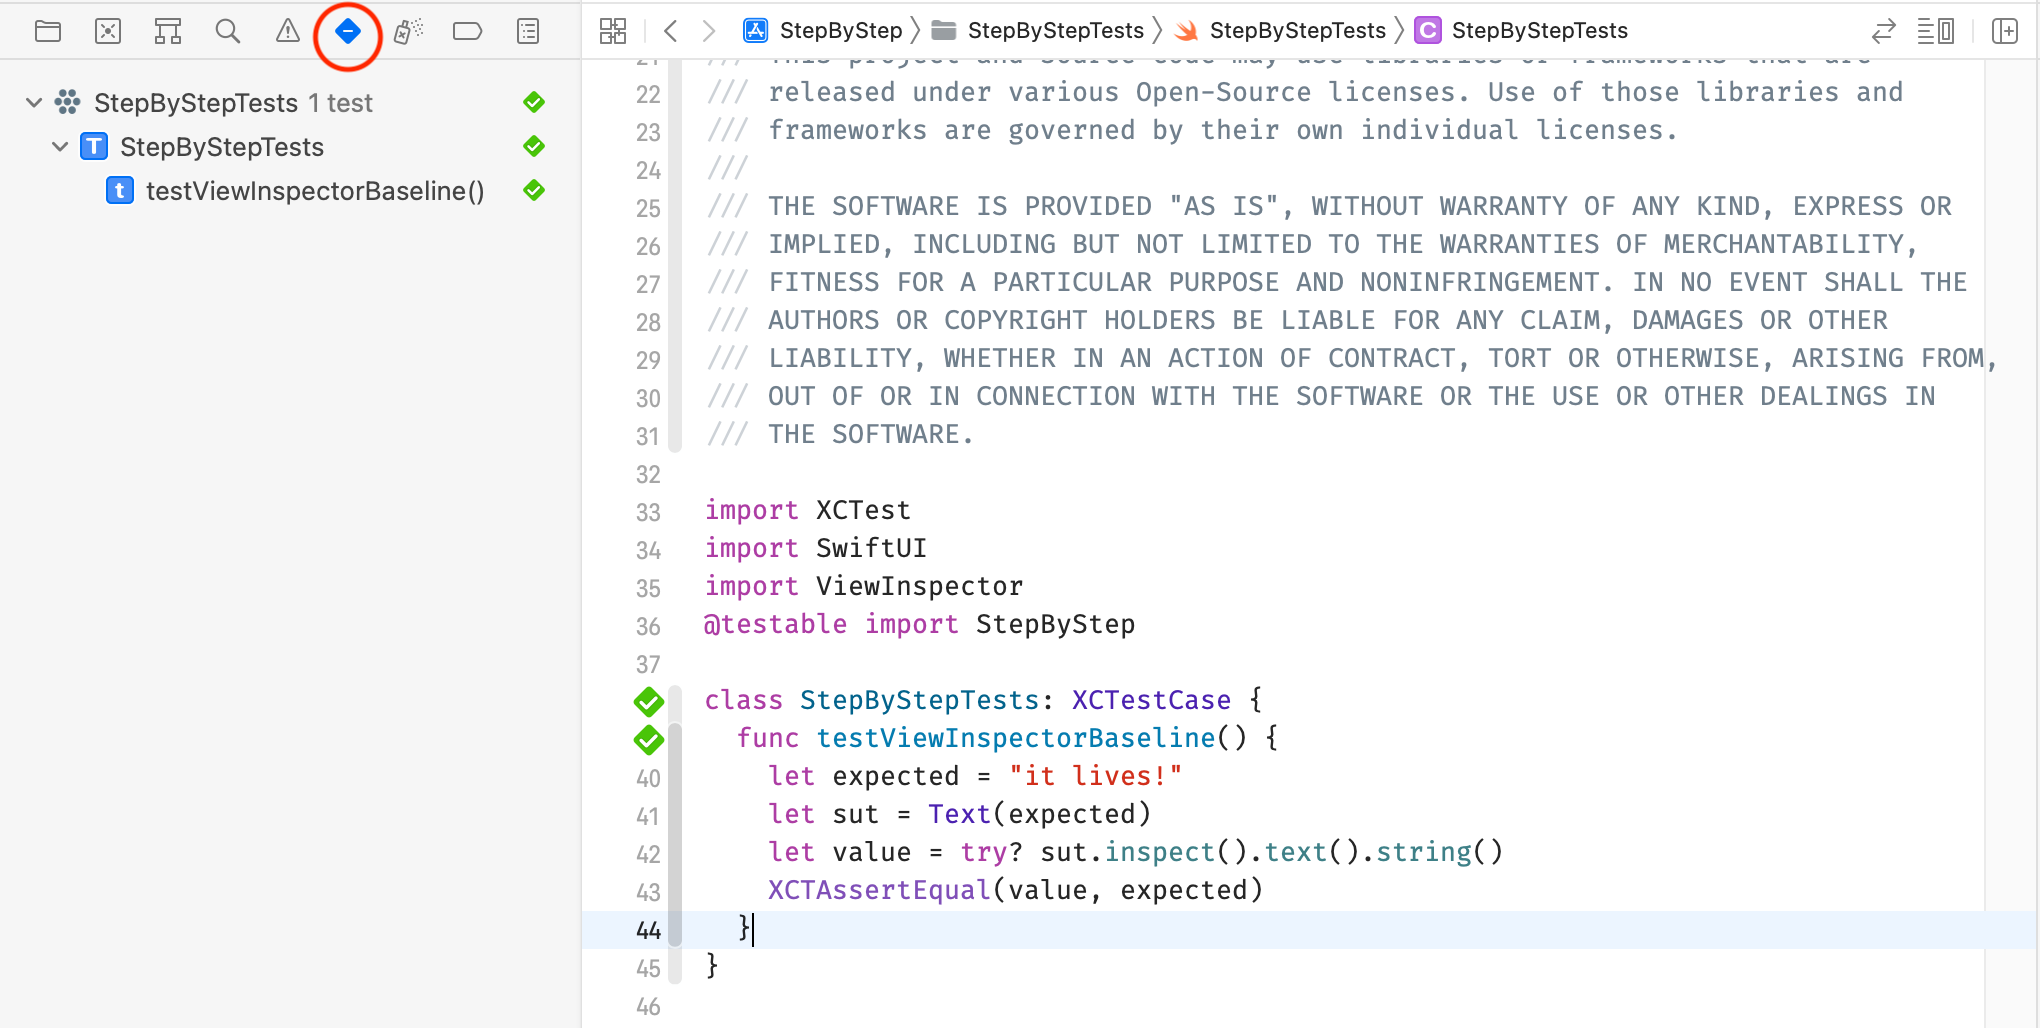
All those green checks tell you that your tests are succeeding.
Having a test that verifies that a framework is working will save you time in the future when your tests break. This test answers the question of whether a break is in the framework or your code.
From here, you’ll start to test your code.
Making Changes to the View
In this section, you’ll apply styles to the recipe list and then test those styles.
In the project navigator, open the folder StepByStep ▸ Views ▸ Recipes. Open RecipeListView.swift. This file contains RecipeListView and an associated preview, RecipeListView_Previews.
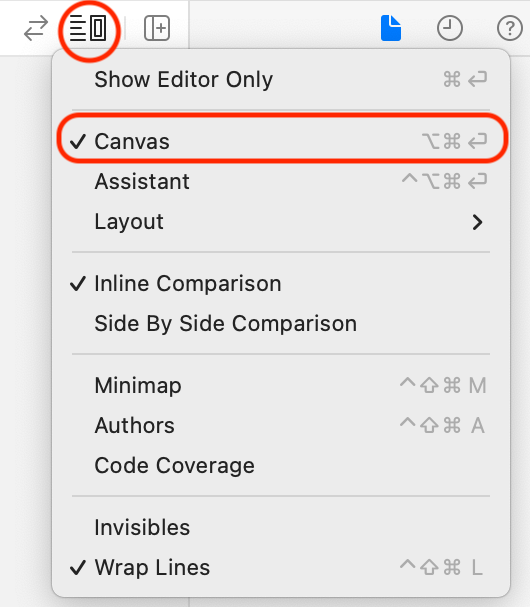
Show the canvas using the control at the right side of the editor or the key combination Command-Option-Return:
Refresh the canvas preview with Resume or the key combination Command-Option-P to show the preview for RecipeList:
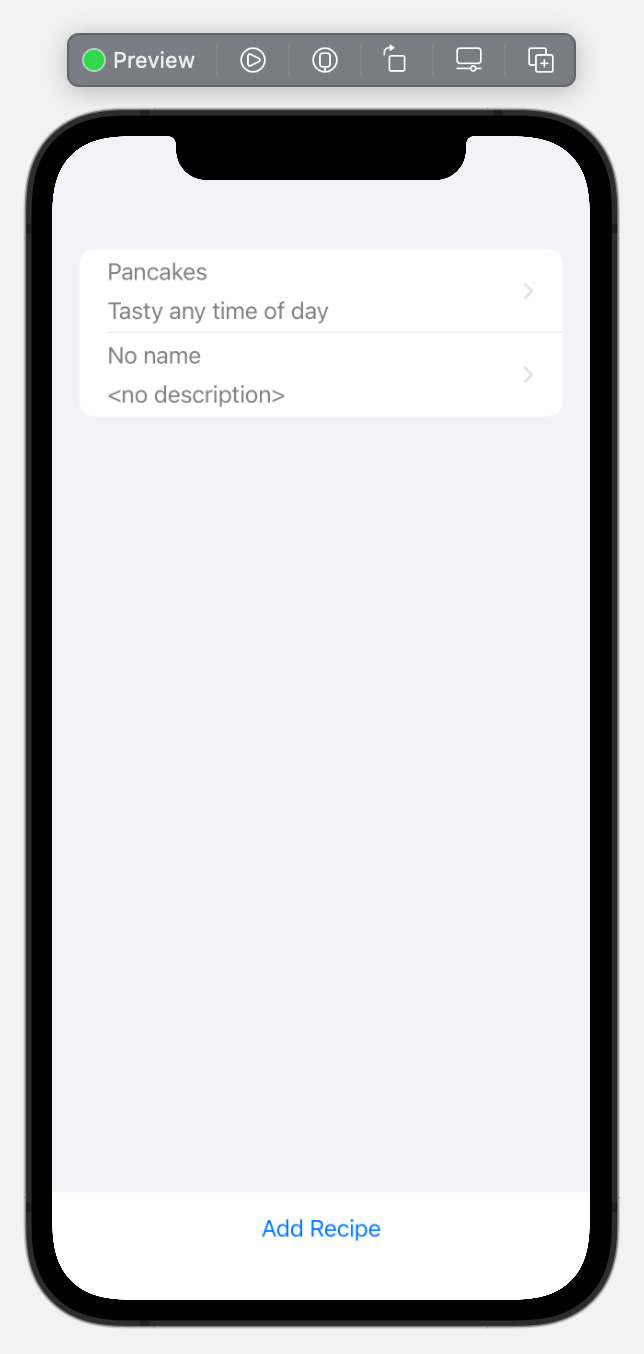
RecipeListView_Previews populates a RecipeController with two recipes, one of them with no title or description. RecipeListView displays those two recipes.
Your first act is to style the cells of the table view. In the project navigator, in the Recipes folder, open RecipeLineView.swift.
Within the body of RecipeLineView, you can see two Text blocks. Add these modifiers to the top Text that displays the recipe name:
.fontWeight(.medium)
.font(.title2)
.foregroundColor(.primary)
That code changes the font of the recipe name. Next, add these modifiers to the bottom Text that displays the recipe description:
.font(.caption)
.foregroundColor(.primary)
.lineLimit(3)
That’s made the description less prominent than the name.
Open RecipeListView.swift again and refresh the preview. Your list now looks a lot better with those small style changes:
