How To Make a Simple iPhone Game with Flash CS5
This is a tutorial by iOS Tutorial Team member Russell Savage, the founder of Dented Pixel, a creative development company. He recently released its first app – Princess Piano – and he is currently hard at work on several new projects. I originally got into Objective C reluctantly. I had been holding out because I […] By Ray Wenderlich.
Sign up/Sign in
With a free Kodeco account you can download source code, track your progress, bookmark, personalise your learner profile and more!
Create accountAlready a member of Kodeco? Sign in
Sign up/Sign in
With a free Kodeco account you can download source code, track your progress, bookmark, personalise your learner profile and more!
Create accountAlready a member of Kodeco? Sign in
Contents
How To Make a Simple iPhone Game with Flash CS5
30 mins
Adding the Hockey Puck
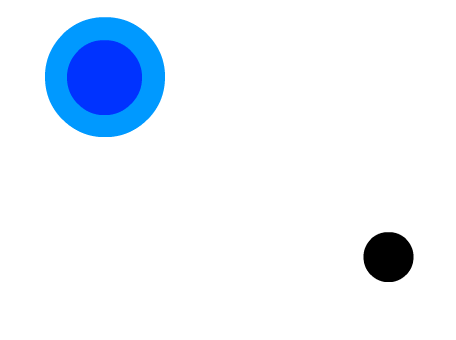
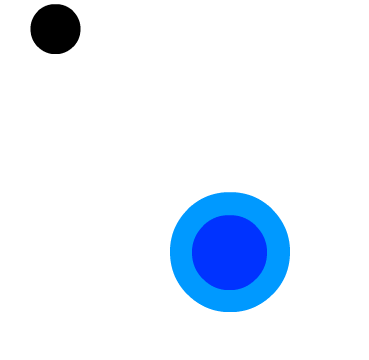
Well a hockey paddle isn’t much fun without a hockey puck, so let’s make that next. Create the puck in a similar way that we created the paddle earlier:
- Switch back to the Flash project, and select Insert->New Symbol.
- Name the symbol HockeyPuck.
- Click on Advanced, Click on Export for Actionscript and the class name should auto-fill in as “HockeyPuck”.
- Click on OK to create the symbol.
- Tap the O key to bring up the circle tool, and draw a black hockey puck.
Next we want to add some code to create the hockey puck and position it randomly along the x-axis. We also want to add some code to initially position the hockey paddle.
Switch back to HockeyMain.as, and add all of this to the constructor, below the hockeyPaddle initialization code:
hockeyPaddle.x = stage.stageWidth * 0.5;
hockeyPaddle.y = stage.stageHeight * 0.5;

hockeyPuck = new HockeyPuck() as Sprite;
this.addChild(hockeyPuck);
hockeyPuck.mouseEnabled = false;
hockeyPuck.x = Math.random()*stage.stageWidth*0.6 + stage.stageWidth*0.2;
hockeyPuck.y = stage.stageHeight*0.3;
Notice all of the code is based on the stageWidth and stageHeight values, this will make it easy for porting to the iPad which has a different pixel resolution than the iPhone (1024×768). It will also help for Android devices which usually have a different aspect ratio all together.
Also you need to declare a variable for the hockey puck in your class like this:
var hockeyPuck:Sprite;
Run your game, and you should now see the hockey puck in the game!
Hit Detection
So we have our hockey puck and paddle, now let’s make them react to one another. For advanced hit detection I would recommend a physics engine like Box2D, but since this game is simple enough, we can write our own hit detection.
First we will need some variables to record what the last x,y coordinates of the paddle were so we can use this to calculate the direction it is moving in. Add these amongst the other class variables.
var paddleLastX:Number;
var paddleLastY:Number;
Then we need some variables to record the direction that the puck is being hit in. It is resting at the moment, so initialize them to zero:
var puckMomentumX:Number = 0;
var puckMomentumY:Number = 0;
Now we are going to add a function that fires on every enter frame to check for hit detection and do any other game logic.
this.addEventListener(Event.ENTER_FRAME, update, false, 0, true); // add this to your constructor!
The enter frame event is the point before Flash has drawn anything to the screen for that frame. This is equivalent to the update method in Cocos2D.
So if your game is set to 60 frames per second (fps), you can expect that this function will be fired 60 times a second. Of course if too much is going on and your game slows down, then it may fire slower than this, so you can not rely upon a constant 60fps.
Next implement the update method as follows:
private function update(e:Event){
    if(hockeyPaddle.hitTestObject(hockeyPuck)){
        var diffX:Number = hockeyPaddle.x - paddleLastX;
        var diffY:Number = hockeyPaddle.y - paddleLastY;
        puckMomentumX = diffX;
        puckMomentumY = diffY;
    }
    hockeyPuck.x += puckMomentumX;
    hockeyPuck.y += puckMomentumY;

    paddleLastX = hockeyPaddle.x;
    paddleLastY = hockeyPaddle.y;
}
This simply detects when the hockey paddle hits the paddle, via a bounding box test, and sets the puck’s velocity to the instantaneous velocity of the paddle.
For this to work, you also have to import the Event class at the top of the file:
import flash.events.Event;
Compile and run, and you should now be able to whack the puck with your paddle!
Better Collision Detection and Boundaries
Currently, we use the hitTestObject function checks whether the paddle has hit the puck. This test is done using the object’s bounding box, so it does not take into account the circular shape of both objects.
For a more advanced hit checking, we can use some math to check the distance of the paddle from the center of the puck. We can get the distance of the puck from the paddle by using Pythagoream Theorem:
var distanceFromPuck:Number = Math.sqrt( Math.pow(hockeyPaddle.x-hockeyPuck.x, 2) + Math.pow(hockeyPaddle.y-hockeyPuck.y, 2) );
Then if this distance is less than the combined radius’s of the puck and paddle we know that they have collided.
While we’re adding the code for this, let’s also add some walls for the puck to bounce off of. Modify your update method as follows:
private function update(e:Event){
    var diffFromPuckX:Number = hockeyPaddle.x-hockeyPuck.x;
    var diffFromPuckY:Number = hockeyPaddle.y-hockeyPuck.y;
    var distanceFromPuck:Number = Math.sqrt( Math.pow(diffFromPuckX, 2) + Math.pow(diffFromPuckY, 2) );
    if(distanceFromPuck <= (hockeyPaddle.width/2 + hockeyPuck.width/2)){
        var diffX:Number = hockeyPaddle.x - paddleLastX;
        var diffY:Number = hockeyPaddle.y - paddleLastY;
        var angleFromPuck:Number = Math.atan2(diffFromPuckY, diffFromPuckX);
        puckMomentumX = - Math.cos(angleFromPuck) * 20;
        puckMomentumY = - Math.sin(angleFromPuck) * 20;
    }
    hockeyPuck.x += puckMomentumX;
    hockeyPuck.y += puckMomentumY;

    var edgePadding:Number = stage.stageWidth/40;
    // check if too far left
    if(hockeyPuck.x - hockeyPuck.width/2 - edgePadding < 0){
        puckMomentumX = -puckMomentumX;
        hockeyPuck.x = edgePadding + hockeyPuck.width/2; // sets the puck to the edge of the screen
    }
    // check if too far right
    if(hockeyPuck.x + hockeyPuck.width/2 + edgePadding > stage.stageWidth){
        puckMomentumX = -puckMomentumX;
        hockeyPuck.x = stage.stageWidth - edgePadding - hockeyPuck.width/2;
    }
    // check if too far up
    if(hockeyPuck.y - hockeyPuck.height/2 - edgePadding < 0){
        puckMomentumY = -puckMomentumY;
        hockeyPuck.y = edgePadding +  hockeyPuck.height/2;
    }
    // check if too low
    if(hockeyPuck.y + hockeyPuck.height/2 + edgePadding > stage.stageHeight){
        puckMomentumY = -puckMomentumY;
        hockeyPuck.y = stage.stageHeight - edgePadding -  hockeyPuck.height/2;
    }

    // Apply Friction, a low amount
    puckMomentumX *= 0.995;
    puckMomentumY *= 0.995;

    paddleLastX = hockeyPaddle.x;
    paddleLastY = hockeyPaddle.y;
}
In the code above, if the puck hits the walls we simply reverse puck’s X or Y direction depending on which wall it has hit.
You can also see below that the code uses a more advanced method to determine the pucks ricocheting momentum. It is now based on the angle of the puck from the paddle. It finds the x and y coordinates of this angle and then reverses it in the other direction causing it to rebound in the opposite angle.
The code also multiplies the puck’s momentum by a fraction that is very close to 1 (0.995) in order to have it eventually slow down. This in effect adds friction to our puck, but not too much friction because this is an air hockey table after all!


