Photoshop For Developers: Making a Leather Navigation Bar
This is a blog post by iOS Tutorial Team member Tope Abayomi, an iOS developer and Founder of App Design Vault, your source for iPhone App Design. In this tutorial, you’ll learn how to make a stylish leather navigation bar for your app, complete with buttons – from scratch! Not only will you go through […] By Tope Abayomi.
Where to Go From Here?
That concludes this tutorial!
To sum up, you used Photoshop to create a custom navigation bar that had buttons with a custom background. You exported the images and then used them in a sample app.
This is a big step toward creating custom apps that stand out and look different from the default look and feel of a UIKit app. Congratulations!
Here is an example project with the final Photoshop file and sample code for this tutorial.
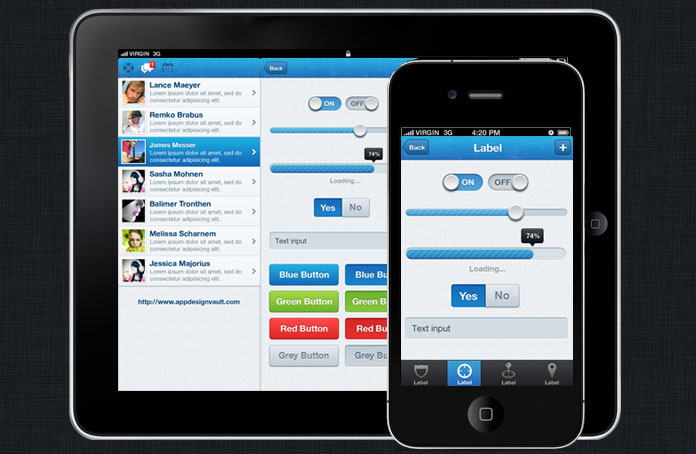
Of course, sometimes you may not want to go through the process of creating Photoshop designs yourself. This is why I created App Design Vault.
After all your hard work… click here to get a free template that includes custom designs for almost all the UIKit controls including Navigation Bar, Tab Bar, UISwitch, UISegmentedControl, UIButton, UIProgressBar, USlider, iPad and iPhone retina designs, and more.
Please visit the forums to let me know what you think of the tutorial and the free template, and if you have any questions!
 This is a blog post by iOS Tutorial Team member Tope Abayomi, an iOS developer and Founder of App Design Vault, your source for iPhone App Design.