Advanced Data Binding in Android: Observables
Learn how to use the Data Binding Library to bind UI elements in your XML layouts to data sources in your app using LiveData and StateFlow. By Husayn Hakeem.
The Data Binding Library was built with observability in mind, a pattern that’s become quite popular in mobile app development.
Observability comes as a complement to data binding, whose basic concept just considers your view and data objects. However, it’s through this pattern that your data can automatically propagate its changes to the view. This removes the need to manually update your views whenever new data is available, thus simplifying your codebase and reducing boilerplate code.
In this tutorial, you’ll learn how to bind observable data sources in your layout. You’ll build the registration screen for SweatBar, a gym app. During the process, you’ll learn how to:
- Set up observable data sources with both
LiveDataandStateFlow. - Make different types of data observable, including simple types, collections and objects.
- Transform data from other sources and expose them to your layouts.
Getting Started
Download the materials using the Download Materials button at the top or bottom of this tutorial. Open Android Studio and import the starter project.
Take a moment to familiarize yourself with the code. The main files are the following:
-
MainActivity.kt: An
Activitywhere the user inputs their information to register. You’ll find this class in the livedata and stateflow packages. Both files are mostly the same, and you’ll only run one of them at any given time during this tutorial. -
MainViewModel.kt: A
ViewModelthat contains the UI’s data. Similar toMainActivity, you’ll find this class in the livedata and stateflow packages. Both files are mostly the same, and you’ll only use one of them at any given time during this tutorial. - Session.kt: An Enum class with the different types of sessions a user can register for.
- PhoneNumber.kt: A model that represents a phone number.
- activity_main_*.xml: A layout file with the registration fields.
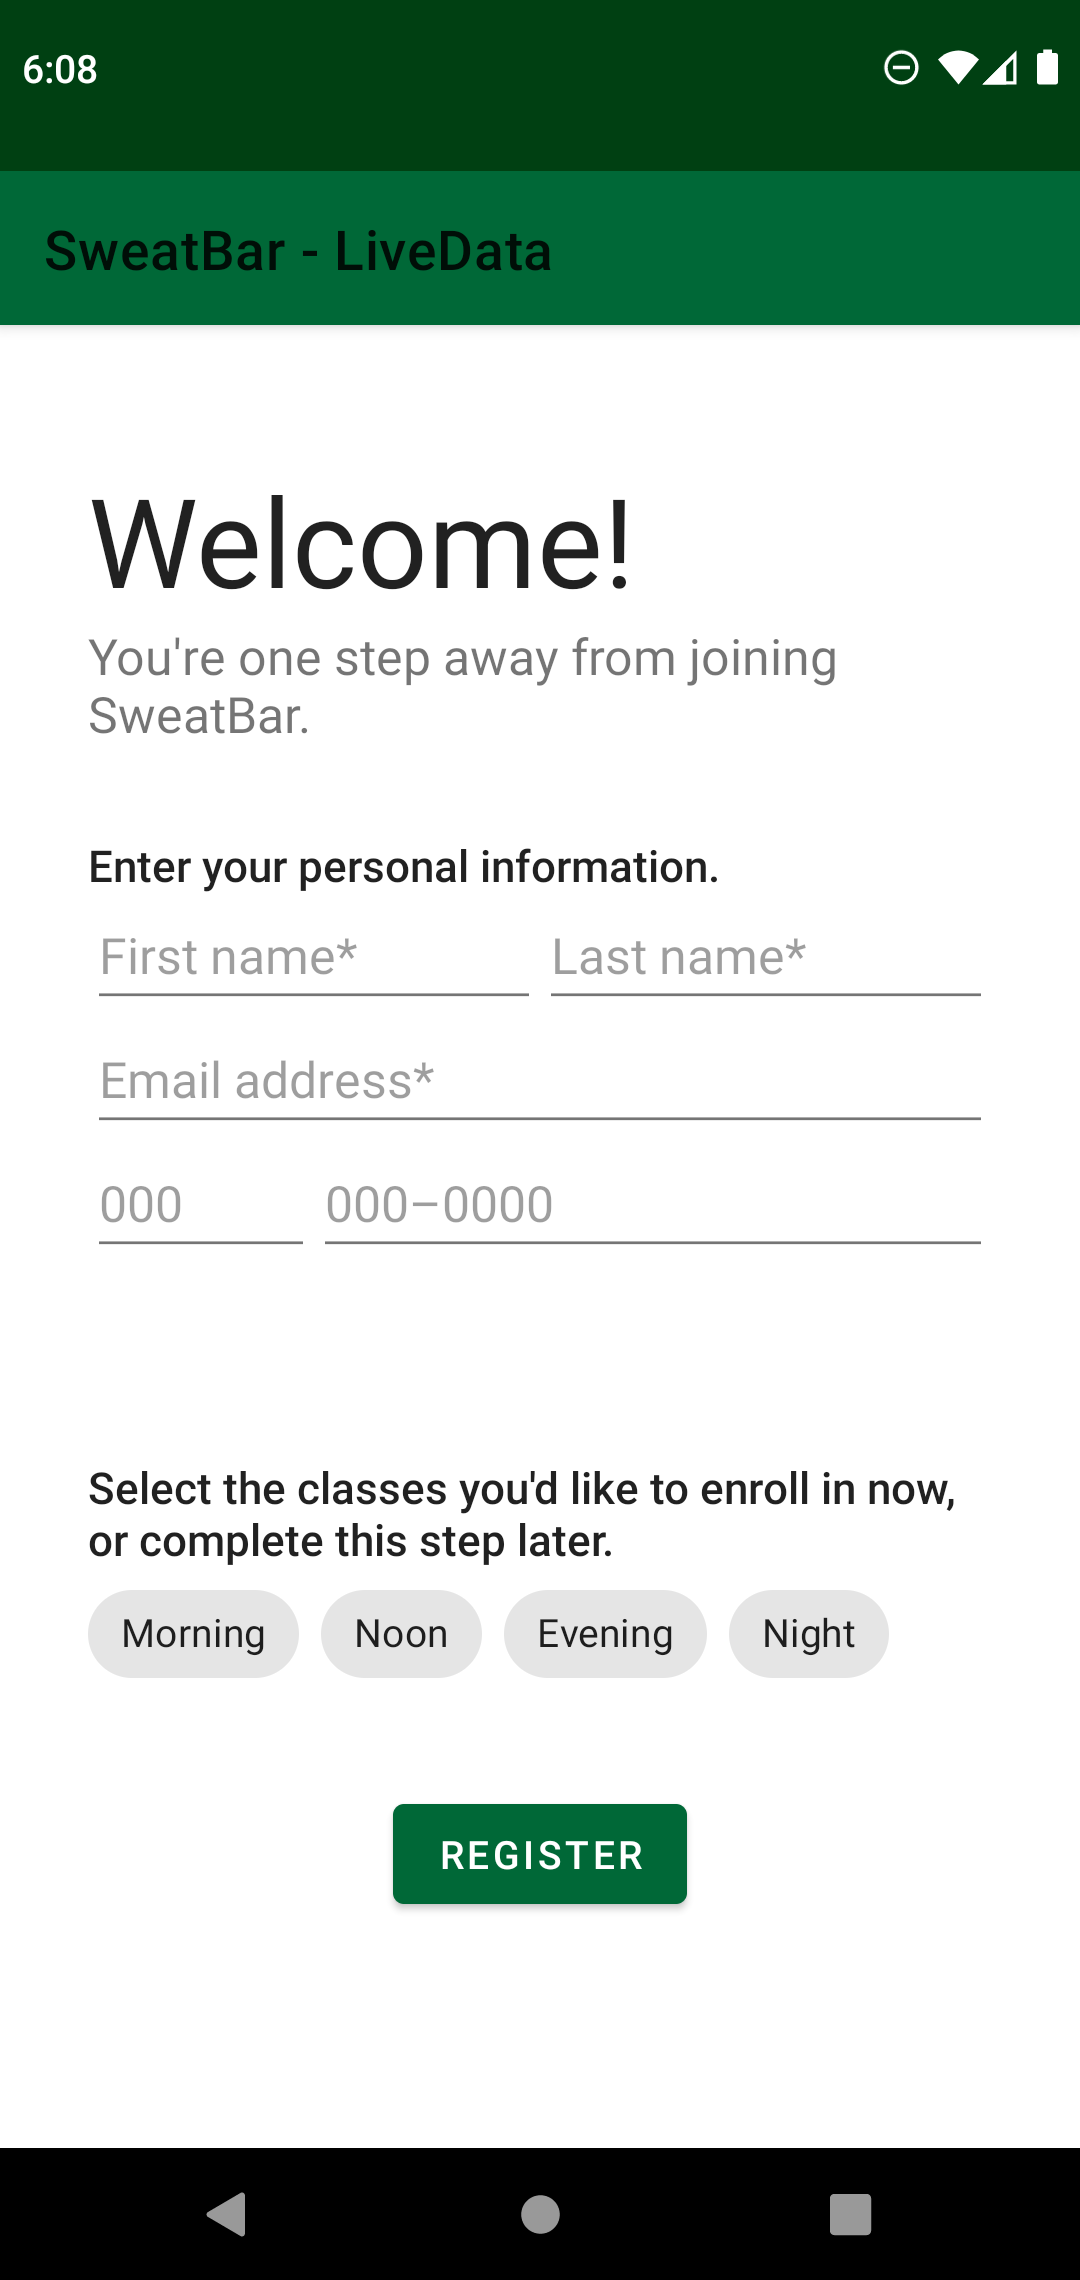
Build and run. You’ll see a screen where the user can input information to register. The UI doesn’t do much at the moment. You’ll work on improving that in the next sections!
Observing Data Sources
When the Data Binding Library was shipped, it included observable classes for simple types, like ObservableBoolean, ObservableInt and ObservableDouble, as well as the generic ObservableField. These observable fields came with lifecycle-aware observability baked into them, as the Data Binding Library only updated Views when they were active.
Years later, the Jetpack Architecture components introduced another observable class, LiveData. In addition to being lifecycle-aware, it also supports transformations and other Architecture components, like Room and WorkManager, which is why using LiveData instead of the observable fields is now recommended.
Enabling Data Binding
You’ll now enable data binding in the project. Open the app’s build.gradle file. Inside the buildFeatures block, replace // TODO: enable data binding with the following:
buildFeatures {
  ...
  dataBinding true
}
Click Sync Now to sync the project with the Gradle file. You’re all set up!
Observing With LiveData
Start by setting up data binding in the Activity and XML layout.
Open activity_main_livedata.xml. Remove the TODO at the top of the file, then wrap the root ScrollView in a layout tag and import MainViewModel, which you’ll use for data binding:
<layout xmlns:android="http://schemas.android.com/apk/res/android"
  xmlns:app="http://schemas.android.com/apk/res-auto"
  xmlns:tools="http://schemas.android.com/tools">

  <data>
    <variable
      name="viewmodel"
      type="com.raywenderlich.android.databindingobservables.livedata.MainViewModel" />
  </data>

  <ScrollView...>
</layout>
Also, remove the following lines from the ScrollView as they are provided by the layout tag:
xmlns:android="http://schemas.android.com/apk/res/android"
xmlns:app="http://schemas.android.com/apk/res-auto"
xmlns:tools="http://schemas.android.com/tools"
Open MainActivity.kt, and replace // TODO: Set up data binding with the following:
val binding = DataBindingUtil.setContentView<ActivityMainLivedataBinding>(
    this,
    R.layout.activity_main_livedata
) // 1
binding.lifecycleOwner = this // 2
binding.viewmodel = viewModel // 3
Finally, make sure the following imports are at the top of the Activity:
import androidx.databinding.DataBindingUtil
import com.raywenderlich.android.databindingobservables.databinding.ActivityMainLivedataBinding
The code above sets:
- The content view of
MainActivity. -
MainActivityas theLifecycleOwnerto use for observing data in the binding. This controls when observing data starts and stops. - The variable
viewmodelof typeMainViewModelyou defined above in the layout file.
With this set up, you’re now ready to connect the app’s data sources to its UI!
Observing Simple Types
Simple types include primitive types such as Boolean, Int and Float as well as String. They aren’t observable by default, but an XML layout can observe them by simply wrapping them in LiveData. Emitting a new value through LiveData propagates it to the UI layout.
The registration form includes fields for the user’s first name, last name and email, which are all Strings. You’ll add corresponding data sources for them in MainViewModel.kt. Open MainViewModel.kt and replace // TODO: Add first name, last name and email with:
val firstName = MutableLiveData(DEFAULT_FIRST_NAME)
val lastName = MutableLiveData(DEFAULT_LAST_NAME)
val email = MutableLiveData(DEFAULT_EMAIL)
Now, open activity_main_livedata.xml and use these newly created observable fields in the EditTexts with the matching ids below:
<EditText
  android:id="@+id/firstNameEditText"
  ...
  android:text="@={viewmodel.firstName}" />

<EditText
  android:id="@+id/lastNameEditText"
  ...
  android:text="@={viewmodel.lastName}" />

<EditText
  android:id="@+id/emailEditText"
  ...
  android:text="@={viewmodel.email}" />
In the code above, you’re binding the value of the user’s first name, last name and email, respectively, to MainViewModel‘s firstName, lastName and email fields. This means that, for example, as the user updates their first name on the registration form, the value of firstName updates at the same time. The opposite is also valid: If firstName‘s value changes, it’s reflected in the UI. This is called two-way binding.
Omitting the = sign and only writing @{viewmodel.firstName} makes it a one-way binding instead, going from the firstName field to the UI. This means that as the user updates the first name on the registration form, firstName‘s value remains the same.
Observing Collections
Usually, collections hold data in an app. Think of lists of users or products and dictionaries of key/value preferences. Making a collection of data observable is similar to simple data — you just wrap it in LiveData.
The registration form you’re building should let the user pick the sessions they plan to enroll in. The Session enum class defines the different possible sessions users can pick from. If the user is an early bird and selects the MORNING session, you’ll store this information in a map: {MORNING: true}. When the user finishes the registration, this map will contain the sessions the user opted into and out of.
Open MainViewModel.kt, and replace // TODO: Add sessions with the following:
val sessions = MutableLiveData<EnumMap<Session, Boolean>>(
    EnumMap(Session::class.java)
).apply { // 1
  Session.values().forEach { value?.put(it, false) } // 2
}
If the IDE hasn’t done already, import these classes:
import java.util.EnumMap
import com.raywenderlich.android.databindingobservables.model.Session
Here’s what is happening doing in the code above:
- A map with keys of type
Sessionand values of typeBooleanis created.EnumMapis a map optimized for enum keys. - The map is populated with all the possible sessions and setting their value to
false, since by default the user isn’t enrolled in any sessions.
Next, bind sessions to the UI. Open activity_main_livedata.xml, locate the session Chips at the bottom of the file and update them as follows:
<com.google.android.material.chip.Chip
  android:id="@+id/morningSessionChip"
  ...
  android:checked="@={viewmodel.sessions[Session.MORNING]}" />

<com.google.android.material.chip.Chip
  android:id="@+id/afternoonSessionChip"
  ...
  android:checked="@={viewmodel.sessions[Session.NOON]}" />

<com.google.android.material.chip.Chip
  android:id="@+id/eveningSessionChip"
  ...
  android:checked="@={viewmodel.sessions[Session.EVENING]}" />

<com.google.android.material.chip.Chip
  android:id="@+id/nightSessionChip"
  ...
  android:checked="@={viewmodel.sessions[Session.NIGHT]}" />
In the code above, you’re binding the state of Chip, whether it’s checked or not, with the sessions field. When the user selects MORNING, the value of the key MORNING in the sessions map is set to true. Its value becomes false when the user deselects MORNING.
Before moving on, you may have noticed a compile error. This is because the XML layout doesn’t recognize the Session enum. To fix this, import the enum into your XML layout file as follows:
<data>
  <import type="com.raywenderlich.android.databindingobservables.model.Session" />
  ...
</data>
Once the enum is imported into the layout, the errors will disappear since it now knows what Session is referring to.