Cocos2D-X Tutorial for iOS and Android: Getting Started
In this Cocos2D-X tutorial, you’ll learn how to use Cocos2D-X and C++ to produce a cross-platform “Hello World” app that will run under both iOS and Android. By .
Defining a Combined Java/C++ Project in Eclipse
Compiling the C++ code with a command line script and compiling the Java code with Eclipse is cumbersome. It would be a lot easier if you could just build everything using Eclipse.
Luckily, you can do this by telling Eclipse that your Android project is a combined Java/C++ cross language project!
To do this, select the samplecocos2dxandroid project in the left tree, and select File\New\Other from the menu and then, C/C++\Convert to a C/C++ Project from the dialog, as shown below:

Click Next. In the next screen, check the box for your project, select the C++ Project option, and specify the Makefile project\Other Toolchain option for Project type:

Click Finish. Eclipse may ask you if you want to open the C/C++ perspective, just click No if this occurs.
The next step is to change the project settings to specify how to run your make command. In the left tree, right click the samplecocos2dxandroid project, select Properties, and select the C/C++ Build section.

Uncheck the Use default build command checkbox, and in the build command textbox type in:
bash ${workspace_loc:/samplecocos2dxandroid}/build_native.sh NDK_DEBUG=1 V=1
Click Apply, and click OK.
Select Project\Build All from the main menu, and you’ll see the C++ make run in the Eclipse console:

There are still some warnings to resolve. To see what I mean, open up jni/hellocpp/main.cpp, and you’ll see a bunch of warnings:

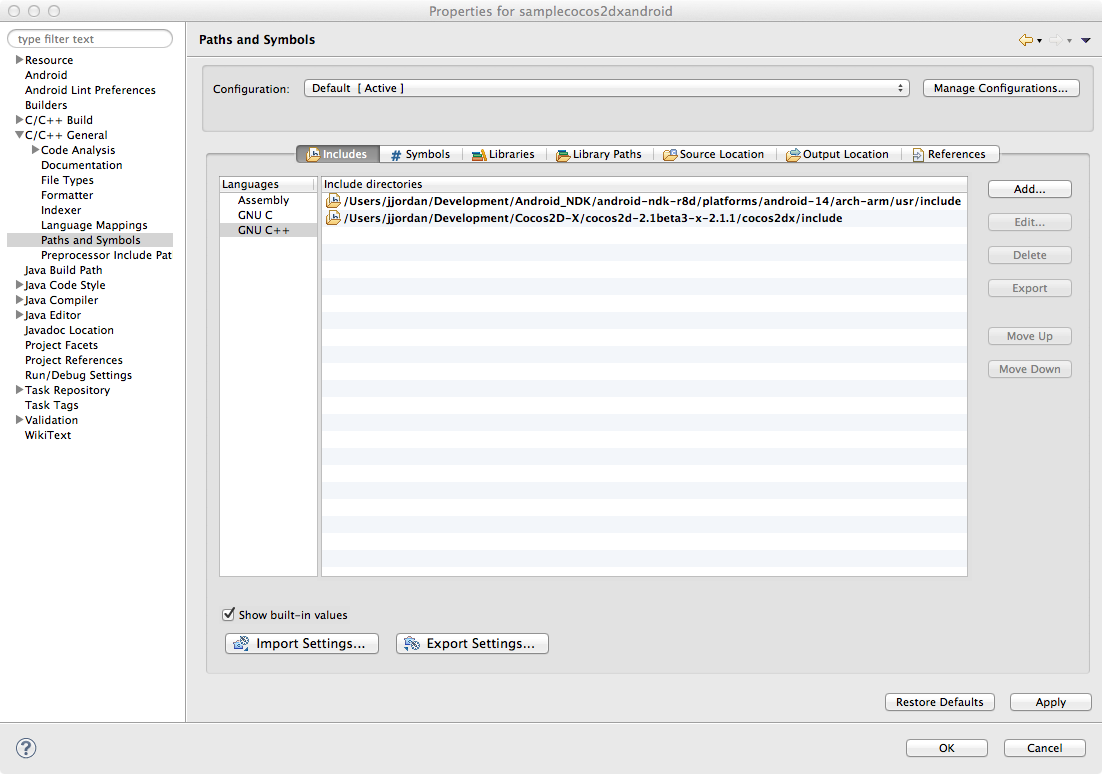
These are occurring because you do not have the correct C++ include path specified yet. To do this, in the left tree, right click the samplecocos2dxandroid project and select Properties\C/C++ General\Paths and Symbols\Includes\GNU C++.
Use the Add button to select the two directories shown below, then click Apply and OK.
$(NDKROOT)/platforms/android-14/arch-arm/usr/include
$(COCOS2DX_HOME)/cocos2dx/include
Note: Don’t forget to replace $(NDKROOT) and $(COCOS2DX_HOME) with the actual paths where you installed these on your machine.
Click Apply and you might be prompted to re-build the indexes. Go ahead and say Yes and then click OK to close the dialog.
Now, if you look at main.cpp, you’ll see most of the include warnings have disappeared:
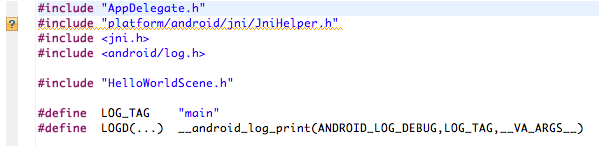
However, the AppDelegate.h file still can’t be found. This is because the AppDelegate.h file is located in the $PROJECT_HOME\Classes folder. This folder is very important for you since it contains the portable C++ classes for your project, such as HelloWorldScene.cpp, which will be the starting point for your project.
When you created your Eclipse project, you had to select the $PROJECT_HOME\proj.android folder as the root folder since Eclipse requires AndroidManifest.xml to be inside the specified folder. But this means your project does not contain the critical Classes folder, and this is why you’re still getting that warning.
Let’s fix it now. In the left tree, right click the samplecocos2dxandroid project, and select Properties\C/C++ General\Paths and Symbols\Source Location. Click Link Folder, check the Link to a folder in the file system checkbox, and browse to the Classes directory inside the $PROJECT_HOME folder. Click OK, then Apply and OK.

You should now be able to see the Classes directory in your file tree, and the #include “AppDelegate.h” warning in main.cpp should have gone away.
Eclipse will still have some warnings in the project, but this is just because Eclipse is not that great at parsing C++ header files for the code analyzer stage. To disable this, bring up the project properties (right-click the project and select Properties from the context menu) and turn off the warnings in the Code Analysis section, as you can see in the screenshot below:

Click Apply and then OK and finally – a project you can edit and build with Eclipse! :]
What About the Java Code?
If you look over the project content in Eclipse, you will notice some Java code in the src and gen folders and might wonder what that’s all about.
The main language for Android development is Java. The project template has created some Java scaffolding code for you that loads the C++ code that does all the heavy lifting in your app.
You won’t usually have to modify the Java code, but let’s look at the main class – src\com\xxx\samplecosos2dxandroid\samplecocos2dandroid.java – in more detail to see what it does.
This class contains the main Android Activity class that takes control when the app launches. It will first load the requested C++ dynamic library generated by the NDK:

Since this class derives from Cocos2dxActivity, behind the scenes, Cocos2D-X will give control to the C++ AppDelegate initInstance method, and finally the applicationDidFinishLAunching method.
So to repeat, the Java code just contains wrapper code that you will rarely need to change, since all the game’s logic will be inside the C++ code.
Combining the iOS and Android Project Structures
Right now you have two Cocos2D-X projects – one for iOS and one for Android. Your goal is to have them share the same directories so that you can use the same C++ files (with all your portable game logic) in both projects.
In both of your projects, you have a folder called Classes that contains this portable game code (Android on the left, iOS on the right):

If you look closely at the Classes directory in Eclipse and Xcode, you will see that the C++ files are completely identical! So all you need to do is point both projects to use the same folder, and you are set!
To do this, open up your Cocos2DxFirstIosSample project in Xcode. Select the Classes group, click Delete, and select Move to Trash when the popup appears.
Next, right click the project in the Project Navigator, select New Group, and rename the new group to Classes. Right click the Classes group, and select Add Files. Select the following files from your $PROJECT_HOME\Classes folder and make sure that the Copy items into destination group’s folder checkbox is not checked before you click Add:

Do a Clean and Build of the Xcode project to check that everything is OK.
Congrats – everything is in place and your Xcode/Eclipse combined iOS/Android projects are ready to use!
When to Use Xcode, and When to Use Eclipse?
Now that you have two project files it might not be immediately obvious which you should use when.
The usual development strategy for Cocos2D-X is to develop and test on iOS (via Xcode) first, and after you’ve got that working, make sure it works on Android (via Eclipse) second. Just keep the following rules in mind:
- Test often. Develop short pieces of code and test that they work on Android. This way you don’t get too far before finding any problems.
- Test on multiple devices: There are a large number of Android devices available, often with subtle differences, so it’s best to test on as many devices as you can lay your hands on.
It’s also possible to have a reversed strategy (develop for Android with Eclipse first), but I find this approach less productive, since Xcode feels faster and easier to use for me than Eclipse. Plus, the Android emulator usually takes a long time to start up and so takes longer when it comes to debugging things whereas the iOS simulator comes up pretty fast each time you start it.