How to Create a Tower Defense Game in Unity – Part 2
In this second and final part of the Unity tower defense tutorial, you’ll add some shooting monsters into the the mix. By Jeff Fisher.
Set Spawn Intervals
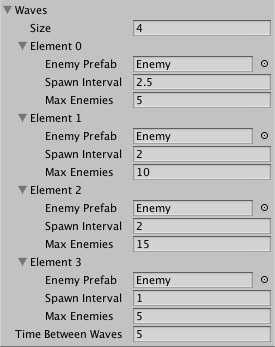
Save the file and switch to Unity. Select Road in the Hierarchy. In the Inspector, set the Size of Waves to 4.
For now, set Enemy Prefab to Enemy for all four elements. Set the Spawn Interval and Max Enemies fields as follows:
- Element 0: Spawn Interval: 2.5, Max Enemies: 5
- Element 1: Spawn Interval: 2, Max Enemies: 10
- Element 2: Spawn Interval: 2, Max Enemies: 15
- Element 3: Spawn Interval: 1, Max Enemies: 5
The final setup should look like the screenshot below.
Of course, you can play around with those settings to increase or decrease the carnage.
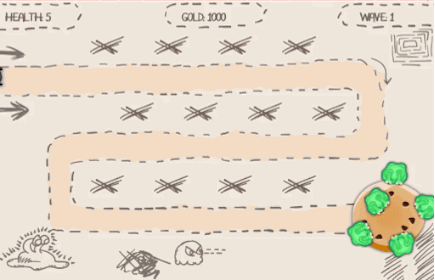
Run the game. Ah-ha! The bugs are marching toward your cookie!

Optional: Add Different Types of Enemies
No tower defense game is complete with only one type of enemy. Luckily, the Prefabs folder contains another option, Enemy2.
Select Prefabs\Enemy2 in Inspector and add the MoveEnemy script to it. Set its Speed to 3 and its Tag to Enemy. You can now use this speedy bug to keep the player on his toes!
Update Player Health – Killing Me Softly
Even though hordes of bugs storm towards the cookie, the player takes no damage. But no more. The player should take a hit when he lets the enemy encroach.

Open GameManagerBehavior.cs in your IDE, and add the following two variables:
public Text healthLabel;
public GameObject[] healthIndicator;
You’ll use healthLabel to access the player’s health readout, and healthIndicator to access the five little green cookie-crunching monsters — they simply represent player health in a more fun way than a standard health label.
Manage Health
Next, add a property to maintain the player’s health in GameManagerBehavior:
private int health;
public int Health
{
  get
  {
    return health;
  }
  set
  {
    // 1
    if (value < health)
    {
      Camera.main.GetComponent<CameraShake>().Shake();
    }
    // 2
    health = value;
    healthLabel.text = "HEALTH: " + health;
    // 3
    if (health <= 0 && !gameOver)
    {
      gameOver = true;
      GameObject gameOverText = GameObject.FindGameObjectWithTag("GameOver");
      gameOverText.GetComponent<Animator>().SetBool("gameOver", true);
    }
    // 4
    for (int i = 0; i < healthIndicator.Length; i++)
    {
      if (i < Health)
      {
        healthIndicator[i].SetActive(true);
      }
      else
      {
        healthIndicator[i].SetActive(false);
      }
    }
  }
}
This manages the player's health. Once again, the bulk of the code is in the setter:
- If you're reducing the player's health, use the
CameraShakecomponent to create a nice shake effect. This script is included with the project and not covered here. - Update the private variable and the health label in the top left corner of the screen.
- If health drops to 0 and it's not yet game over, set
gameOvertotrueand trigger theGameOveranimation. - Remove one of the monsters from the cookie. If it just disabled them, this bit could be written more simply, but it also supports re-enabling them when you add health.
Initialize Health in Start():
Health = 5;
You set Health to 5 when the scene starts playing.
With this property in place, you can now update the player's health whenever a bug reaches the cookie. Save this file and then switch to MoveEnemy.cs, still in your IDE.
Update Health
To update the player's health, find the comment in Update() that reads // TODO: deduct health and replace it with this code:
GameManagerBehavior gameManager =
    GameObject.Find("GameManager").GetComponent<GameManagerBehavior>();
gameManager.Health -= 1;
This gets the GameManagerBehavior and subtracts one from its Health.
Save the file and switch to Unity.
Select GameManager in the Hierarchy and set its Health Label to HealthLabel.
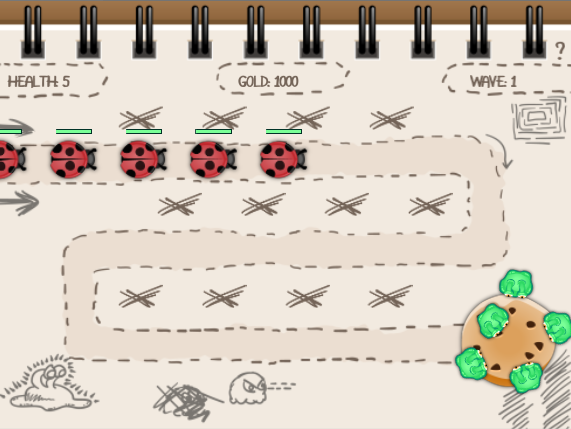
Expand Cookie in the Hierarchy and drag and drop its five HealthIndicator children into GameManager's Health Indicator array -- the health indicators are the tiny green monsters happily eating their cookie.
Play the scene and wait for the bugs to reach the cookie. Do nothing until you lose.
Monster Wars: The Revenge of the Monsters
Monsters in place? Check. Enemies advancing? Check — and they look mean! Time to mow those suckers down!
This requires several things:
- A health bar, so the player knows which enemies are strong and weak
- Detection of enemies within the range of a monster
- Decision points -- which enemy to fire upon
- Lots of bullets
Enemy Health Bar
You'll use two images to implement the health bar, one for a dark background and a slightly smaller green bar you'll scale to match the enemy's health.
Drag Prefabs\Enemy into the scene from the Project Browser.
Then drag Images\Objects\HealthBarBackground onto Enemy in the Hierarchy to add it as a child.
In the Inspector, set the Position for HealthBarBackground to (0, 1, -4).
Next, select Images\Objects\HealthBar in the Project Browser and ensure its Pivot is set to Left. Then, add it as a child of Enemy in the Hierarchy and set its Position to (-0.63, 1, -5). Set its X Scale to 125.
Add a new C# script named HealthBar to the HealthBar game object. Later, you'll edit it to adjust length of the health bar.
With Enemy selected in the Hierarchy, make sure it's position is (20, 0, 0).
Click on Apply at the top of the Inspector to save all your changes as part of the prefab. Finally, delete Enemy from the Hierarchy.

Now, repeat those steps to add the health bar to Prefabs\Enemy2.
Adjust Health Bar Length
Open HealthBar.cs in your IDE, and add the following variables:
public float maxHealth = 100;
public float currentHealth = 100;
private float originalScale;
maxHealth stores the enemy's maximal health points, and currentHealth tracks how much health remains. Lastly, originalScale remembers the health bar's original size.
Store the object's originalScale in Start():
originalScale = gameObject.transform.localScale.x;
You save the localScale's x value.
Set the health bar's scale by adding the following to Update():
Vector3 tmpScale = gameObject.transform.localScale;
tmpScale.x = currentHealth / maxHealth * originalScale;
gameObject.transform.localScale = tmpScale;
You copy localScale to a temporary variable because you cannot adjust only its x value. Then, calculate a new x scale based on the bug's current health, and set the temporary variable back on localScale.
Save the file and run the game in Unity. You'll see health bars above the enemies.
While the game runs, expand one of the Enemy(Clone) objects in the Hierarchy and select its HealthBar child. Change its Current Health value and check for that health bar to change.
