Developing and Testing Server-Side Swift with Docker and Vapor
Use Docker to develop and test your Vapor apps and learn to use Docker Compose to run different services, which include a database. By Natan Rolnik.
Changing the App to Use PostgreSQL
Before building with the Docker Compose file, change the app to use PostgreSQL. The sample project already includes the Fluent Postgres driver, so you won’t need to add it to the package description.
Because you won’t be using SQLite anymore, you no longer need the package fluent-sqlite-driver. So remove it by following the instructions below:
- Open the Package.swift file and remove the two references to
fluent-sqlite-driver. One is in the package’s dependencies, and the other one in the target’s dependencies. - There’s no more need to install
libsqlite3-devin the docker image. Open development.Dockerfile and remove the lineRUN apt-get update && apt-get install libsqlite3-dev.
To replace SQLite with Postgres in the app itself, open configure.swift and replace the statement import FluentSQLiteDriver with import FluentPostgresDriver. Then, replace the following line:
app.databases.use(.sqlite(), as: .sqlite)
with:
app.databases.use(.postgres(
  hostname: Environment.get("DATABASE_HOST") ?? "localhost",
  port: Environment.get("DATABASE_PORT").flatMap(Int.init) ?? 5432,
  username: Environment.get("DATABASE_USERNAME") ?? "vapor_username",
  password: Environment.get("DATABASE_PASSWORD") ?? "vapor_password",
  database: Environment.get("DATABASE_NAME") ?? "vapor_database"), as: .psql)
To configure a Postgres database, you need to configure a bunch of parameters. All of them use environment variables, and in case they’re not set, use the hardcoded fallback. The parameters are:
- The host name: the address of the database server. Use the environment variable and fall back to the localhost. In this case, that’s your local machine.
-
The port to connect to: If not set, use the
5432port by default. -
The username and password to authenticate with the server. The fallback values match the username and password environment variables you declared in the
postgresservice in the Docker Compose file. -
The database name. Although it’s also an optional parameter, it’s appropriate to set a name if you have different purposes, such as testing. This also must match the
POSTGRES_DBenvironment variable from thepostgresservice.
You’re now ready to build your first Docker images using Compose.
Building and Running with Docker Compose
Open Terminal again in the root directory and run the following command:
docker-compose --file docker-compose-development.yml build til-app-dev
The --file flag tells Docker to use the docker-compose-development.yml file you just created and build only the app service with it (at least initially). Composing will take a few minutes to complete.
Now that the app image is ready, your next step is certifying that the database is running. Run this in Terminal:
docker-compose --file docker-compose-development.yml run --rm start_dependencies
This will ensure that the database container is up, running and ready to be connected to. Here, you use --rm to certify that Docker will remove this container after the command returns. Once the previous command has finished, run the app image using Docker Compose, as follows:
docker-compose --file docker-compose-development.yml up til-app-dev
Open http://localhost:8080 in the browser and you’ll see that the app is running and it’s now using PostgreSQL. Well done!
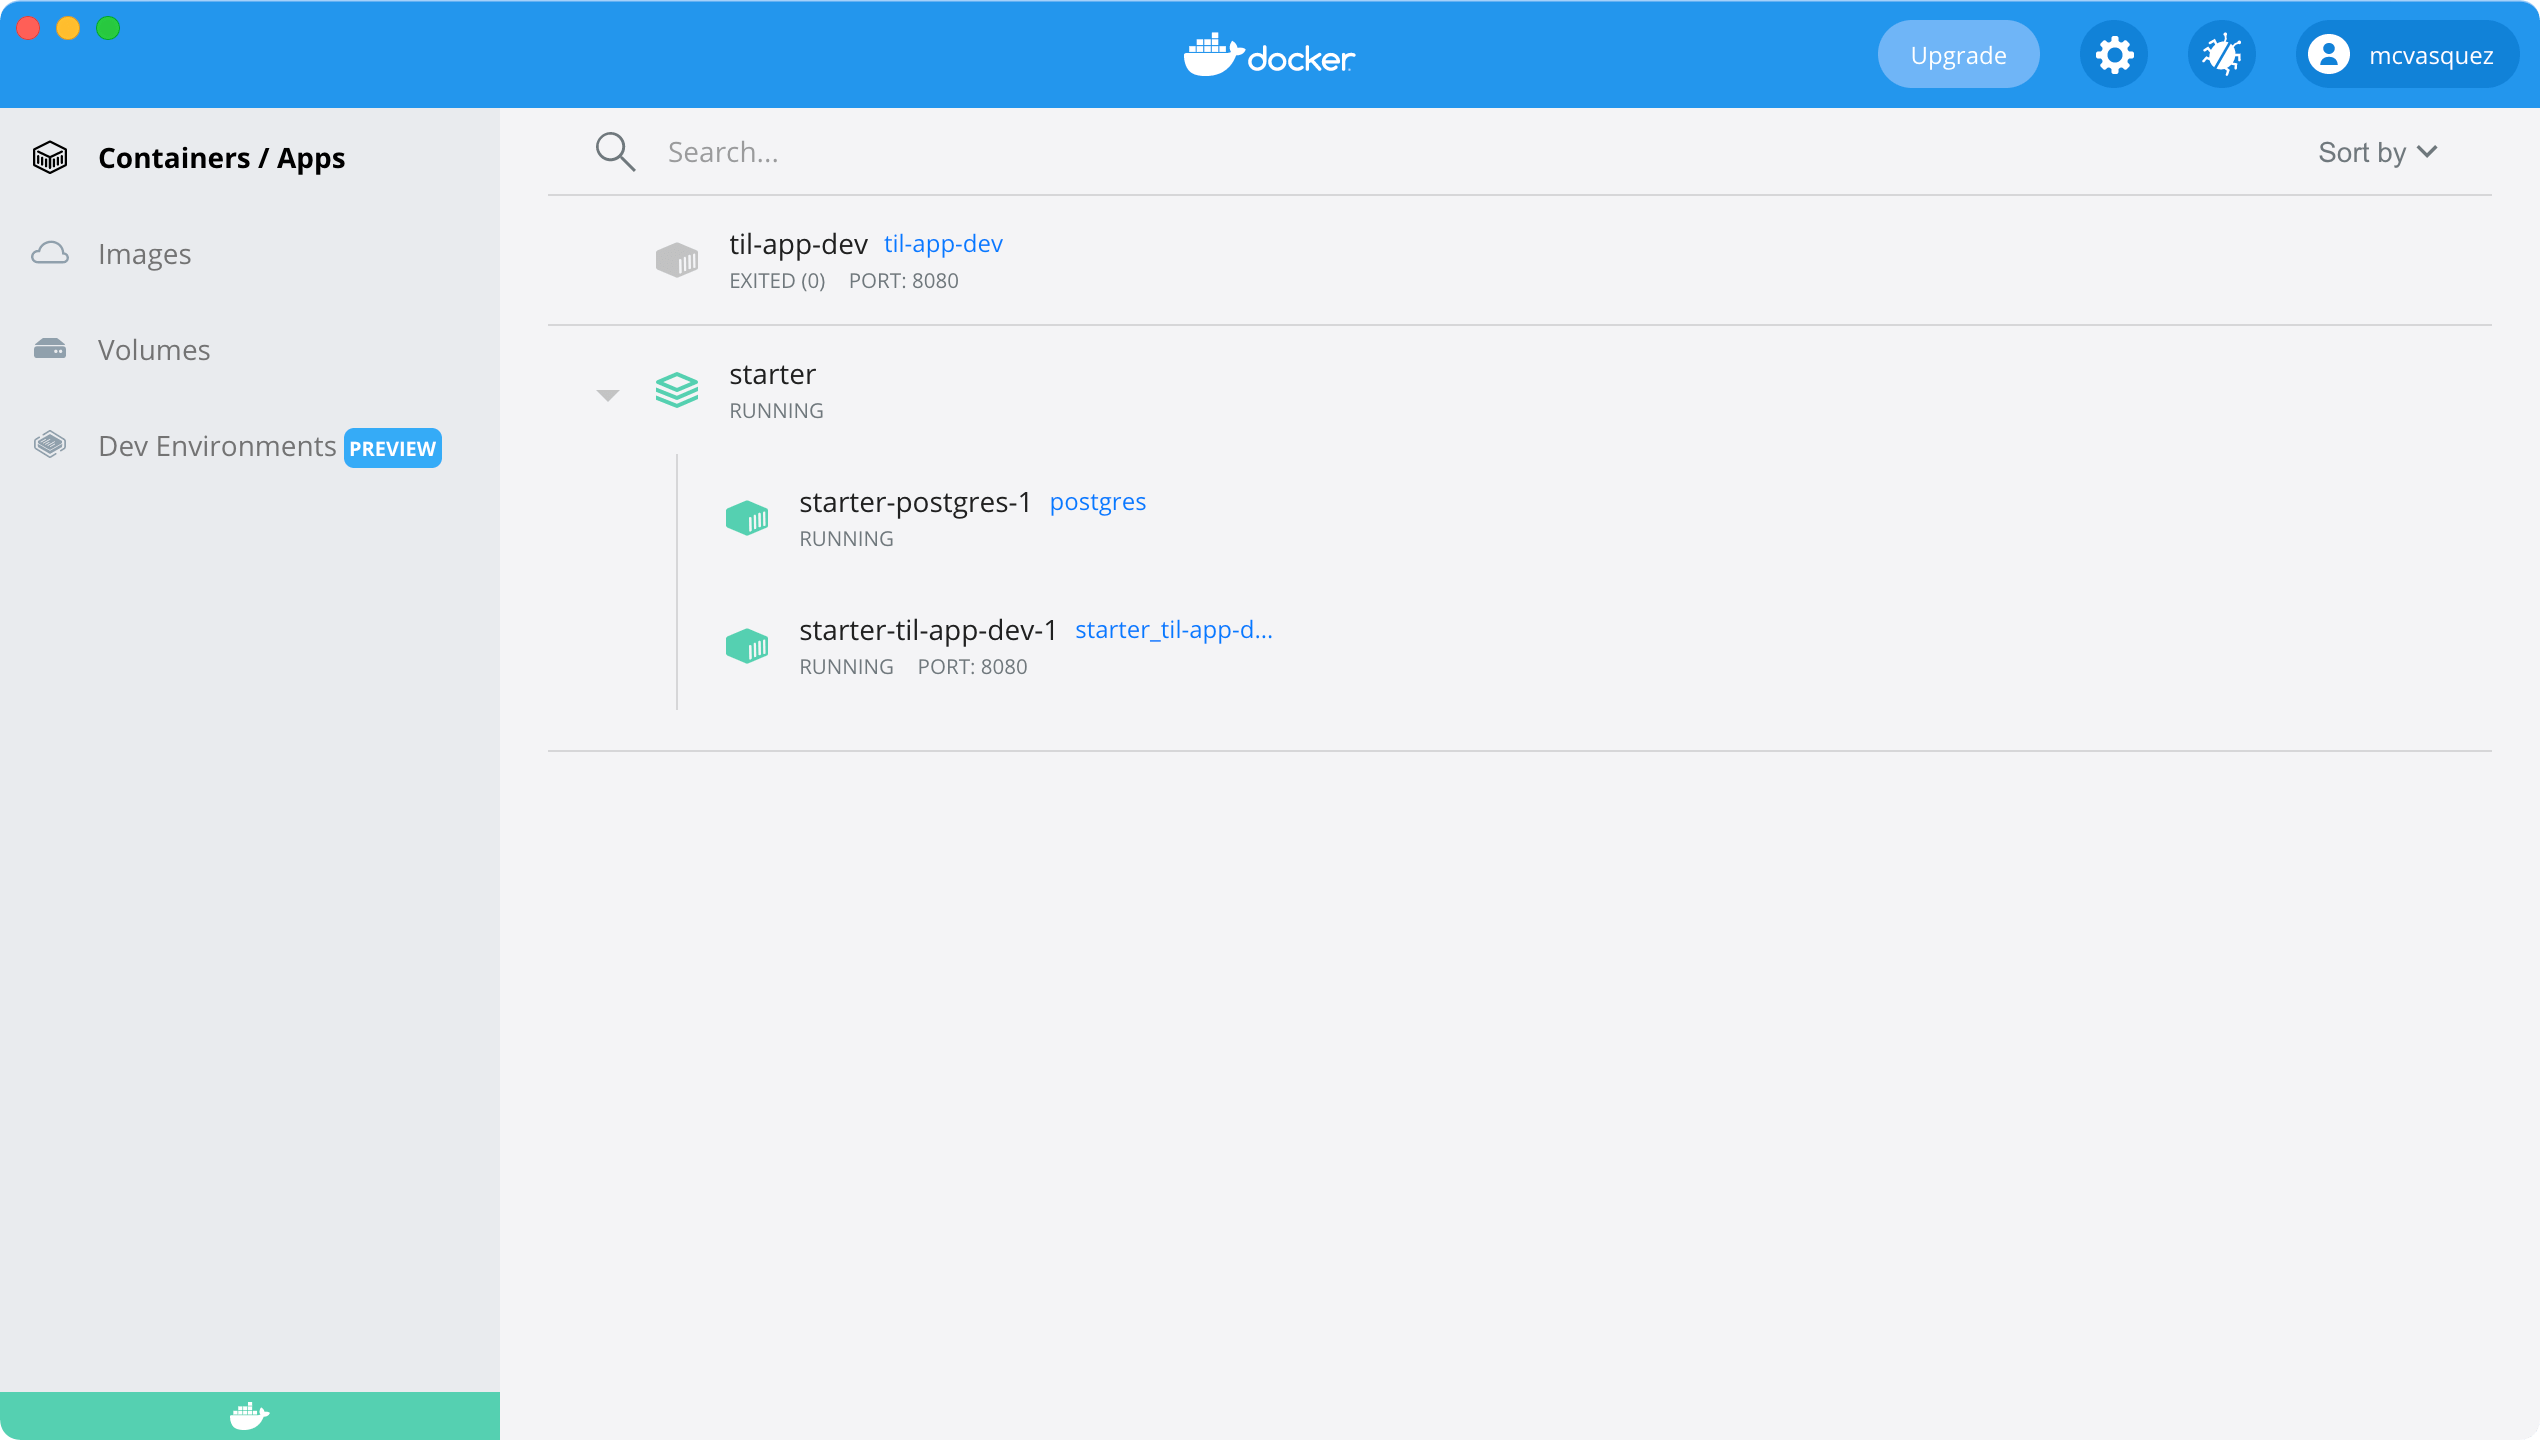
Open Docker for Desktop and you’ll see that it lists the services and containers grouped by project, as defined in the Docker Compose file.
Services and containers grouped per project, as defined in Docker Compose.
Running Your App’s Tests
The next critical piece is testing. Your tests need to run on Linux as well. Docker does the heavy lifting for you once again to make this happen.
Creating the Testing Dockerfile
Like running the development image, you’ll need two files for executing the tests: the Dockerfile and the Docker Compose file. Start by creating a file named testing.Dockerfile in the root directory and add the following:
# 1
FROM swift:5.5

# 2
WORKDIR /app
# 3
COPY . ./
# 4
CMD ["swift", "test"]
Here’s what you’re telling Docker to do:
- Use the Swift 5.5 image.
- Set the working directory to
/app. - Copy the contents of the current directory — the project directory — to the container.
- Set the default command to
swift test, which is the Swift command for running a package’s tests. You’re doing this because when Docker runs a Dockerfile, it needs either an entry point or a command.
Creating the Testing Docker Compose File
Next, under the same location, create a file named docker-compose-testing.yml. Add the following contents to the file:
# 1
version: '3'

# 2
services:
  til-app-tests:
    # 3
    depends_on:
      - postgres_test
    # 4
    build:
      context: .
      dockerfile: testing.Dockerfile
    # 5
    environment:
      - DATABASE_HOST=postgres_test
      - DATABASE_PORT=5432
      - DATABASE_NAME=vapor_test
  # 6
  postgres_test:
    image: "postgres"
    # 7
    environment:
      - POSTGRES_DB=vapor_test
      - POSTGRES_USER=vapor_username
      - POSTGRES_PASSWORD=vapor_password
This Docker Compose file is similar to the development one. Here’s what it does:
- Sets the Docker Compose version.
- Declares the services you’ll want, starting with the app tests service.
- Sets a dependency on the Postgres service, which you’ll declare a few lines below.
- Uses the
testing.Dockerfileyou just created, which is in the current directory. - Injects the database environment variables into the app tests container. As you did with the development dockerfile, use
postgres_testto allow the app tests to find the database container, and set the port and the database name. - Defines the database container for tests. Here, you use a different name to avoid conflicts with the development Postgres container.
- Sets the database container environment variables using the same name you passed to the
til-app-testsservice.
Because you already configured the environment variables in the previous sections, there’s no need to change the database configuration in the app.
If for some reason you still need to check whether your Vapor app is running under tests, use the following check in your code:
if app.environment == .testing {
  // app is running tests
}
if app.environment == .testing {
  // app is running tests
}
Running Tests with Docker
Once the testing files are ready, you only need to build the images and run the tests.
First, build the images by running:
docker-compose --file docker-compose-testing.yml build
After Docker Compose finishes building the app images, run:
docker-compose --file docker-compose-testing.yml up --abort-on-container-exit
This will start both the til-app-tests and the postgres_test container. The entry point of the testing Dockerfile is swift test. The command exits after the tests finish. This action works differently from running the server, which only exits when the server stops, whether manually or due to a crash. For that reason, it’s better to use --abort-on-container-exit, which makes Docker Compose stop all containers should any container stop.
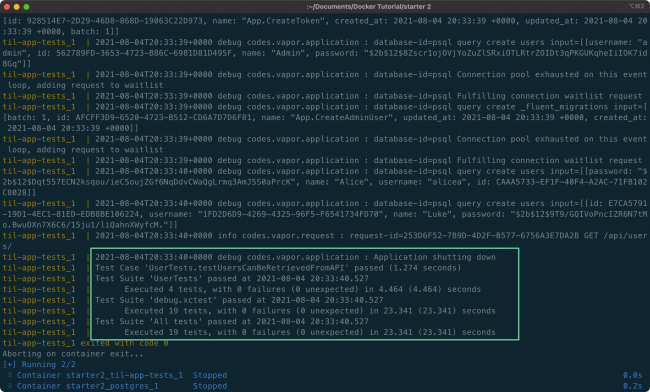
After tests finish running, you’ll see the test results in the container logs:
Tests passed
Congrats! You have now a solid development and testing setup ready to build the next iteration of your web app.