How To Export Blender Models to OpenGL ES: Part 3/3
In this third part of our Blender to OpenGL ES tutorial series, learn how to implement a simple shader to showcase your model! By Ricardo Rendon Cepeda.
Switching Between Models
Since you now have two models to show off, as the final step in this tutorial you’ll be implementing a simple UI element to switch between the two while your app is running.
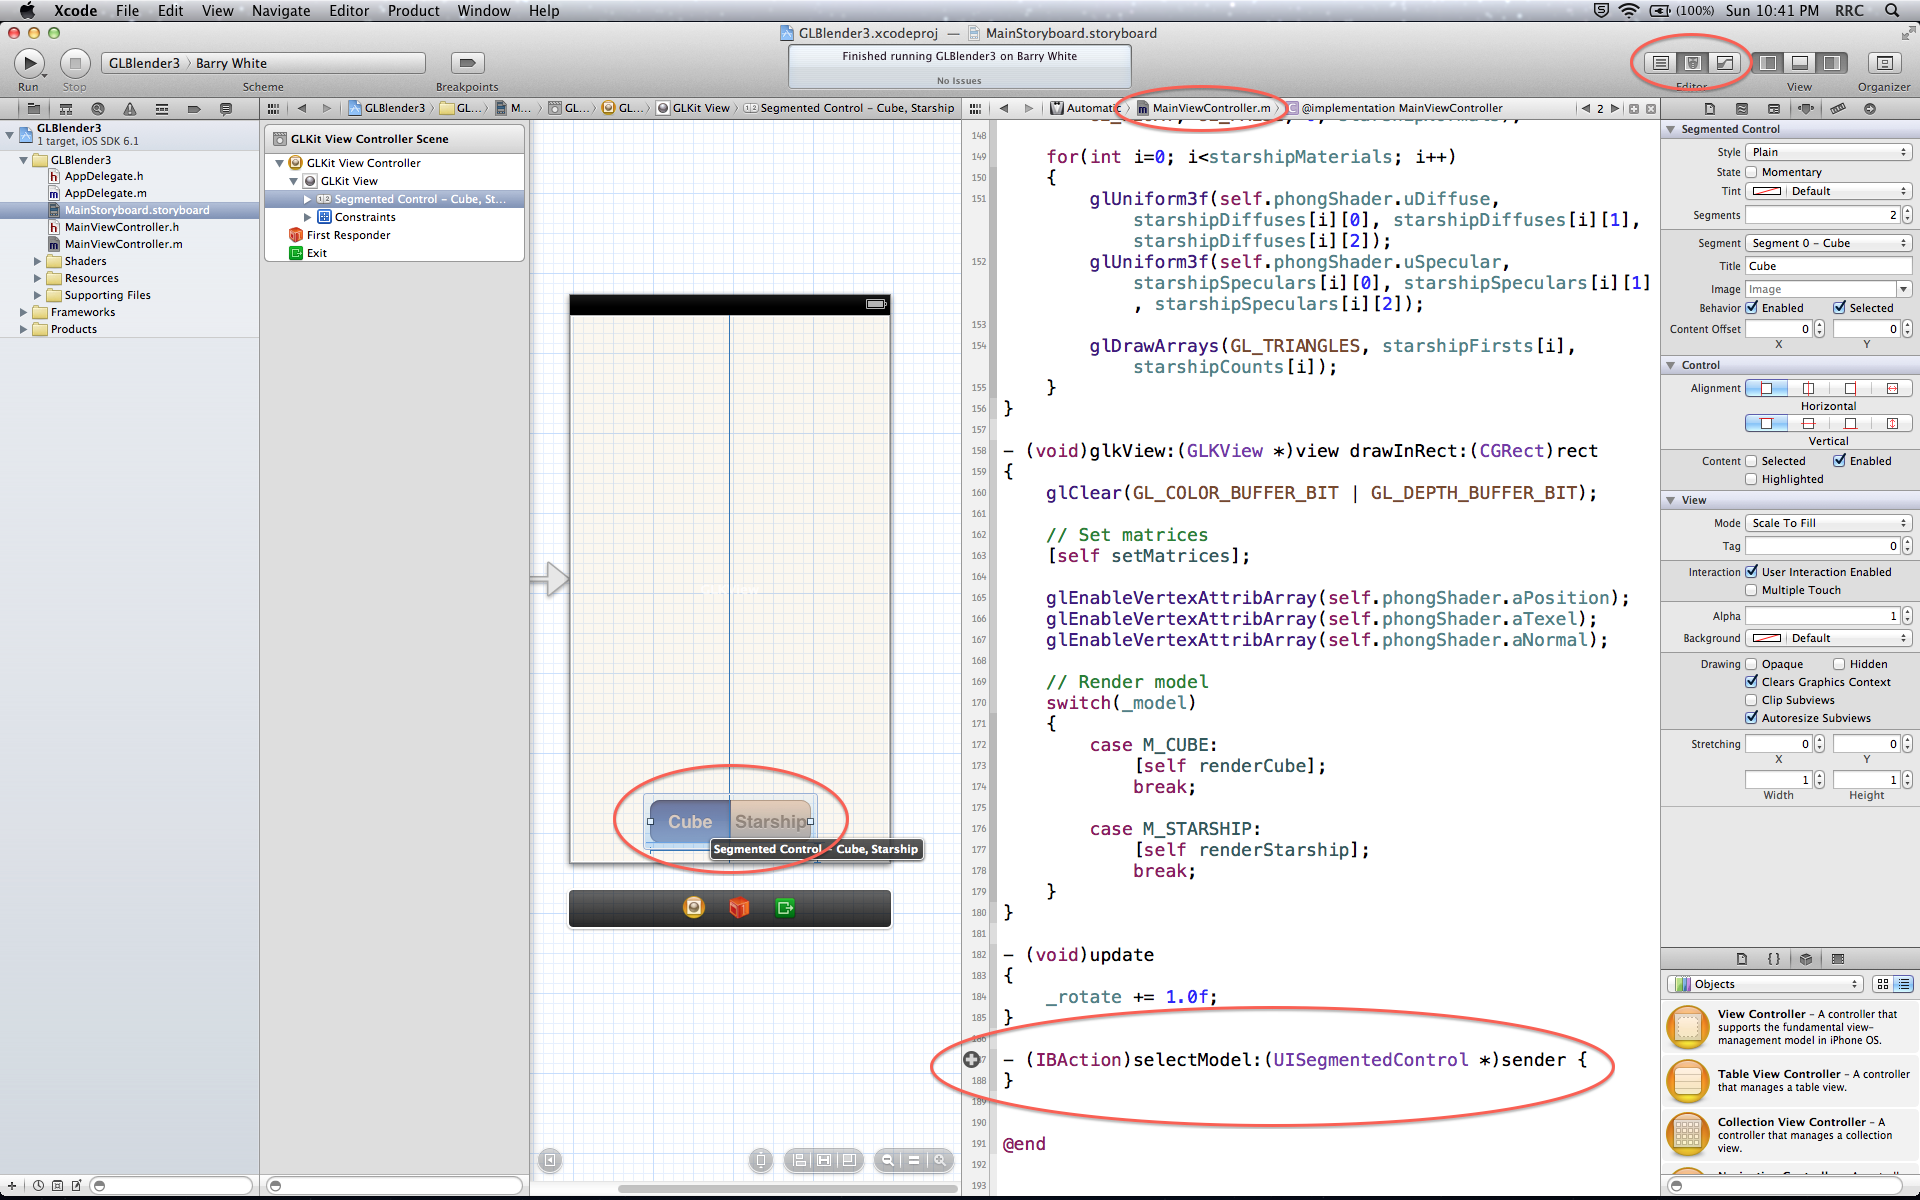
Open MainStoryboard.storyboard and add a Segmented Control to your GLKit View. With your new segmented control selected, look to the sidebar on your right and click on the Attributes inspector tab. Choose 2 for the number of Segments and name them Cube and Starship (in the Title field).
The image below illustrates this whole process:

Next, show the Assistant editor in Xcode with MainStoryboard.storyboard in the left window and MainViewController.m in the right window. Click on your Segmented Control, then control+drag a connection from it to MainViewController.m. This creates an Action in the file.
Name the new action selectModel with Type UISegmentedControl. Make sure the Event for this action is Value Changed and the Argument is Sender. Use the image below to help yourself out:
Go back to the Standard editor and open MainViewController.m. Add the following lines inside your new selectModel: function:
self.paused = YES;

int m = (int)sender.selectedSegmentIndex;
switch(m)
{
    case 0:
        _model = M_CUBE;
        break;

    case 1:
        _model = M_STARSHIP;
        break;
}

[self loadTexture];

self.paused = NO;
With this, you have a control that determines which model to render. When a user selects a new model, the app loads its texture with a simple call to loadTexture. You want to treat OpenGL ES nicely, so performing the model switch between two calls to self.paused ensures you aren’t switching data in the middle of a render.
Build and run! Use your new UI to switch between your models with ease. The transition and experience should all be very smooth—good job!

Congratulations, you’ve completed the entire Blender to OpenGL ES tutorial series!
Where to Go From Here?
Here is the completed project with all of the code and resources from this part of the Blender to OpenGL ES tutorial. You can also find its repository on GitHub.
This was a challenging series, with Part 3 being particularly rewarding because it took you deep into OpenGL ES shaders and lighting/shading theory. More impressively, you pretty much replicated a big portion of Apple’s very own GLKit framework.
Now that you’ve completed this three-part series, you should have a very good understanding of back-end computer graphics, command line tools, geometry and materials, mathematical illumination models, shaders, CPU-GPU communication, rendering and a whole heap of low-level graphics! These are all advanced programming topics not for the faint of heart, and you should feel proud of yourself for getting through them.
There is so much that you can do now, but here are a few suggestions:
- Try implementing the Blinn-Phong shading model.
- Write a Point Light shader.
- Parse the specular coefficient Ns of a material.
- Or maybe just open Blender and make a Porygon model (please do!).
If you have any questions, comments or suggestions, feel free to join the discussion below!