How to Create an Interactive Children’s Book for the iPad
Learn how to create your own beautiful animated interactive children’s book for the iPad! By Tammy Coron.
Adding Content to the First Page
In this section, you’ll add the first page to the book along with some physics simulation and some touch response logic. Before you do that you’ll need to set up the scene.
Open Scene01.m and add the following import statements to the top of the file:
#import "Scene00.h"
#import "Scene02.h"
#import "SKTUtils.h"
The first two lines above give you access to other scenes so you can implement page forward and back controls. The third line allows you to use all of the goodies in SKTUtils, which is an external resource developed for iOS Games by Tutorials and won’t be covered in detail in this tutorial.
Add the following private variables to the implementation section of Scene01.m:
SKSpriteNode *_footer;
SKSpriteNode *_btnLeft;
SKSpriteNode *_btnRight;
Just as before, you’ll need to initialize the scene before you can do anything with it. There are several ways to accomplish this, but this tutorial takes the approach of creating separate methods for each scene instead of handling everything within a single method.
Add the following block of code to Scene01.m, just after the comment that reads /* additional setup */:
[self setUpText];
[self setUpFooter];
[self setUpMainScene];
Those are your basic setup methods — your job is to fill them out. The good news is that the implementation of setUpText setUpFooter is identical for each scene in your project, so you’ll only need to write it once for all scenes.
Add the following code to setUpText in Scene01.m:
SKSpriteNode *text = [SKSpriteNode spriteNodeWithImageNamed:@"pg01_text"];
text.position = CGPointMake(300 , 530);

[self addChild:text];

[self readText];
Here you create an SKSpriteNode, set its location, and add it to the scene. The sprite above holds an image for the text of the page; you’ll have one sprite for the text of each page in your book.
This method also calls readText which plays the narration for the book provided by the very talented Amy Tominac.
Add the following code to readText in Scene01.m:
if (![self actionForKey:@"readText"])
{
  SKAction *readPause = [SKAction waitForDuration:0.25];
  SKAction *readText = [SKAction playSoundFileNamed:@"pg01.wav" waitForCompletion:YES];

  SKAction *readSequence = [SKAction sequence:@[readPause, readText]];

  [self runAction:readSequence withKey:@"readText"];
}
else
{
  [self removeActionForKey:@"readText"];
}
Here you create a new SKAction, much like you did earlier for the bouncing title text. The difference this time — and it’s an important difference — is that you also assign a key name of readText to your action. You’ll discover why a bit later.
You’re also using SKAction’s playSoundFileNamed:waitForCompletion: class method, which is a really simple method for playing sounds. While this method works great for quick sound effects, it’s probably not the best choice for read-along text because you can’t interrupt the sound when it’s playing, among other reasons. You’re using it in this tutorial for ease-of-use only and to become familiar with the framework.
In a production-level app, you should consider using something with a little more functionality such as the ability to stop sounds while they are playing, such as one of Apple’s other audio technologies.
Build and run, and now you will see and hear the narrated text for page 1!

Adding the Navigation Controls
Next let’s add the navigation controls for your app, which will all be located along the bottom of the screen.
Add the following code to setUpFooter in Scene01.m:
/* add the footer */

_footer = [SKSpriteNode spriteNodeWithImageNamed:@"footer"];
_footer.position = CGPointMake(self.size.width/2, 38);

[self addChild:_footer];

/* add the right button */

_btnRight = [SKSpriteNode spriteNodeWithImageNamed:@"button_right"];
_btnRight.position = CGPointMake(self.size.width/2 + 470, 38);

[self addChild:_btnRight];

/* add the left button */

_btnLeft = [SKSpriteNode spriteNodeWithImageNamed:@"button_left"];
_btnLeft.position = CGPointMake(self.size.width/2 + 400, 38);

[self addChild:_btnLeft];

/* add the sound button */

if (_soundOff)
{
  // NSLog(@"_soundOff");

  [_btnSound removeFromParent];

  _btnSound = [SKSpriteNode spriteNodeWithImageNamed:@"button_sound_off"];
  _btnSound.position = CGPointMake(self.size.width/2 + 330, 38);

  [self addChild:_btnSound];
  [_backgroundMusicPlayer stop];
}
else
{
  // NSLog(@"_soundOn");

  [_btnSound removeFromParent];

  _btnSound = [SKSpriteNode spriteNodeWithImageNamed:@"button_sound_on"];
  _btnSound.position = CGPointMake(self.size.width/2 + 330, 38);

  [self addChild:_btnSound];

  [_backgroundMusicPlayer play];
}
The code above initializes _footer with the footer area’s background image, sets its position, and adds it to the scene. It also adds sprites for both the page back and page forward buttons. Finally, it adds the sound toggle button, which should look familiar since it’s essentially the same code you used to set up the button in the previous scene.
Build and run, and you will now see the footer along the bottom of the scene (although tapping it won’t do anything yet):
Now that the basic scene setup is complete, it’s time to add the main character.
Adding The Main Character
Still working in the Scene01.m file, add the following private variable to the Scene01 implementation:
SKSpriteNode *_kid;
This variable holds a reference to your main character’s sprite.
Next, add the following two lines to setUpMainScene of Scene01.m:
[self setUpMainCharacter];
[self setUpHat];
These methods simply call other methods to keep your code nice and tidy. You’ll populate those next.
Add the following code to setUpMainCharacter in Scene01.m:
_kid = [SKSpriteNode spriteNodeWithImageNamed:@"pg01_kid"];
_kid.anchorPoint = CGPointZero;
_kid.position = CGPointMake(self.size.width/2 - 245, 45);

[self addChild:_kid];
[self setUpMainCharacterAnimation];
This should be familiar territory to you by now; you create an SKSpriteNode, set its anchorPoint and position, and add it to the scene. Then you call setUpMainCharacterAnimation to set up the main character animation.
setUpMainCharacterAnimation only exists as a shell — time to add some madness to your method! :]
Add the following code to setUpMainCharacterAnimation in in Scene01.m:
NSMutableArray *textures = [NSMutableArray arrayWithCapacity:2];

for (int i = 0; i <= 2; i++)
{
  NSString *textureName = [NSString stringWithFormat:@"pg01_kid0%d", i];
  SKTexture *texture = [SKTexture textureWithImageNamed:textureName];
  [textures addObject:texture];
}

CGFloat duration = RandomFloatRange(3, 6);

SKAction *blink = [SKAction animateWithTextures:textures timePerFrame:0.25];
SKAction *wait = [SKAction waitForDuration:duration];

SKAction *mainCharacterAnimation = [SKAction sequence:@[blink, wait, blink, blink, wait , blink, blink]];
[_kid runAction: [SKAction repeatActionForever:mainCharacterAnimation]];
Animations are performed using a series of images. In the code above, the main character blink animation uses two images to achieve this effect.
The first line creates an array to hold your images. Following that, you generate the image name, create an SKTexture object for each image in the animation, then add that object to your array.
Next you create the animation sequence using SKAction's animateWithTextures:timePerFrame: class method which expects an array of textures.
Finally, you instruct the _kid sprite to perform its action. By using the repeatActionForever method, you tell the node to run this action continuously.
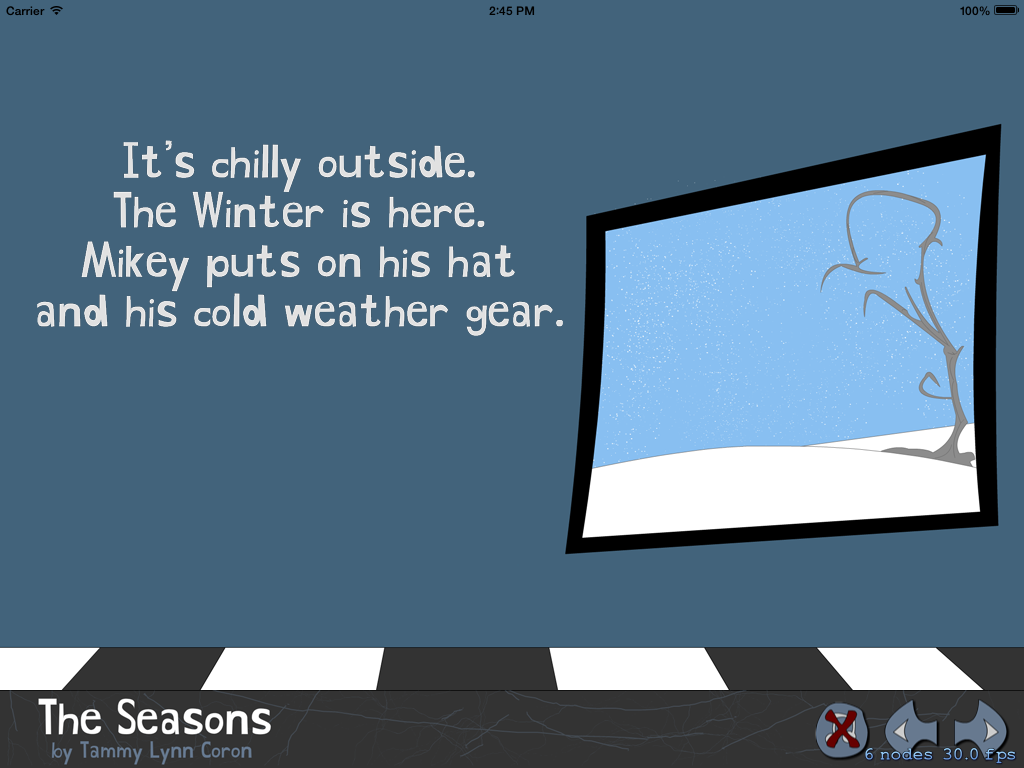
Build and run your project; hit the "Read Story" button and you'll see the main character appear on-screen and blink his eyes while the narration plays in the background, as so:
![]()