App Mockup Tools Reviews Part 2: Briefs, OmniGraffle, and Balsamiq
We review three of the most popular iOS app mockup tools: briefs vs omnigraffle vs balsamiq. Find out which is the best! By Riccardo D'Antoni.
How Does OmniGraffle Stack Up?
As an OmniGraffle newbie, it took 25 minutes to finish the wireframe. In my opinion, OmniGraffle is one of the most powerful and adaptable software of the reviewed set since it can do far more than just app mockups. That said, if your interest is primarily wireframing for mobile apps, you might find the other reviewed tools more useful because they have focused, out-of-the-box features that can take care of your projects.
All the other tools have a companion app or methods that help you to share project with your team and clients. OmniGraffle’s more time-consuming interface is forgivable since OmniGraffle is a broader, more versatile program.
If you want to learn more about Omnigraffle, check out this cool demo video I made showing off the final results from the sample app:
OmniGraffle – More Info
- OmniGraffle 6 is a PAID app that costs $99.99 + $89.99 to go PRO from the Mac AppStore. Another option is to purchase one license for $199.99 from the Omni Store
- OmniGraffle for iPad is a Paid app that costs $49.99. It has limited functionality when compared to the desktop counterpart
Balsamiq Mockups by Balsamiq

Balsamiq Mockup is a wireframing tool that allows quick design creation and simple elements that do not distract the evaluator or client, which keeps him or her focused on the content and graphic quality!
Balsamiq offers a desktop app, with a fully functional 7-day trial. At the time of writing this, the price for a lifetime license was $79. Different from the other two tools, Balsamiq Mockups is cross-platform so you can work on Mac, Windows or Linux. Here’s where you can find the download page.
It also offers a web application myBalsamiq. You can begin with 30-day trial and if you want to keep it, it’s $12 per month. The option to share all your work automatically across platforms, including PC, (PCs need love too) makes the web app rather tempting.
Now it’s time to dive into the nitty-gritty with Balsamiq Mockups! :]
At a first glance, it’s clear you can divide the UI in three main areas, the toolbar, the elements bar and the canvas.

- In green, there is the toolbar that contains various utilities that will help you with your work, such as, undo, redo, cut, copy, delete, bring to front, send to back, zoom …
- In orange, the UI components bar contains all the components you can use to compose your mockup. Notice how they are ordered by category.
- In blue, this is where you’ll actually organize your mockup sheet. It can contain multiple sheets. You can link them to create interactive prototypes.
I think the UI component bar is really well organized. However, there was a surprise when I opened the iPhone category; there were only a few:

So I Googled and found some community-generated sets of UI components. The crowd saves that day again. Phewww..! :D
For my simple tracking app I will use: iPad Controls, iPad Controls by Raad, iPhone Glossy Bars and iPhone Customizable.
If you still need a custom component, you can drag and drop images inside Balsamiq Mockups. When you add the first custom component, it will create an asset folder on your desktop.

The Project Assets category will reference that folder.

If you need to customize a component, there is a terrific set of icons ready for you.

When you highlight a specific component, a popup appears to allow you to change its properties.

Different components have different properties inspectors, and you can even change group properties.

I worked with the help of one canvas, and my goal was to quickly copy and paste so that all my mockups would be in the same place. Ten short minutes went by and the next thing I knew, I was done!

Although, Balsamiq Mockups is very simple, it gives you a great level of customization. Plus, it’s user-friendly and quick.
Creating an interactive prototype is simple, you only have to follow a few steps:
- If you worked in one canvas as I did, create a number of canvasses according to your views. Select New Mockup. Click the + button to add to your heart’s content.

- Copy and paste a single view in each canvas. Click on tab labels to give each a name, as this will keep your project clean and help you during the linkage phase.

- Now link canvasses by clicking on the component that should trigger the action and set up the link type and destination.

When you finish the set up, your views should look like the one below, with little red arrows representing links.

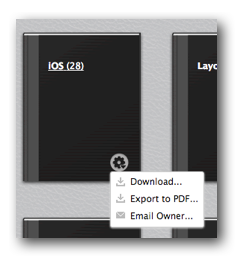
It’s possible to export your project in different formats: PNG, PDF, XML; but to allow interactivity I’ve exported it as a PDF File for your reference.
How Does Balsamiq Mockups Stack Up?
It took me ten minutes to finish the wireframe. Balsamiq Mockups is the most easy-to-use wireframing tool I’ve ever used. It’s intuitive and allows a substantial amount of customization. It’s cross-platform, and this gives it a definite advantage over the other tools reviewed in this article. Furthermore, you may use the browser app to share your work between office and home! :]

Balsamiq Mockups – More Info
- You can find a comparative table of Balsamiq versions, and a direct link to download at their compare versions page.
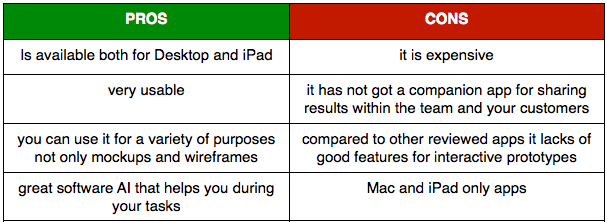
Prototyping Tools Compared
This series has covered a ton of app mockup tools, and at this point it might be hard to keep them all straight! So I’ve put together this handy table that sums up the features offered by the various prototyping tools:

So what’s the verdict?
Overall, I think all of these tools are pretty sweet. Each has a unique set of attributes, abilities and characteristics that may appeal to different developers with specific needs.
But I know you might wanna see what I think is the best after reviewing these tools, so I picked a winner in a few different categories.
Best Value On Mac For Wireframing Only

If you’re looking for the best app solely focused on making app mockups and time and money is a concern, I’d recommend Briefs.
In my opinion, Briefs is a great app because it offers the right amount of features to create mobile and desktop app wireframes. It’s also intuitive and has the most aesthetically pleasing UI; personally, I think the darker color makes it easier to focus on your work. Lastly, Briefscase completes the Briefs package as a remarkably useful and free prototype tester.