Glide Tutorial for Android: Getting Started
In this Glide Tutorial, you’ll learn how to use Glide to create a photo app that displays pictures to your users with different filters. By Meng Taing.
Glide is the most recommended image loader for Android. it’s easy to use and requires minimal configuration. Although you might have used Glide to load image from a URL to ImageView, there are many cool features you might not know.
In this Glide Tutorial, you’ll create Wendergram, a simplified Instagram which displays a three-column grid of photos. It also allows you to apply filters to those photos.
Note: For this intermediate-level tutorial, you need a basic knowledge of Kotlin and Android. If you’re new to Android, check out our Android tutorials. If you’re unfamiliar with Kotlin, take a look at Kotlin For Android: An Introduction.
Getting Started
Use the Download Materials button at the top or bottom of this tutorial to download the starter project. Open the starter project in Android Studio 3.3 or above. Build and run the app. The UI skeleton is in place, so you can start with Glide right away.

Adding Permission and Dependencies
If you’re using Glide to load images from URLs, make sure AndroidManifest.xml has INTERNET permission. This is a common mistake that even experienced developers could spend hours debugging.
Open AndroidManifest.xml and add the following permission above the <application> tag:
<uses-permission android:name="android.permission.INTERNET" />
Next, open build.gradle under app directory. Add the following dependencies inside dependencies curly brackets under // TUTORIAL DEPENDENCIES HERE comment:
implementation 'com.github.bumptech.glide:glide:4.9.0'
Finally, press Sync Now and wait until Android Studio finishes syncing your dependencies. Now you’re ready to work with photos using Glide.
Photo Source
The photo URLs used in this tutorial are from https://source.unsplash.com/random. This URL redirects to a random image URL which accepts a ?w= query string for image width that allows you to retrieve the image with any dimensions. This is useful when you have a screen to show thumbnails and another screen to show full resolution images.
Open PhotoProvider.kt. This class returns a list of photo URLs. You’ll notice the first item in the list is null and the second one is https://non-existing-url. Yes, it’s a non-existing URL. The rest of the URLs are valid and will return images. You’ll see how Glide handles these URLs in the next section.
Loading a Photo Gallery
Open PhotoAdapter.kt. This is a RecylerView Adapter. Use onBindViewHolder to bind the data to PhotoViewHolder. Open the declaration of holder.bind(photoUrl) by holding Command (Ctrl key on Windows) and clicking on the word bind. Android Studio opens PhotoViewHolder.kt where you won’t find anything implemented yet in bind(photoUrl: String?). You’ll load all the photos into the gallery here. Add the following code into bind(photoUrl: String?):
val url = if (photoUrl != null) "$photoUrl?w=360" else null //1
Glide.with(itemView)  //2
    .load(url) //3
    .centerCrop() //4
    .placeholder(R.drawable.ic_image_place_holder) //5
    .error(R.drawable.ic_broken_image) //6
    .fallback(R.drawable.ic_no_image) //7
    .into(itemView.ivPhoto) //8
- Append
?w=360to the URL if the URL is not null. This value assumes that the device screen has 1080px in width. You can set this value dynamically to be one-third of the device’s screen width. - Provide a view, fragment or activity to Glide as the life-cycle context.
- Load the URL.
- Apply the
centerCroptransformation so that the photo fully fills theImageView. - Provide an image resource as a placeholder before Glide starts loading the image.

- Provide an image resource as an error placeholder when Glide is unable to load the image. This will be shown for the
non-existing-url.

- Use
fallbackimage resource when theurlcan benull.
- Set the
ImageViewofPhotoViewHolderas the target.
Use alt+enter to add import statements if necessary. Run the app to see if all the photos load successfully:

As you can see, the first URL is null, so Glide immediately loads R.drawable.ic_no_image. The second URL is an invalid URL, so Glide displays R.drawable.ic_broken_image after trying to load it. The rest of photos are fine.
Loading a Profile Picture
Open MainActivity.kt and load this URL https://source.unsplash.com/random into the profile picture ImageView. Inside the empty loadProfilePic(profilePicUrl: String), add the following code:
Glide.with(this) //1
    .load(profilePicUrl)
    .placeholder(R.drawable.ic_profile_placeholder)
    .error(R.drawable.ic_profile_placeholder)
    .skipMemoryCache(true) //2
    .diskCacheStrategy(DiskCacheStrategy.NONE) //3
    .transform(CircleCrop()) //4
    .into(ivProfile)
- Now that you’re in
MainActivity, you can providethisas Glide context. - By default, Glide caches images with URLs as keys in the memory and disk.
https://source.unsplash.com/randomredirects to a different URL every time. Glide will cache the image it loads for the first time withhttps://source.unsplash.com/randomas the key. If you do not supply this option, Glide will always use the same image from both memory and disk. - Tell Glide not to write any images to the cache.
- What would you do if you wanted to have a circular Image view? Normally, you would google to find an existing library. With Glide, you can achieve this through applying
transform(CircleCrop())option.
Run the app to see the circular profile photo:

Each time you relaunch the app, you should see a different profile photo, thanks to Unsplash.
Beside CircleCrop(), Glide has FitCenter() built in. You’ll learn more about other Transformations in the next section.
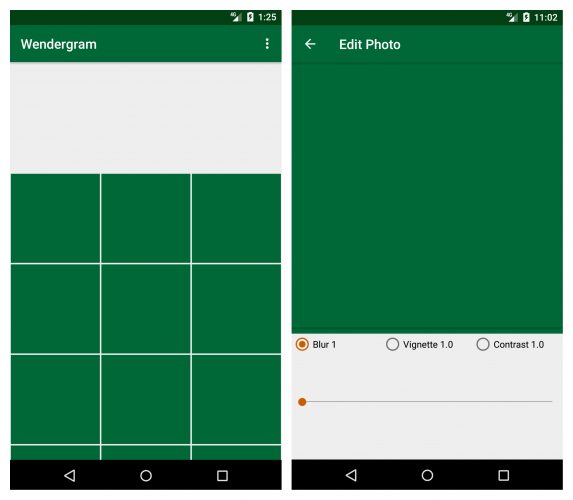
Editing Photos with More Transformations
Reopen or switch build.gradle under the app directory. Add the following dependencies below the Glide dependencies you added earlier:
implementation 'jp.wasabeef:glide-transformations:3.3.0'
implementation 'jp.co.cyberagent.android.gpuimage:gpuimage-library:1.4.1'
The second library is for GPU filters. You can find out more about the library here.
After you sync the project with Gradle files, open EditPhotoActivity.kt. This is where you’ll apply three transformations — Blur, Vignette, and Contrast — to the photo. Each RadioButton and the SeekBar adjusts the value of blurValue, vignetteValue and contrastValue, respectively. Scroll down to applyFilters(progress: Int, photoUrl: String?), and add the following code before the closing curly bracket:
Glide.with(this)
    .load(photoUrl)
    .override(500, 500) //1
    .transform( //2
        CenterCrop(),
        BlurTransformation(blurValue), //3
        ContrastFilterTransformation(contrastValue), //4
        VignetteFilterTransformation(
            PointF(0.5f, 0.5f),
            floatArrayOf(0f, 0f, 0f),
            0f,
            vignetteValue)) //5
    .diskCacheStrategy(DiskCacheStrategy.DATA) //6
    .placeholder(ivPhoto.drawable) //7
    .into(ivPhoto)
- Glide automatically limits the size of the image it holds in cache and memory to the
ImageViewdimensions. The more transformations you apply, the longer Glide takes to load the image. In this case, useoverride(width, height)to tell Glide to load smaller image. -
transform(...)takes one or multiple transformations. -
BlurTransformationaccepts a blur radius from 1 to 25. -
ContrastFilterTransformationaccepts contrast values from 0.0 to 4.0, with 1.0 as the normal level. -
VignetteFilterTransformationrequires center-point position, color, starting location and ending location. The end location value is between 0.0 and 4.0. - Use
DiskCacheStrategy.DATAso that Glide only caches the full resolution image, not the transformation. - Provide the current drawable as a placeholder while Glide is doing the transformation. Otherwise, the
ImageViewwill be blank for a brief moment every time theSeekBaris changed.
You can check Glide documentation to learn more about other DiskCacheStrategies.
Run the app. Click on any photo to edit it. Play around with RadioButton and drag the SeekBar to change it. Voila! You made your own Instagram.
